Prepaid credits
In Orb, custom pricing units allow you to use multiple ledgers, a real-world currency ledger and any number of credit ledgers. Prepaid credits are a type of custom pricing unit that enables you to offer credits to your customers, which can be used to pay for product usage and services. You can create custom pricing units and enable credits in the settings page. Note that each custom pricing unit will have its own ledger, allowing you to manage and track credits separately.Enabling custom pricing units
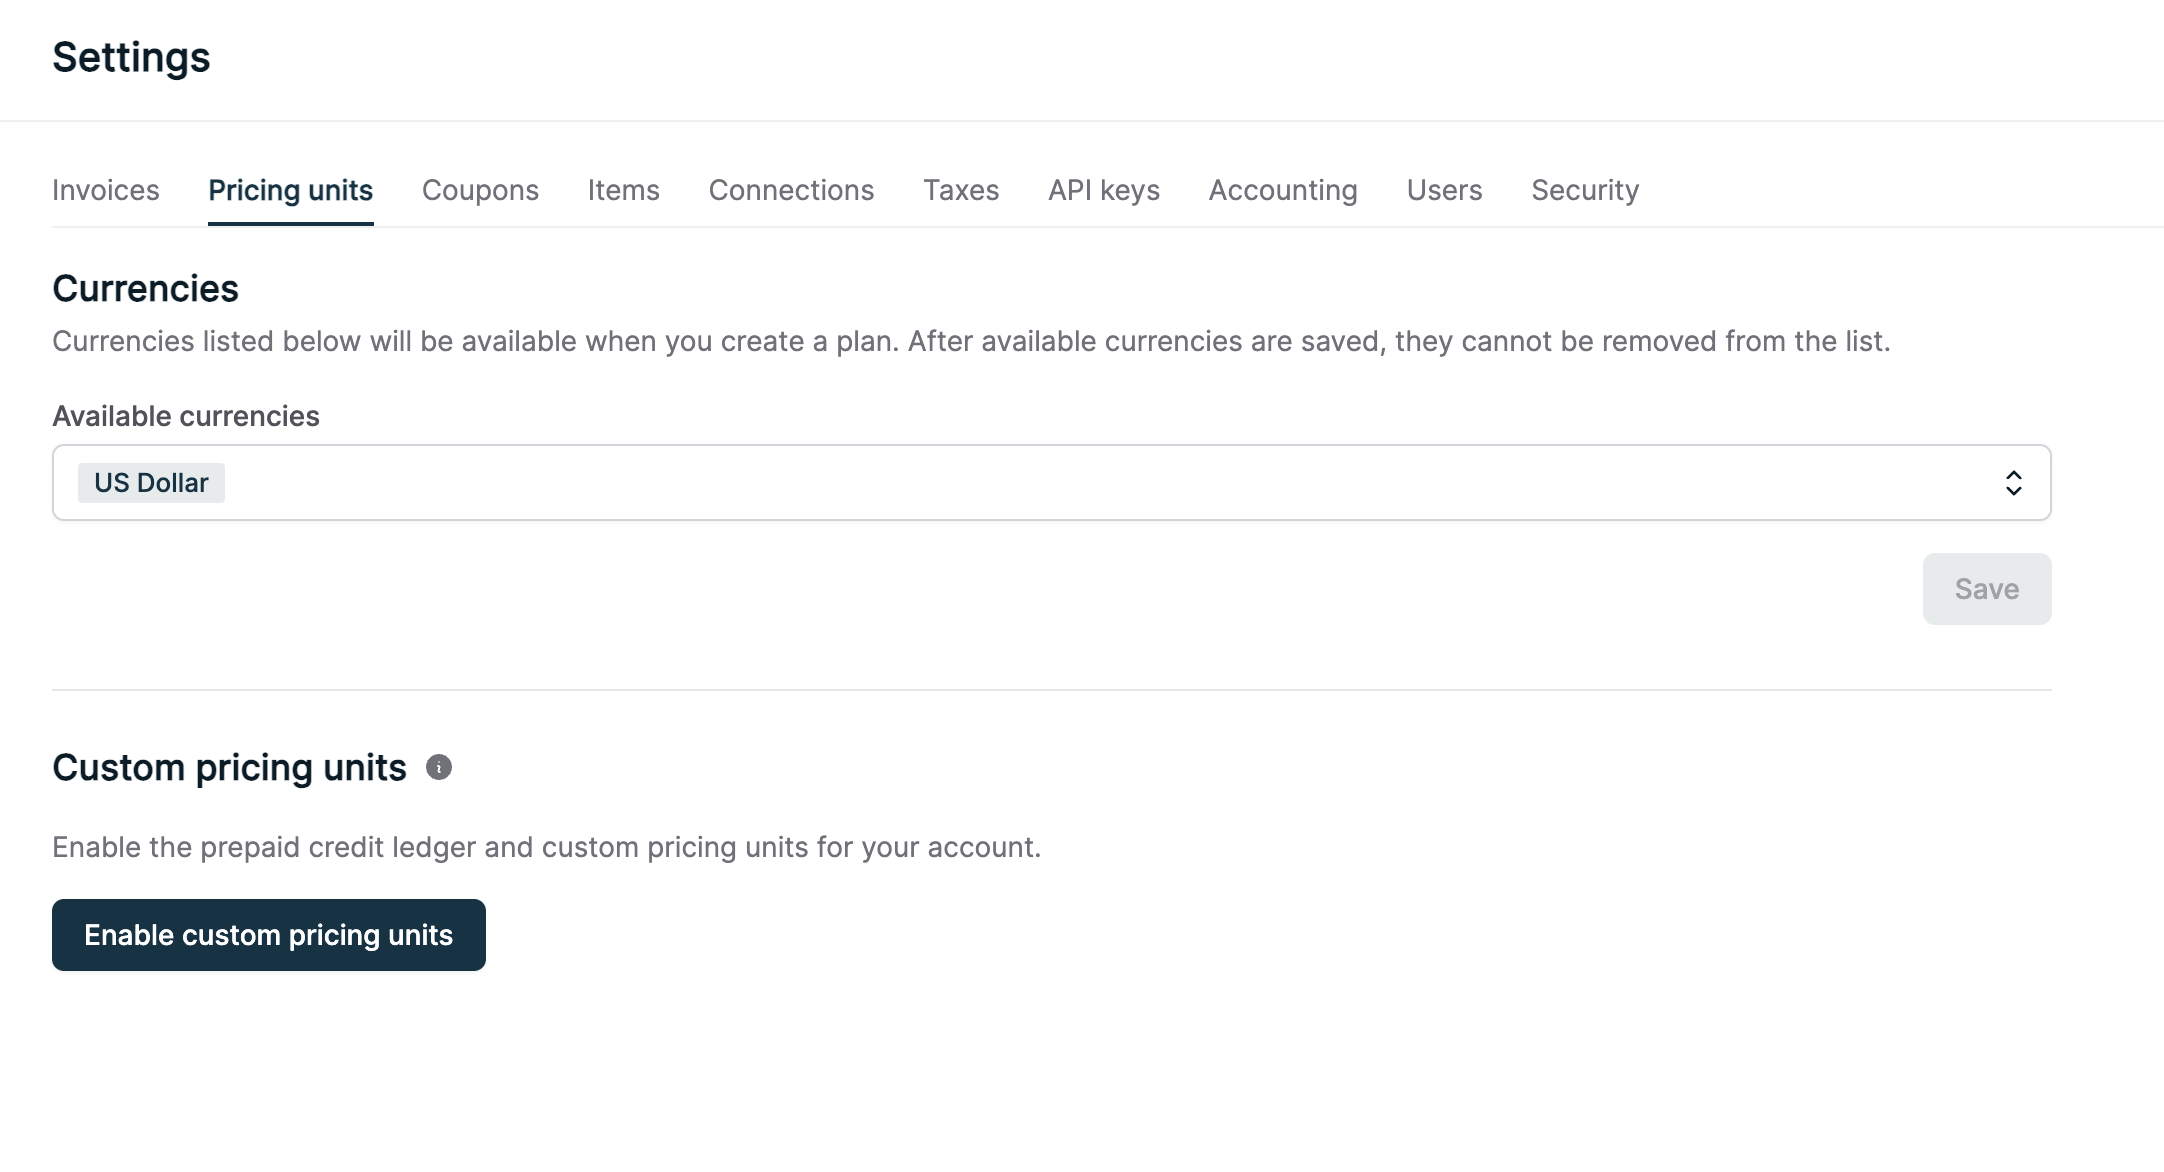
Prepaid credits work similarly to other ledgers, deducting usage from the available credit balance. However, there are key differences in plan creation and invoice display. When setting up plans with credit ledgers, you’ll need to configure a credit overage rate, which determines the conversion rate from credits to real-world currency for any overage incurred during a billing period. This ensures clarity on invoices, where the overage conversion is explicitly shown on each line item. With custom pricing units, you can set usage prices to use either credits or real-world currency. Prices set to use real-world currency won’t be included on the ledger, while prices using credits will utilize any available credit balance on the ledger. This flexibility allows you to offer various pricing options to your customers.- Navigate to the settings page.
- In the Pricing units tab, click “Enable custom pricing units” and confirm.
- Input the identifier, display name, and short name for the new pricing unit.
- Confirm your new pricing unit. This unit will now be available to use as a price currency when creating a new plan.
Including credits in a plan
When you create a plan, you can decide which prices in the plan burn down from the prepaid credit balance. Not all prices in a plan need to use prepaid credits if you are using credit ledgers. Let’s create a new plan with a price that uses prepaid credits:Using a credit ledger
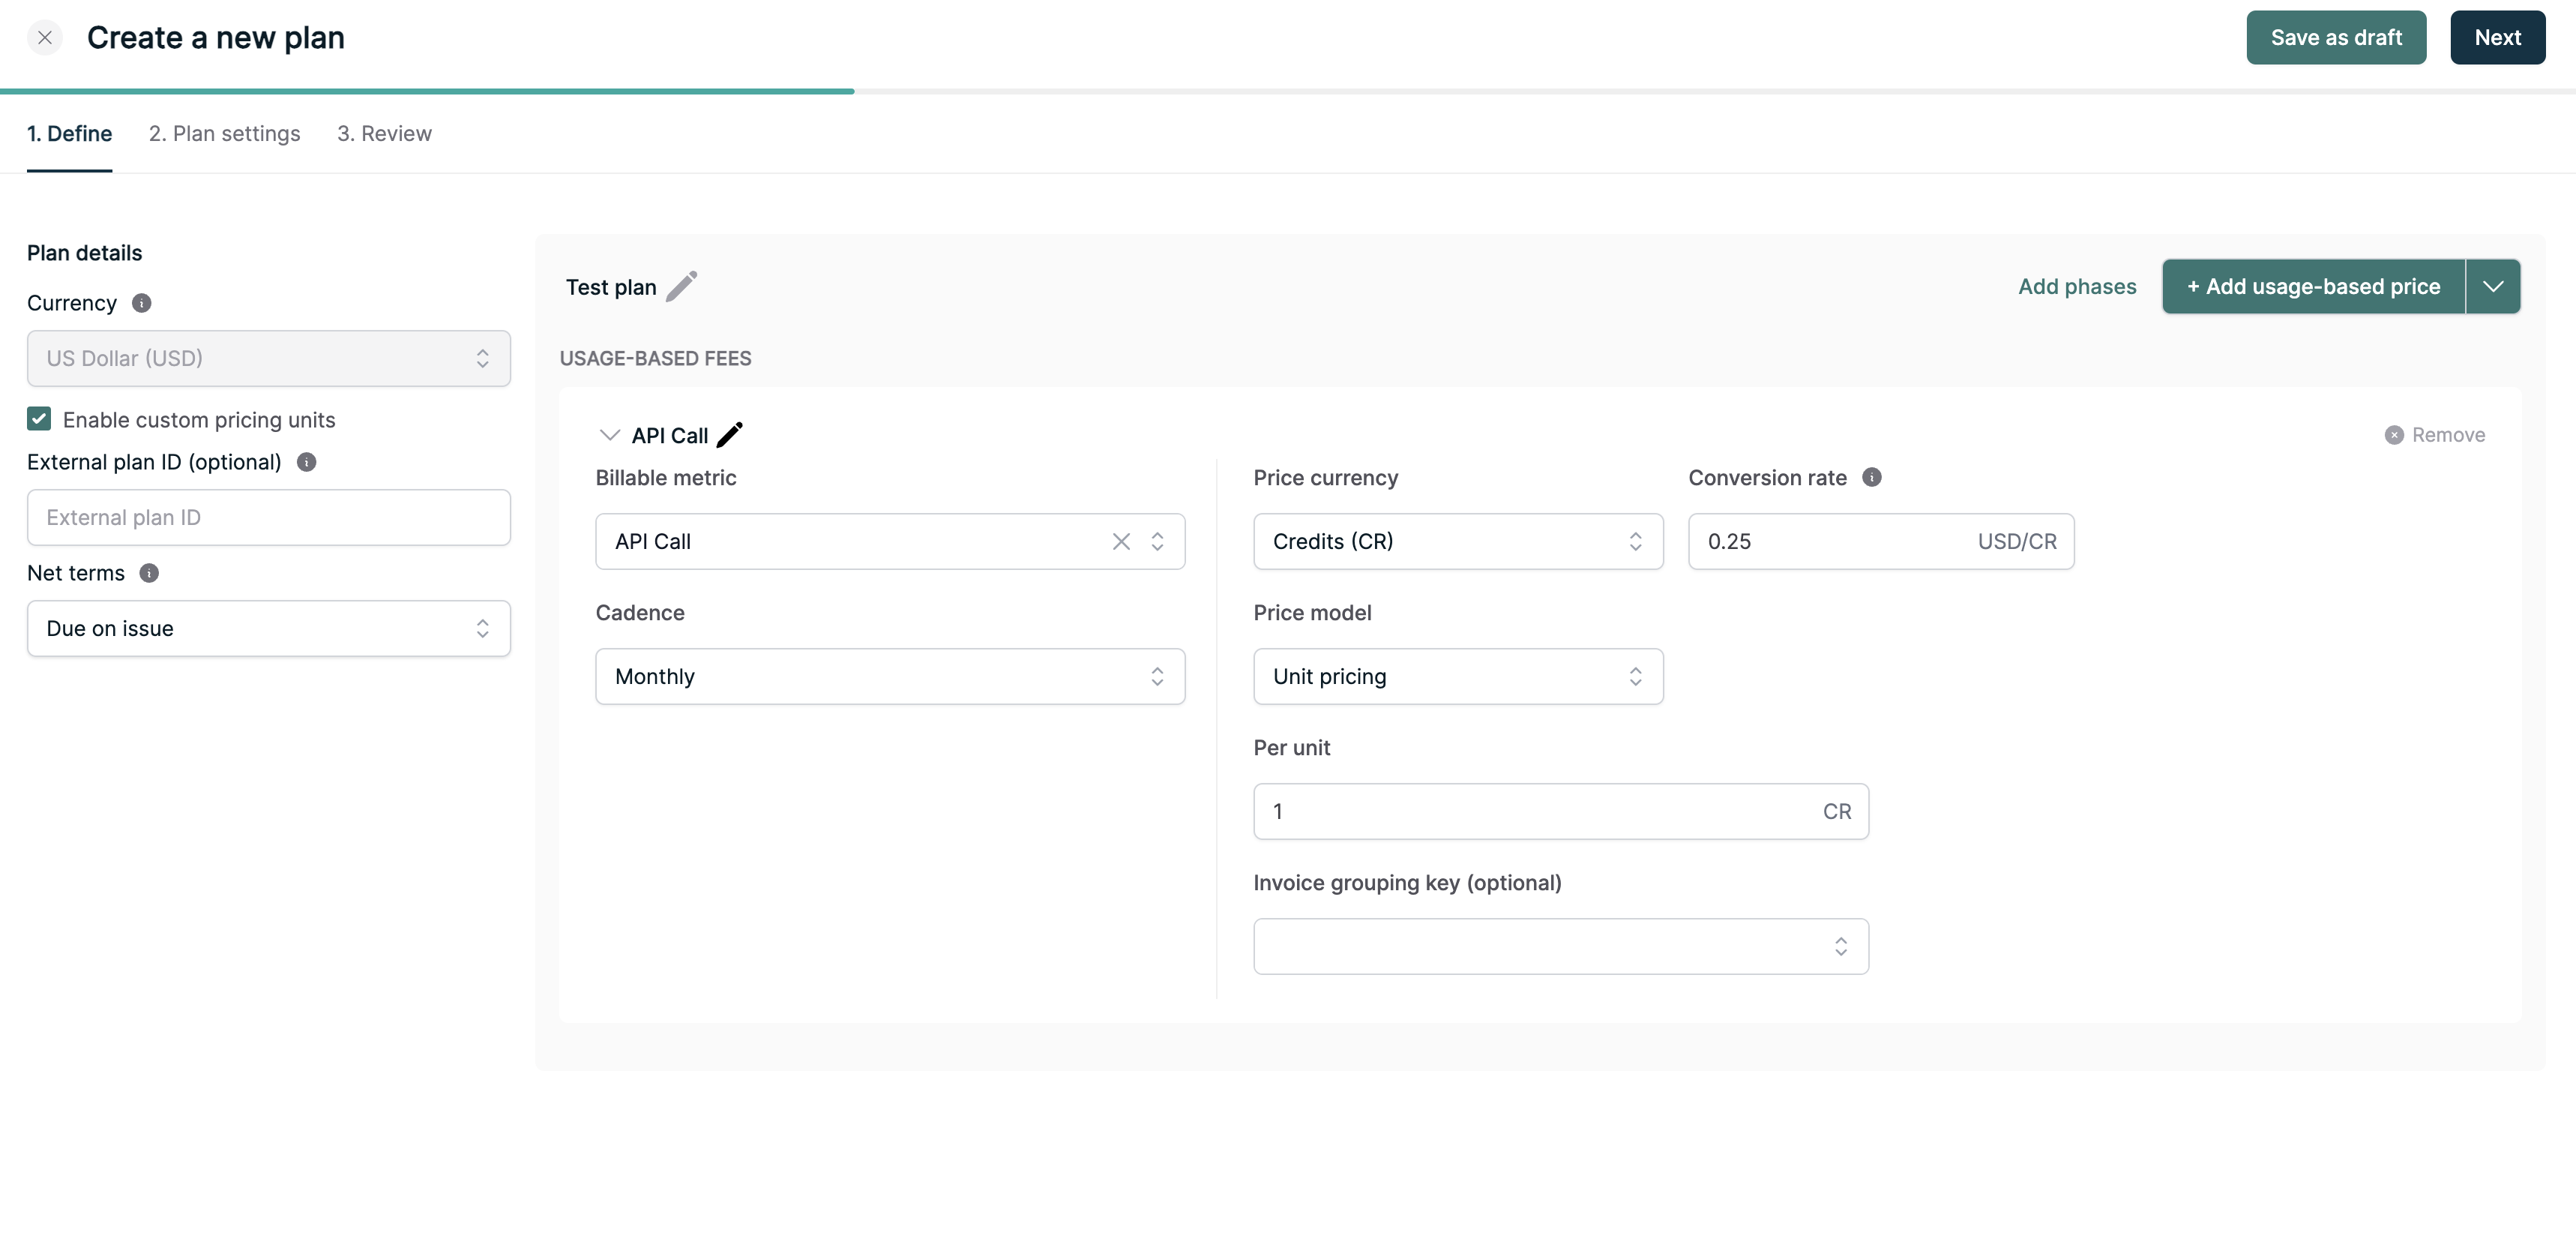
- Navigate to the plan creation flow
- Select the primary currency you want to invoice in (e.g. USD) and click “Enable custom pricing units”
- Add a usage based price using the billable metric you created, and specify Credits as the price currency
- Enter a conversion rate. This is the per unit conversion of the custom currency (e.g. credits) to the invoicing currency (e.g. USD). This is the amount in the invoicing currency that will be charged on the invoice at the end of the billing period if a customer goes over their prepaid credit balance.
Using a currency ledger
- Navigate to the plan creation flow
- Select the primary currency you want to invoice in (e.g. USD)
- Add a usage based price using the billable metric you created.
- In this situation, all usage based prices will deduct from the ledger.
Fixed fees and credit usage: While the examples above focus on usage-based prices, it’s important to note that fixed fees can also draw down from the credit ledger when they are billed in arrears. This means that if you have a fixed fee (such as a monthly platform fee or support fee) configured to bill at the end of the billing period rather than in advance, it will also be eligible to use prepaid credits. Only fixed fees billed in advance cannot use credit balances.
Trial credits
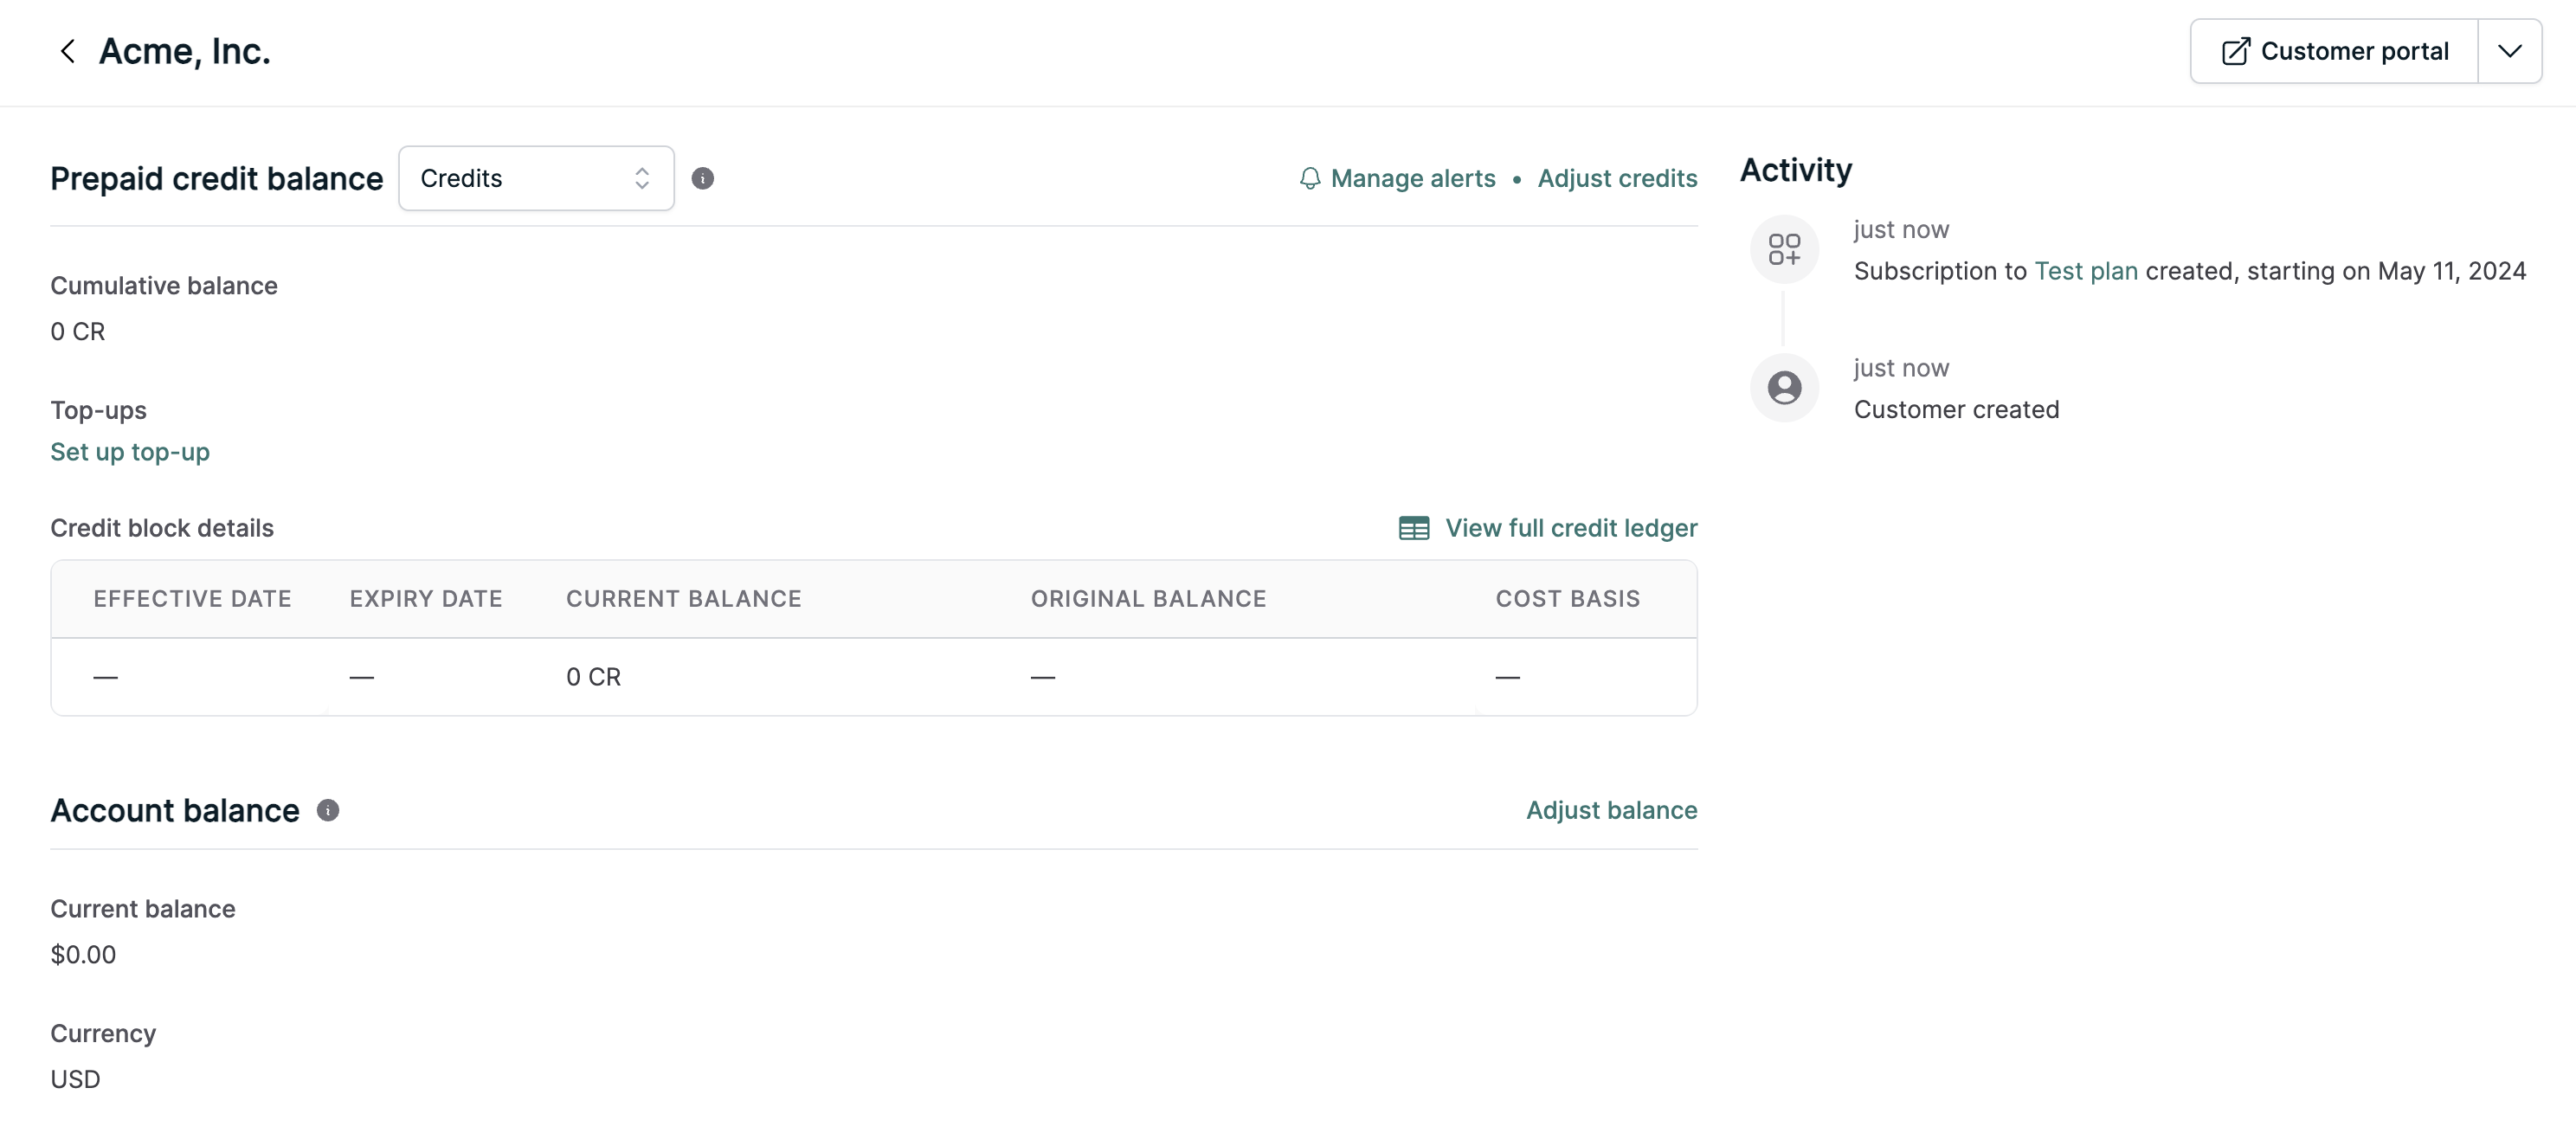
Trial credits are free credits you might offer your user to try out your product. Let’s add some trial credits for a customer we’ve created:- Navigate to a customer’s page
- In the
Prepaid credit balancesection, clickAdjust credits
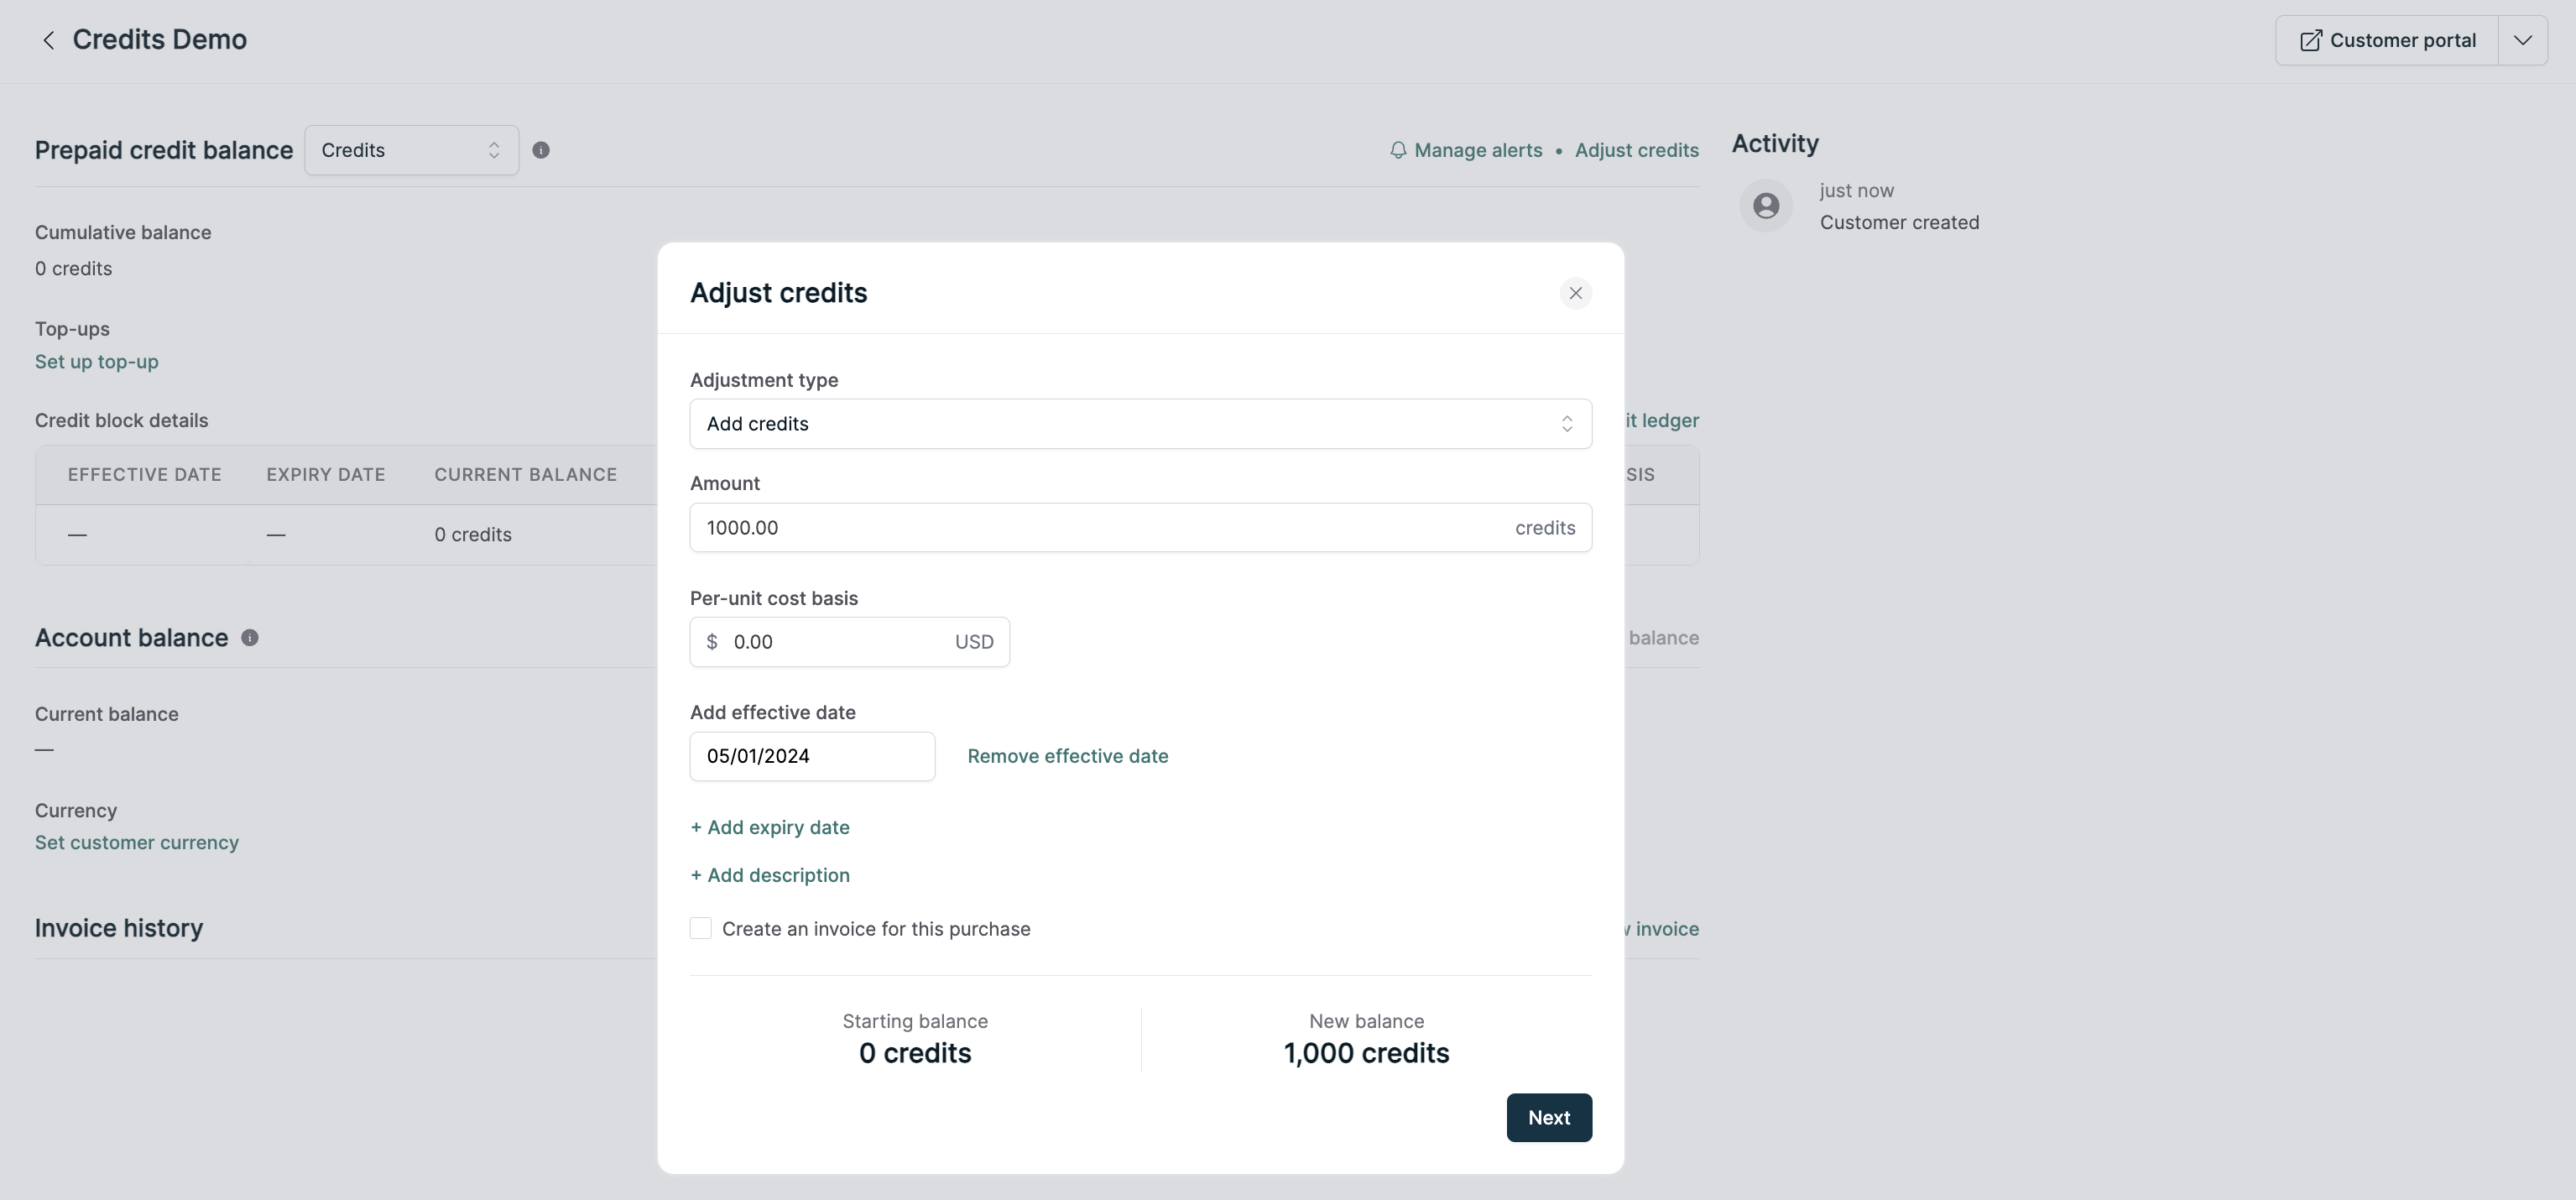
- Fill in an amount and $0.00 for the cost basis
- Cost basis refers to how much the user paid for these credits
- Optionally add an expiry date and description, and click Save
- Click
View full credit ledgerin the Credits section to see this credit increment and all future changes to the customer’s prepaid credit balance
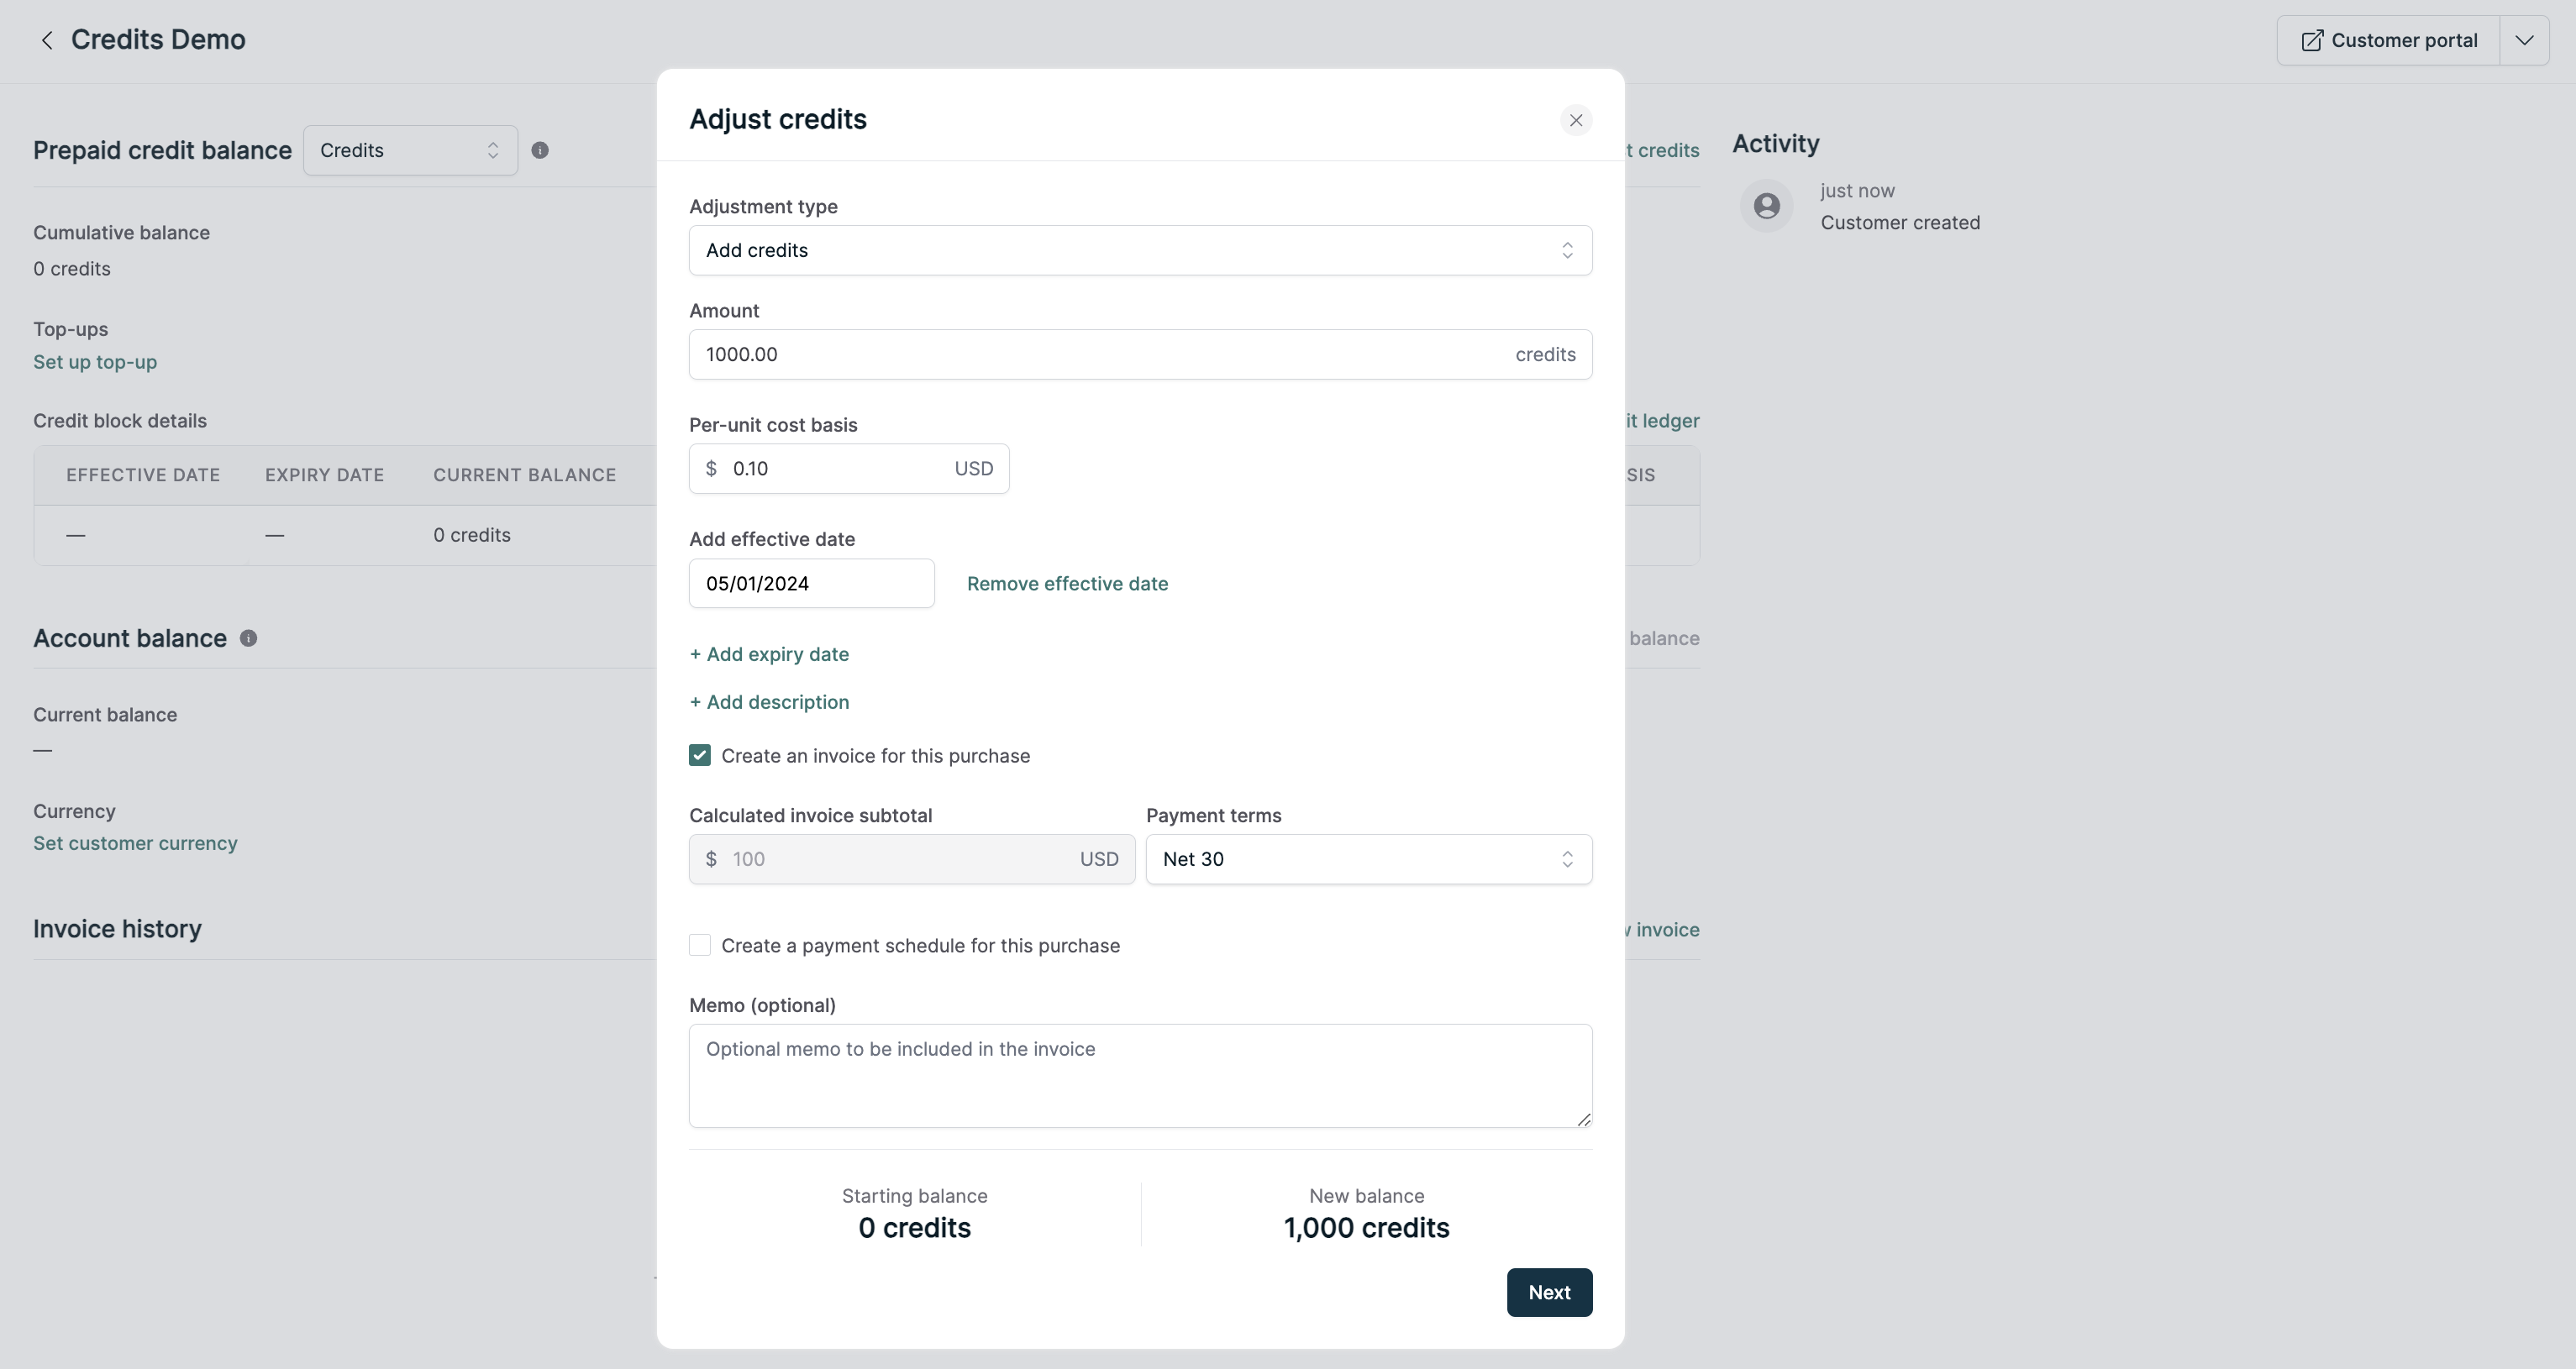
Paid credits
When a customer pays for a block of prepaid credits, you can use the Adjust credits UI as described above to add paid credits. The differences compared to trial credits are:- Specify a real, non-$0 cost basis for the credit block - this is how much the user paid for a single credit
- This is important later on when your finance team needs to pull revenue numbers
- Check the
Create an invoice for this purchasebutton, specify when you want the invoice to be due, and add an optional memo
Invoice processing for paid credits
When creating invoices for paid credits, Orb will attempt to process them synchronously if your account has automatic invoice issuance enabled. This means the invoice will be generated and finalized immediately, providing faster confirmation of the credit purchase. However, if the invoice needs to be synced to an external provider or if there’s system contention, the invoice will be processed asynchronously in the background.Additional credits configuration
You can also automatically add credits based on a customer’s usage using top ups or as part of a customer’s subscription with allocations. Allocations allow you to automatically add recurring credits to a customer as part of their subscription. Allocations can be configured with either:- Zero cost basis (default): Free inclusions that don’t generate charges on invoices
- Non-zero cost basis: Recurring credit commitments that appear as charges on invoices, useful for contracted spend or recurring credit packages