Prerequisites
- QuickBooks account
Connecting QuickBooks with Orb
-
In the sidebar of the Orb dashboard, click “Settings”, then click on the “Integrations” tab. Click “Connect to QuickBooks” from either the Invoicing section or Accounting section, depending on which integration you plan on using.

- Follow the instructions to connect QuickBooks
-
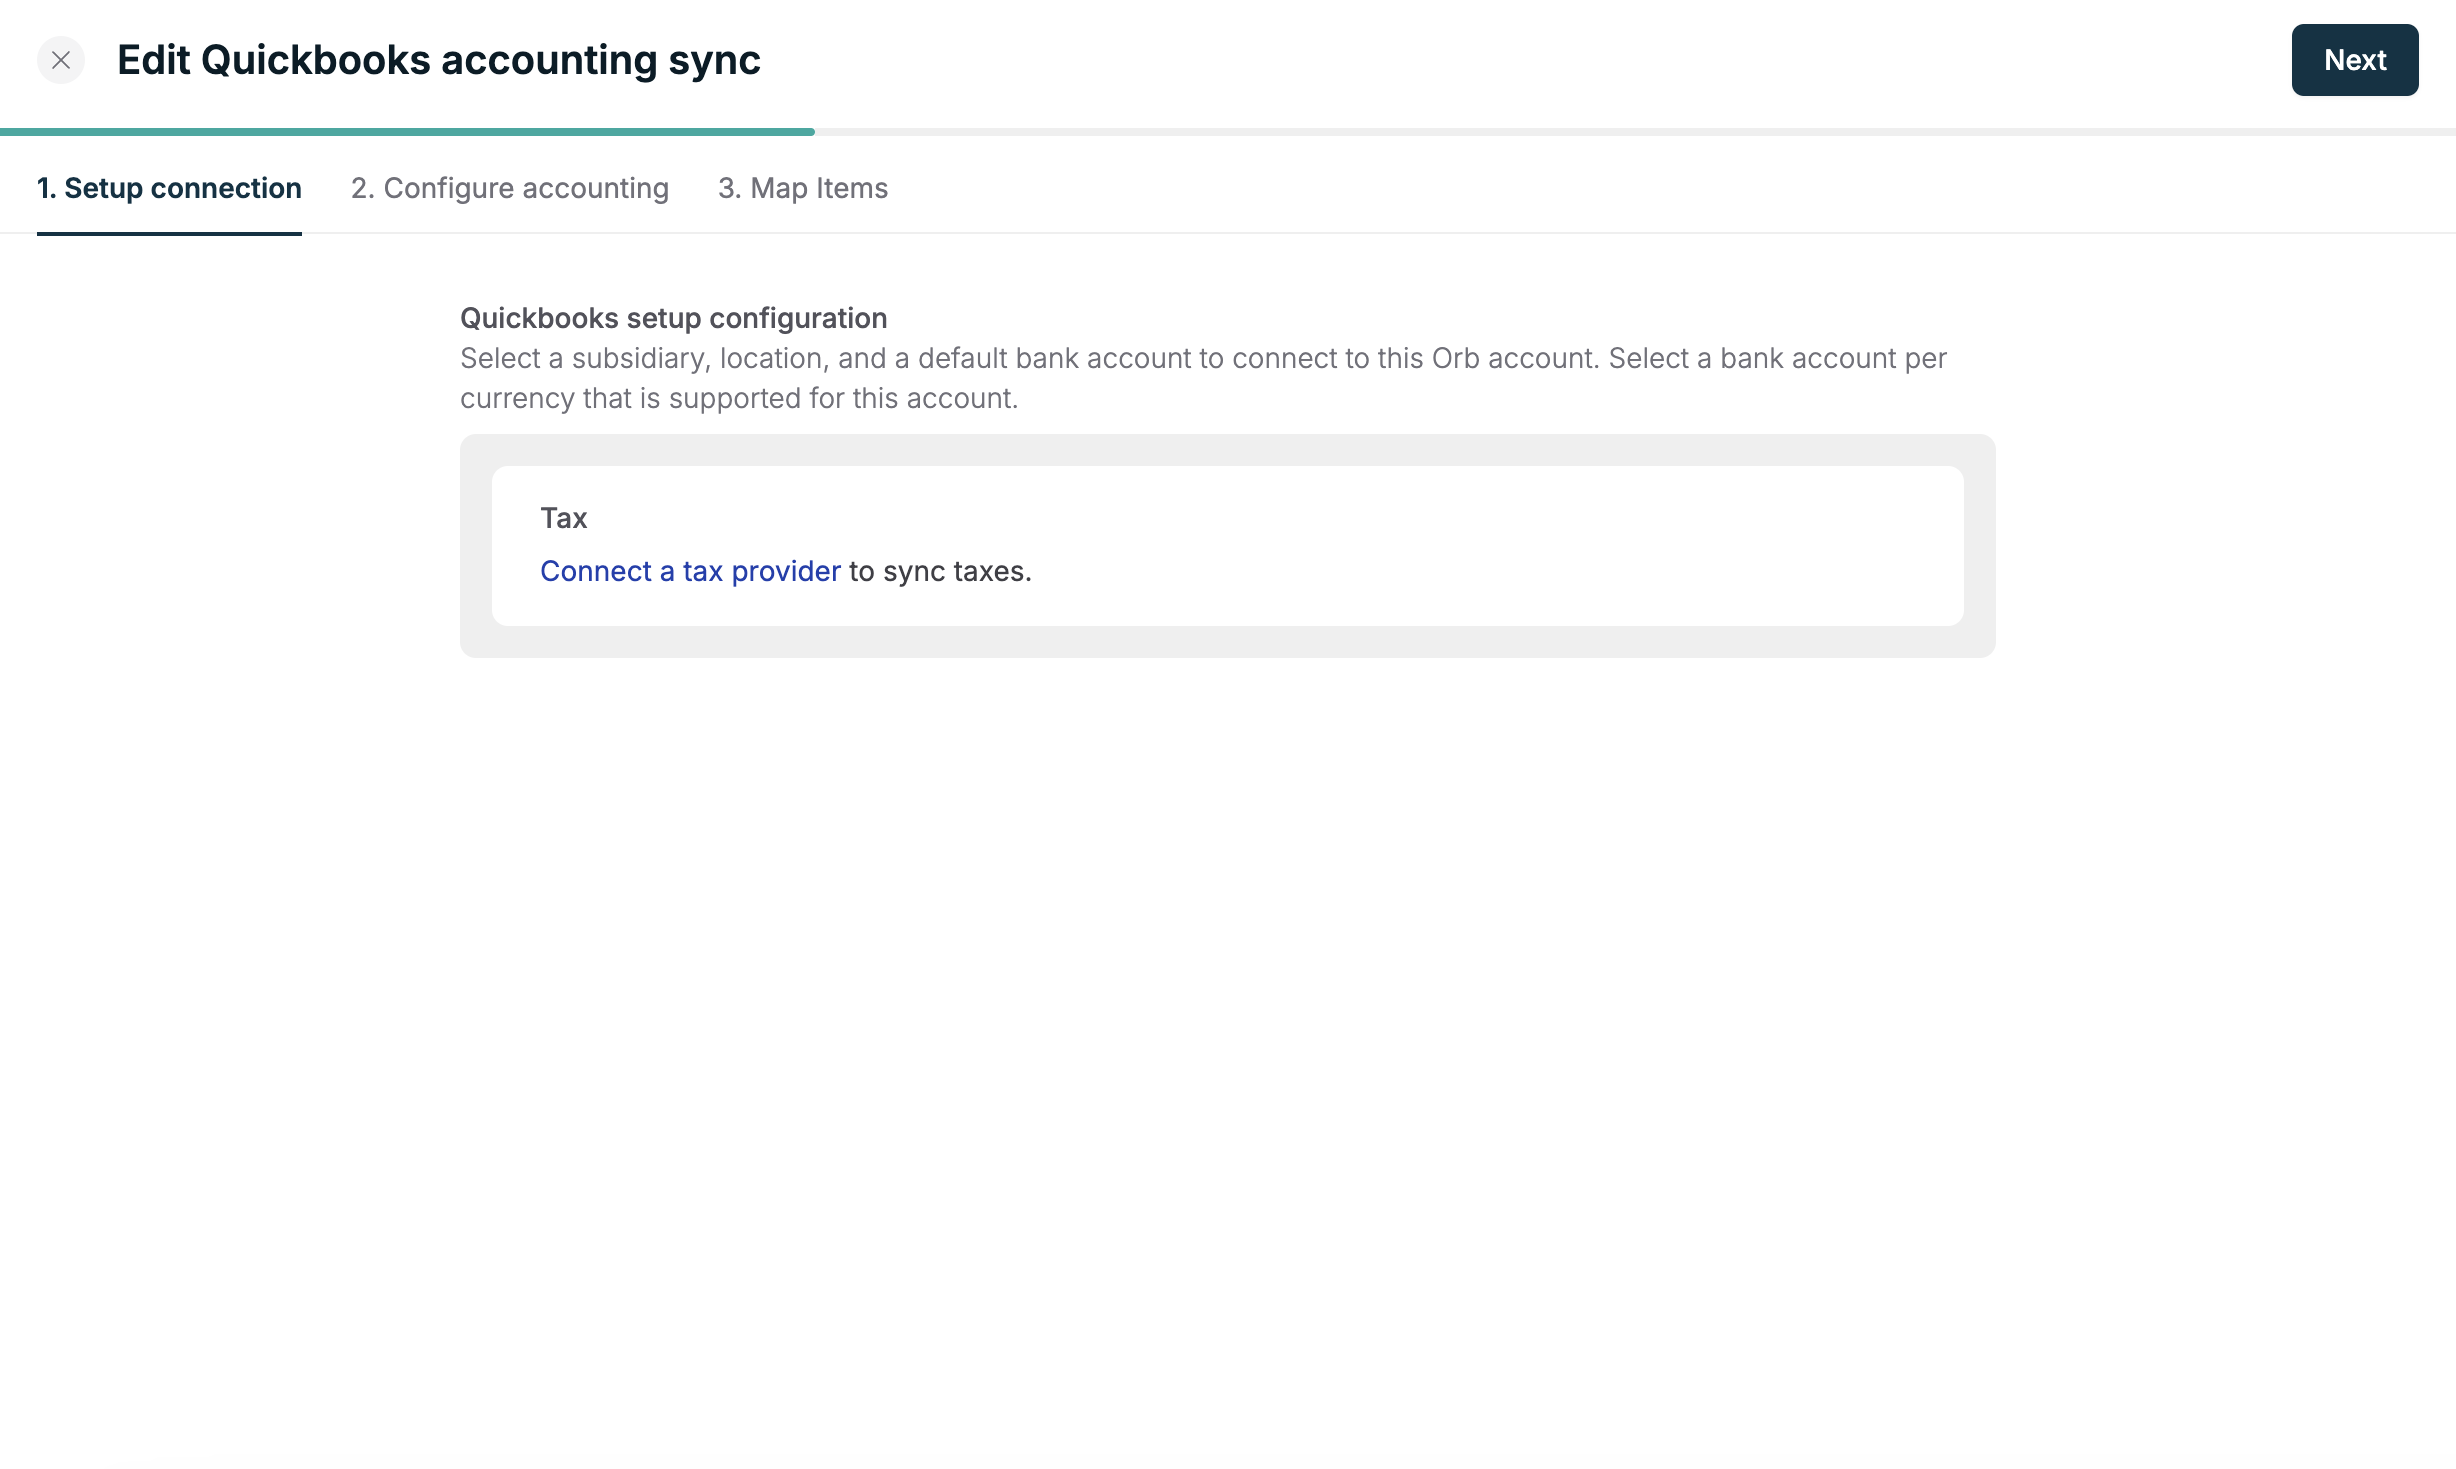
[Optional] Sync taxes to Quickbooks. After connecting to QuickBooks click the “Configure” button. Taxes will be synced as a separate line item when using the QuickBooks Accounting Sync. Select an external item in quickbooks to map taxes to.
-
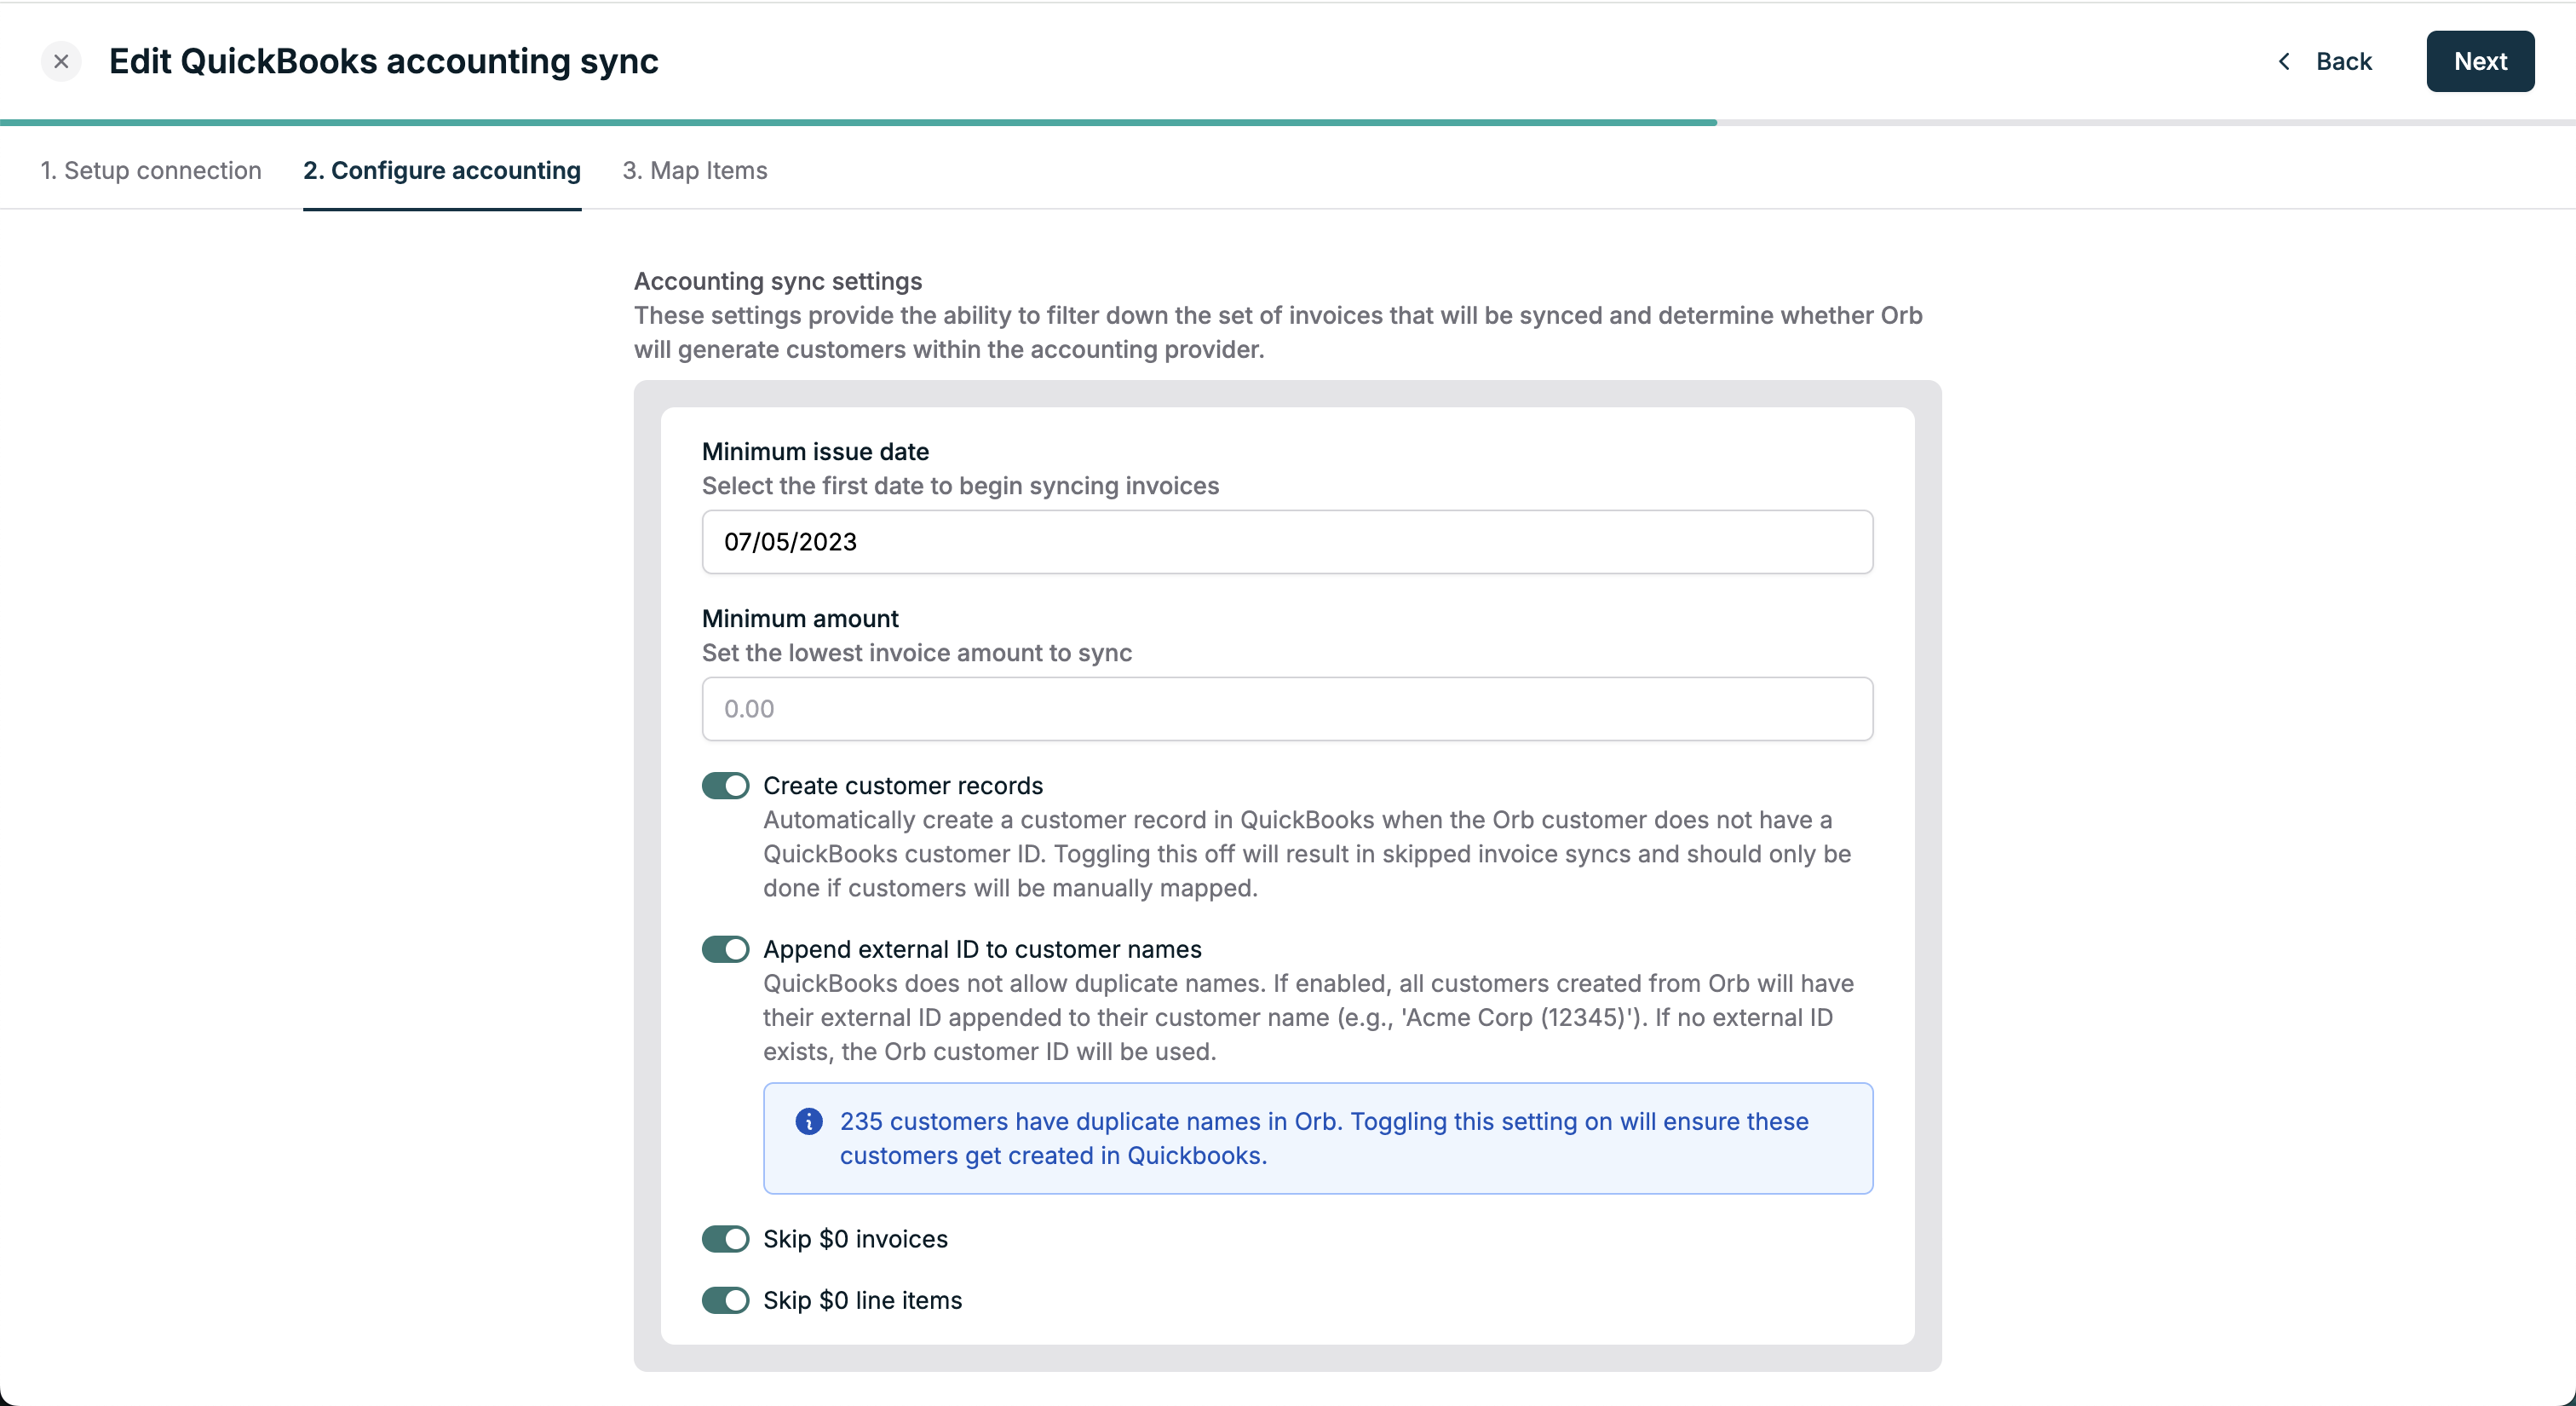
If configuring Accounting sync, there will be an extra step to configure invoice accounting sync settings.
Note: If you already have customers in your accounting provider, map Orb customers to existing customer records before turning on the “Create customer records” setting, so that duplicate customer records are not generated in your accounting provider. You can enable this setting later if you are not ready to map customers. Instructions for mapping customers can be found here.
To create customers with duplicate names in Orb, enable appending an external id to the customer name to successfully create and sync them as new, unique customers in Quickbooks.
-
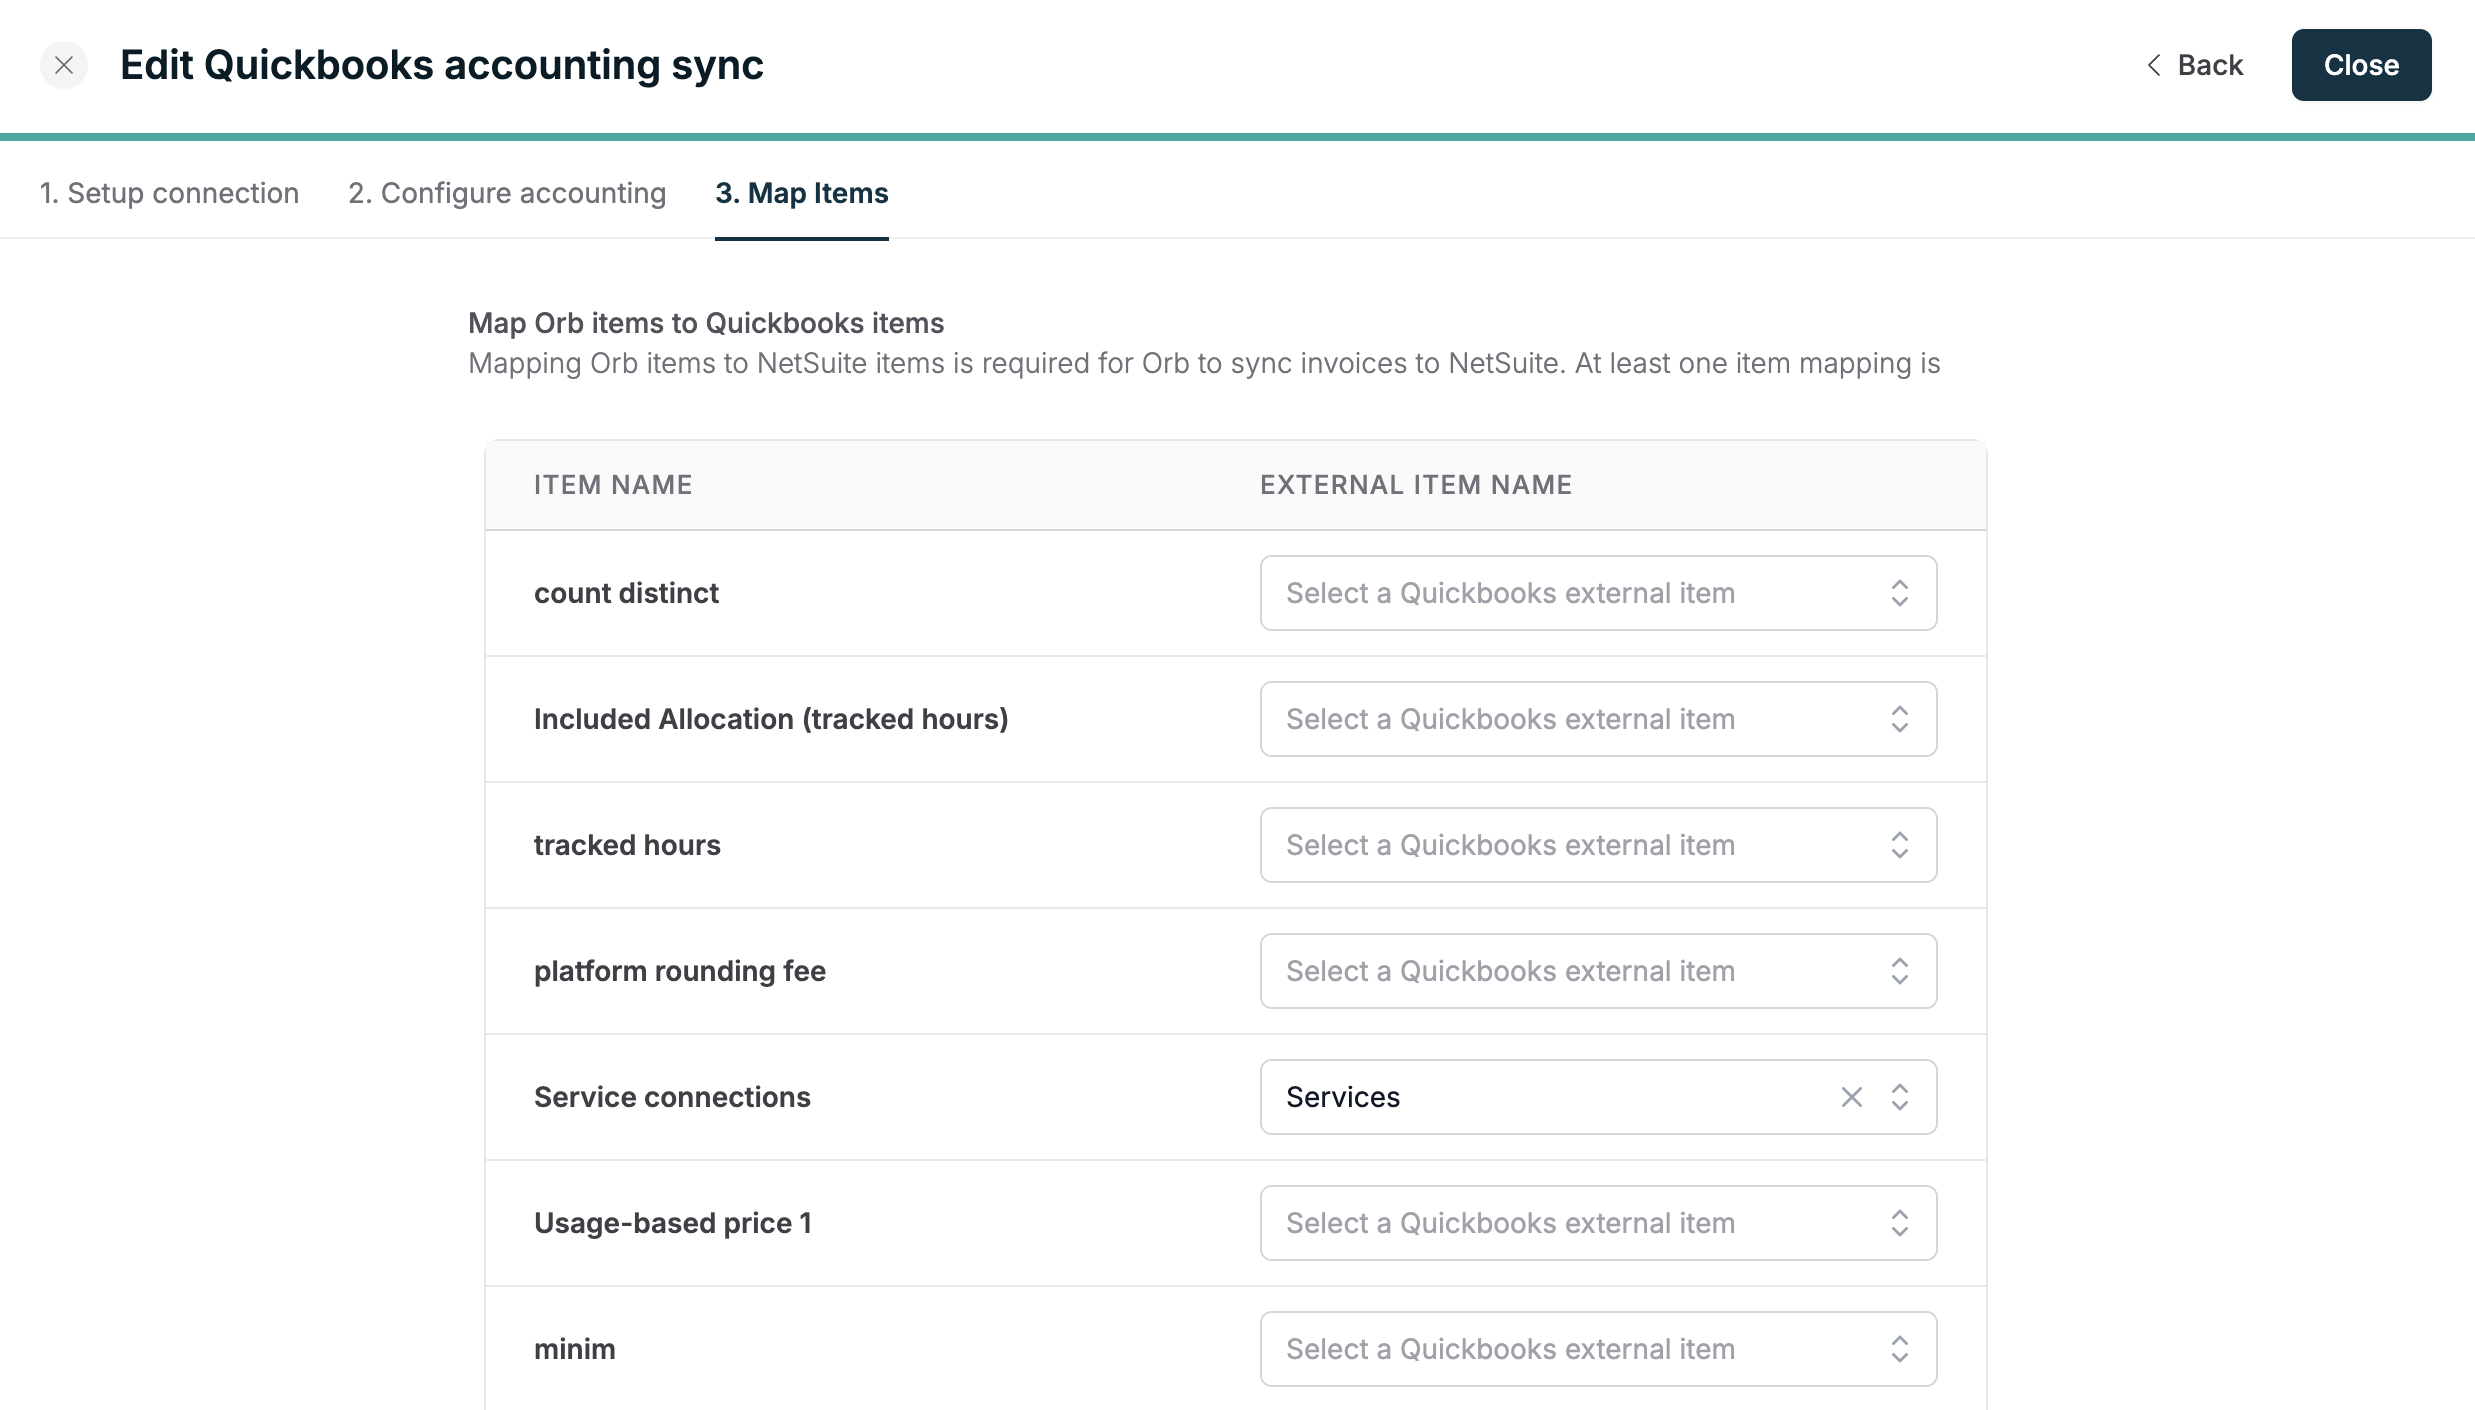
[Optional] Map Orb items to their external item in QuickBooks, then click “Save”. Mapping Orb items to items in QuickBooks is required for Orb to sync invoices to QuickBooks. This can be completed later if you are not ready to map items, but invoices with unmapped items will fail to issue.
Mapping items
In QuickBooks, Items are called Products and Services, and can be found in the Get paid and pay menu (direct link https://app.qbo.intuit.com/app/items). Create a product or service in QuickBooks for every item that you are selling in Orb. There are two ways to map items: Navigate to the Items tab in Orb under Settings, select an item, click edit, and select a QuickBooks item for each Orb item.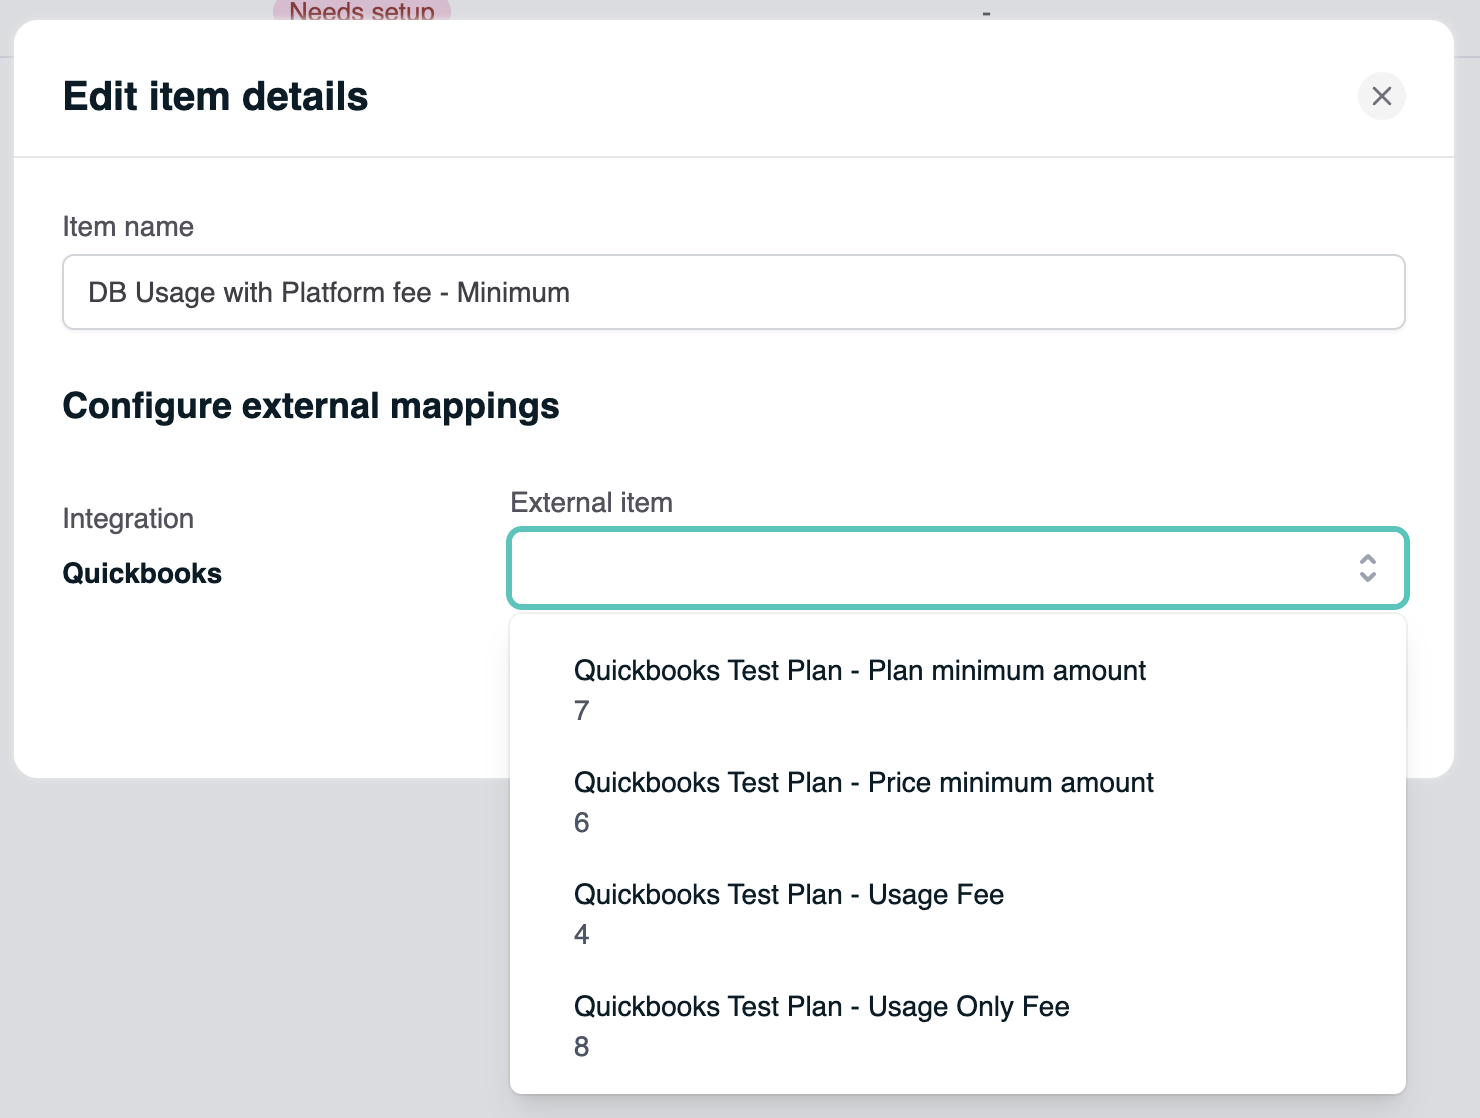
Using Orb for Invoicing?
Go to Settings > Integrations > Accounting section to configure the sync. For more information on sync settings and details go here.Using Quickbooks as an external invoicing provider?
Setup the Invoicing Integration
Finish setting up the invoicing provider by mapping customers.Configuring customers
After item mapping has been completed the last step for the invoicing provider is to create or update customers in the Orb UI or through the API. When creating or updating customers in the Orb UI, select QuickBooks as the Payment Provider in order to view a list of previously created customers in your QuickBooks account. Customer mappings can also be configured in the API, by passing in the customer’s QuickBooks ID underpayment_provider_id, and setting payment_provider to quickbooks. The customer’s QuickBooks ID can be found by navigating to the customer’s page in QuickBooks, and copying the ID from the URL
(e.g. https://app.qbo.intuit.com/app/customerdetail?nameId=377, where 377 is the ID)
Once mappings are configured, invoices for customers with a QuickBooks payment provider ID will be synced to QuickBooks.