Orb’s integration with NetSuite syncs a copy of invoices from Orb to NetSuite to power downstream workflows like invoicing, reporting, revenue recognition, and recordkeeping directly in your ERP.Documentation Index
Fetch the complete documentation index at: https://docs.withorb.com/llms.txt
Use this file to discover all available pages before exploring further.
Getting started
Prerequisites
- NetSuite account
- Sufficient administrator settings in your NetSuite instance to install bundles and enable SuiteCloud features
Connecting NetSuite and Orb
-
To get started with setup, navigate to the Integrations tab of your account Settings in Orb.
- Depending on if you’re connecting to NetSuite for invoicing, or strictly for accounting purposes (you invoice using Orb or a different provider), click “Connect to Netsuite” in the relevant section.

-
In NetSuite, do the following to establish the connection:
- Install the
AccountLink NetSuite Bundle, and the AccountLink: Rev Rec Columns Bundle.- _Note: _
The AccountLink: Rev Rec Columns Bundleadds two custom fields to the Netsuite instance in order suppport syncing start and end dates for invoice line item service periods. - Alternatively, if the direct link to install the
Account Link: Rev Rec Columns Bundleis not working, navigate to the Search & Install Bundles in Netsuite to findAccountLink: Rev Rec Columns Bundle.
- _Note: _
- Enable SuiteCloud features as listed.
- Confirm setup.
- Upon clicking Save, you should now see NetSuite as a connection at the top of the Integrations tab, with the status “Sync in progress” in Orb.
- Once existing data from NetSuite is synced and ready to be used by Orb, the status of the connection will show up as “Configuration required”. Until then, the connection cannot be used in Orb. This can take up to a few hours, depending on the amount of data in the connected NetSuite account.
- Install the
-
In Orb, finish configuring the connection.
- Within the Integrations tab, go to either the Invoicing or Accounting section, depending on which integration you want to use, and click “Configure” in the NetSuite card.
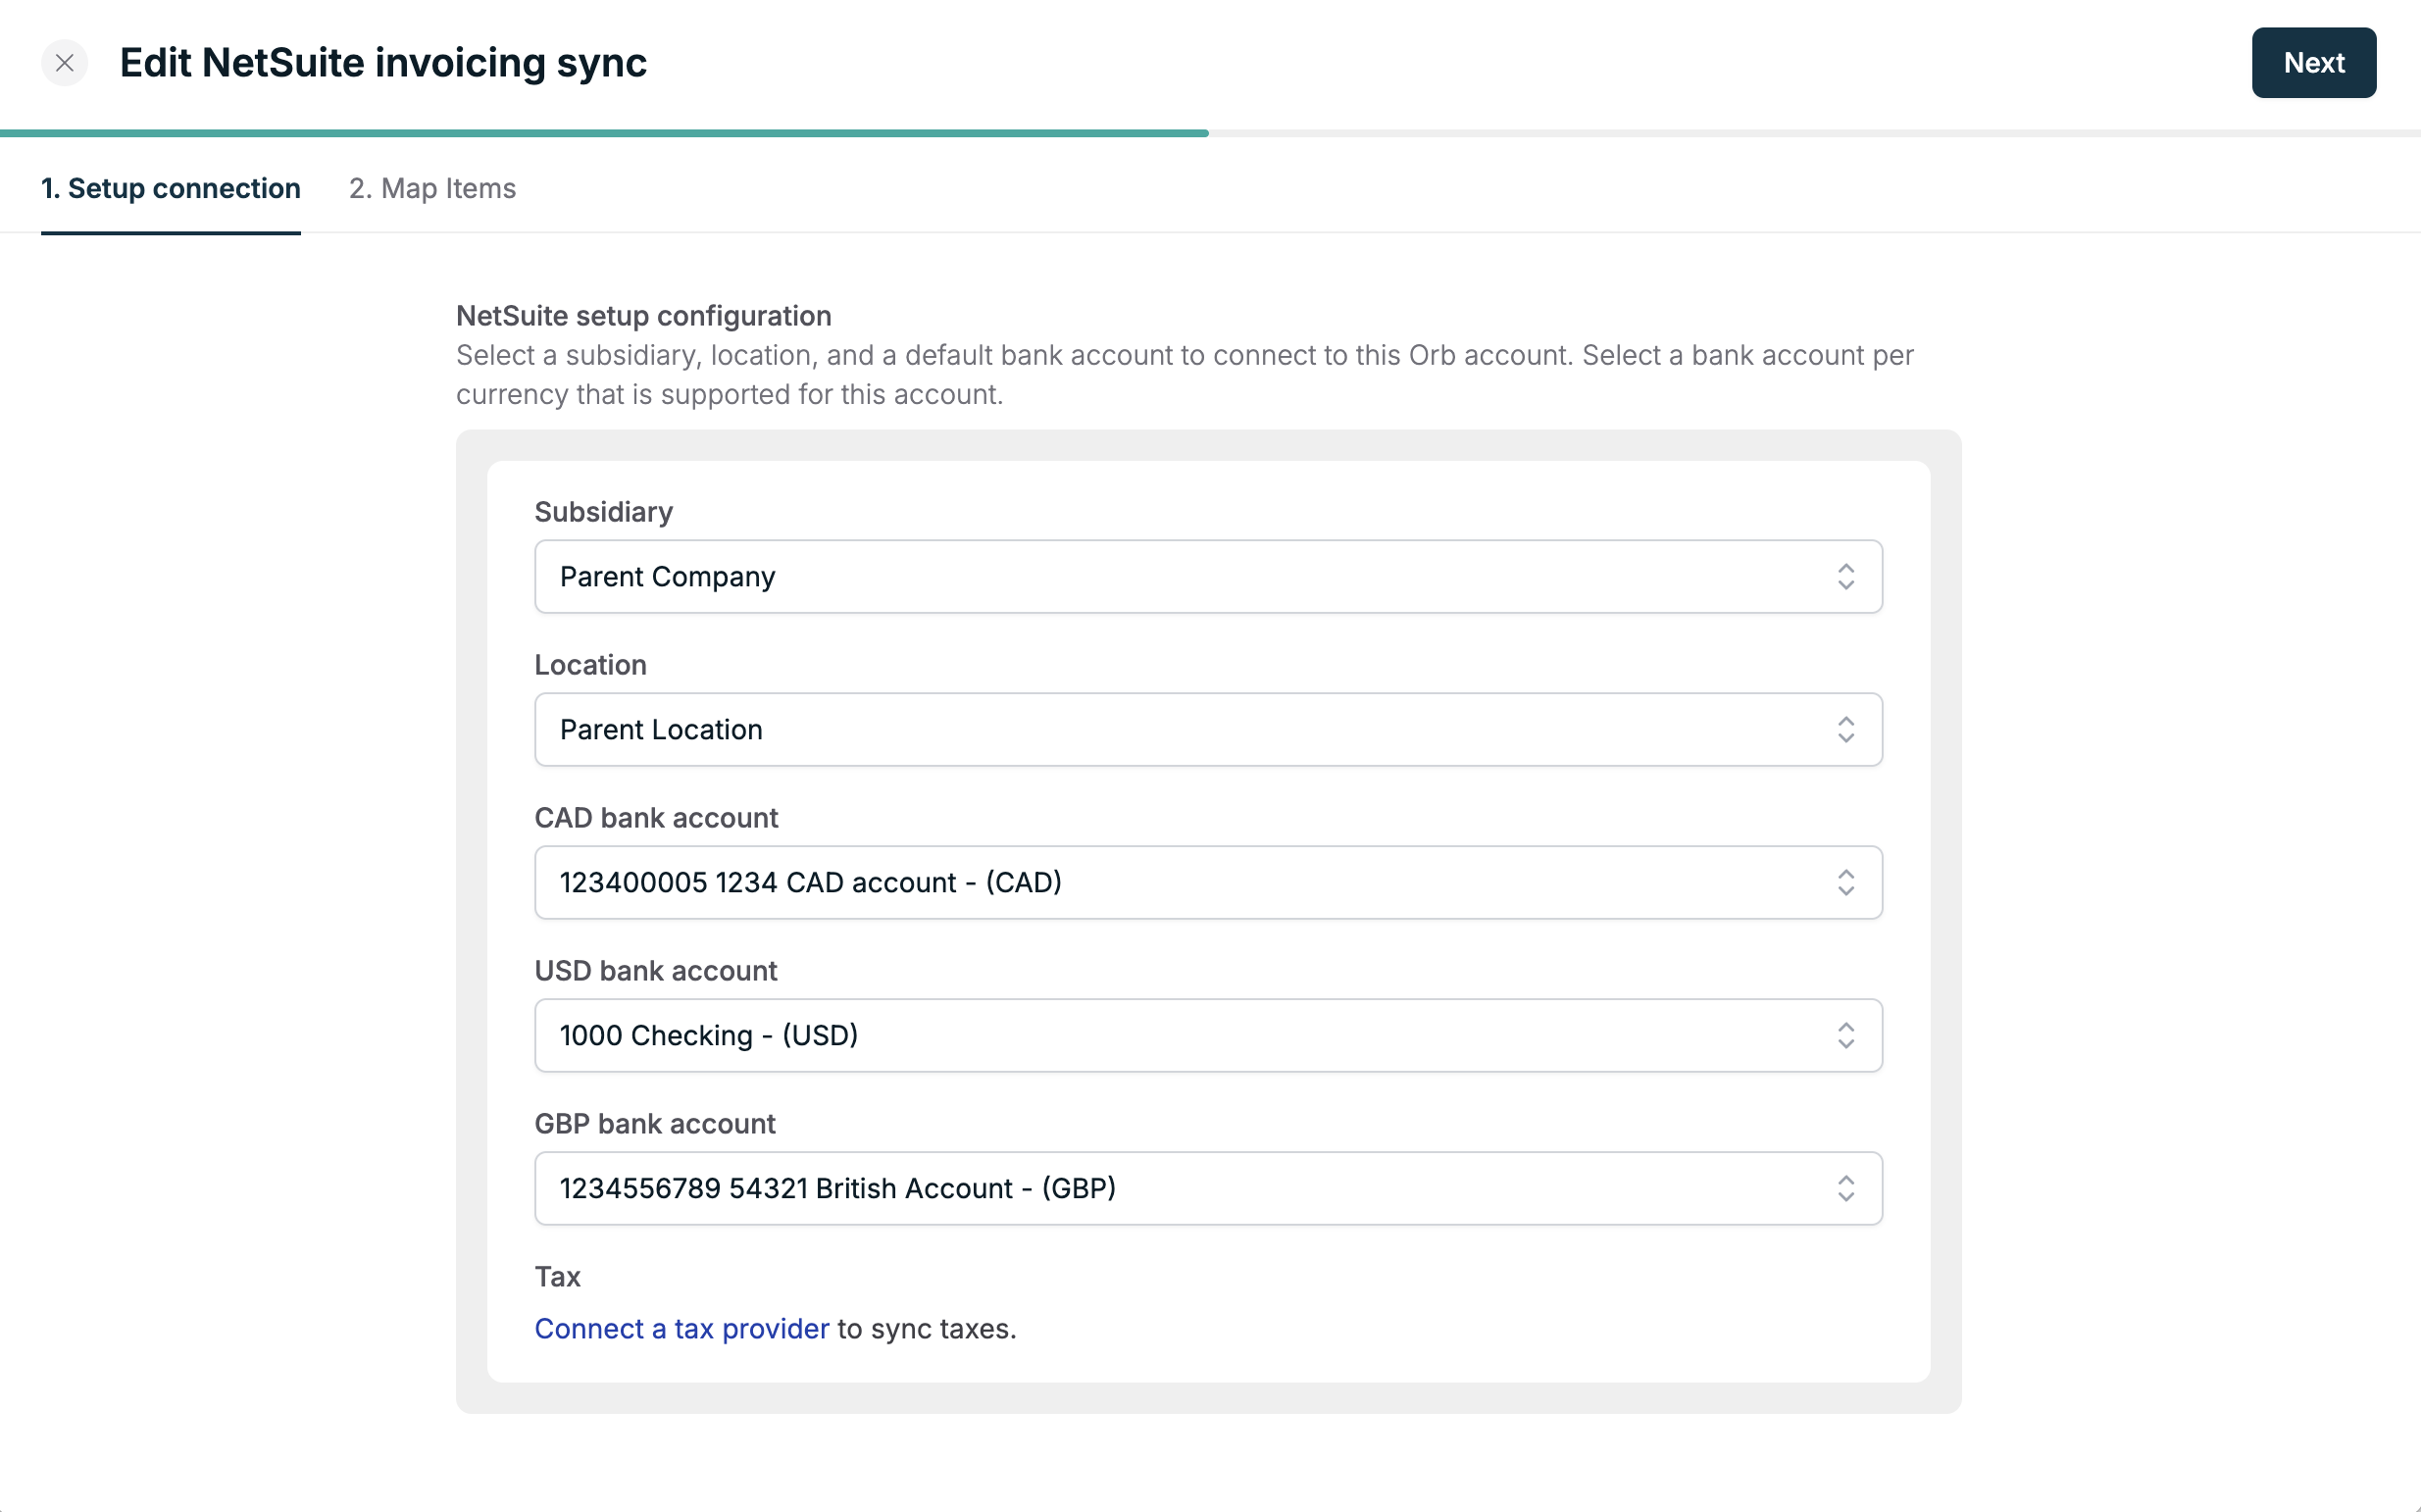
- Select a subsidiary and a default bank account to connect your Orb account to. You will need to select a bank account per currency that you support in Orb.
- If you’ve configured the Location field to be mandatory in your NetSuite Accounting Preferences, select the corresponding location from the dropdown.
-
(Optional) Sync taxes to NetSuite. Taxes will be synced as a separate line item when using the NetSuite Accounting Sync. Select an external item to sync taxes to.
-
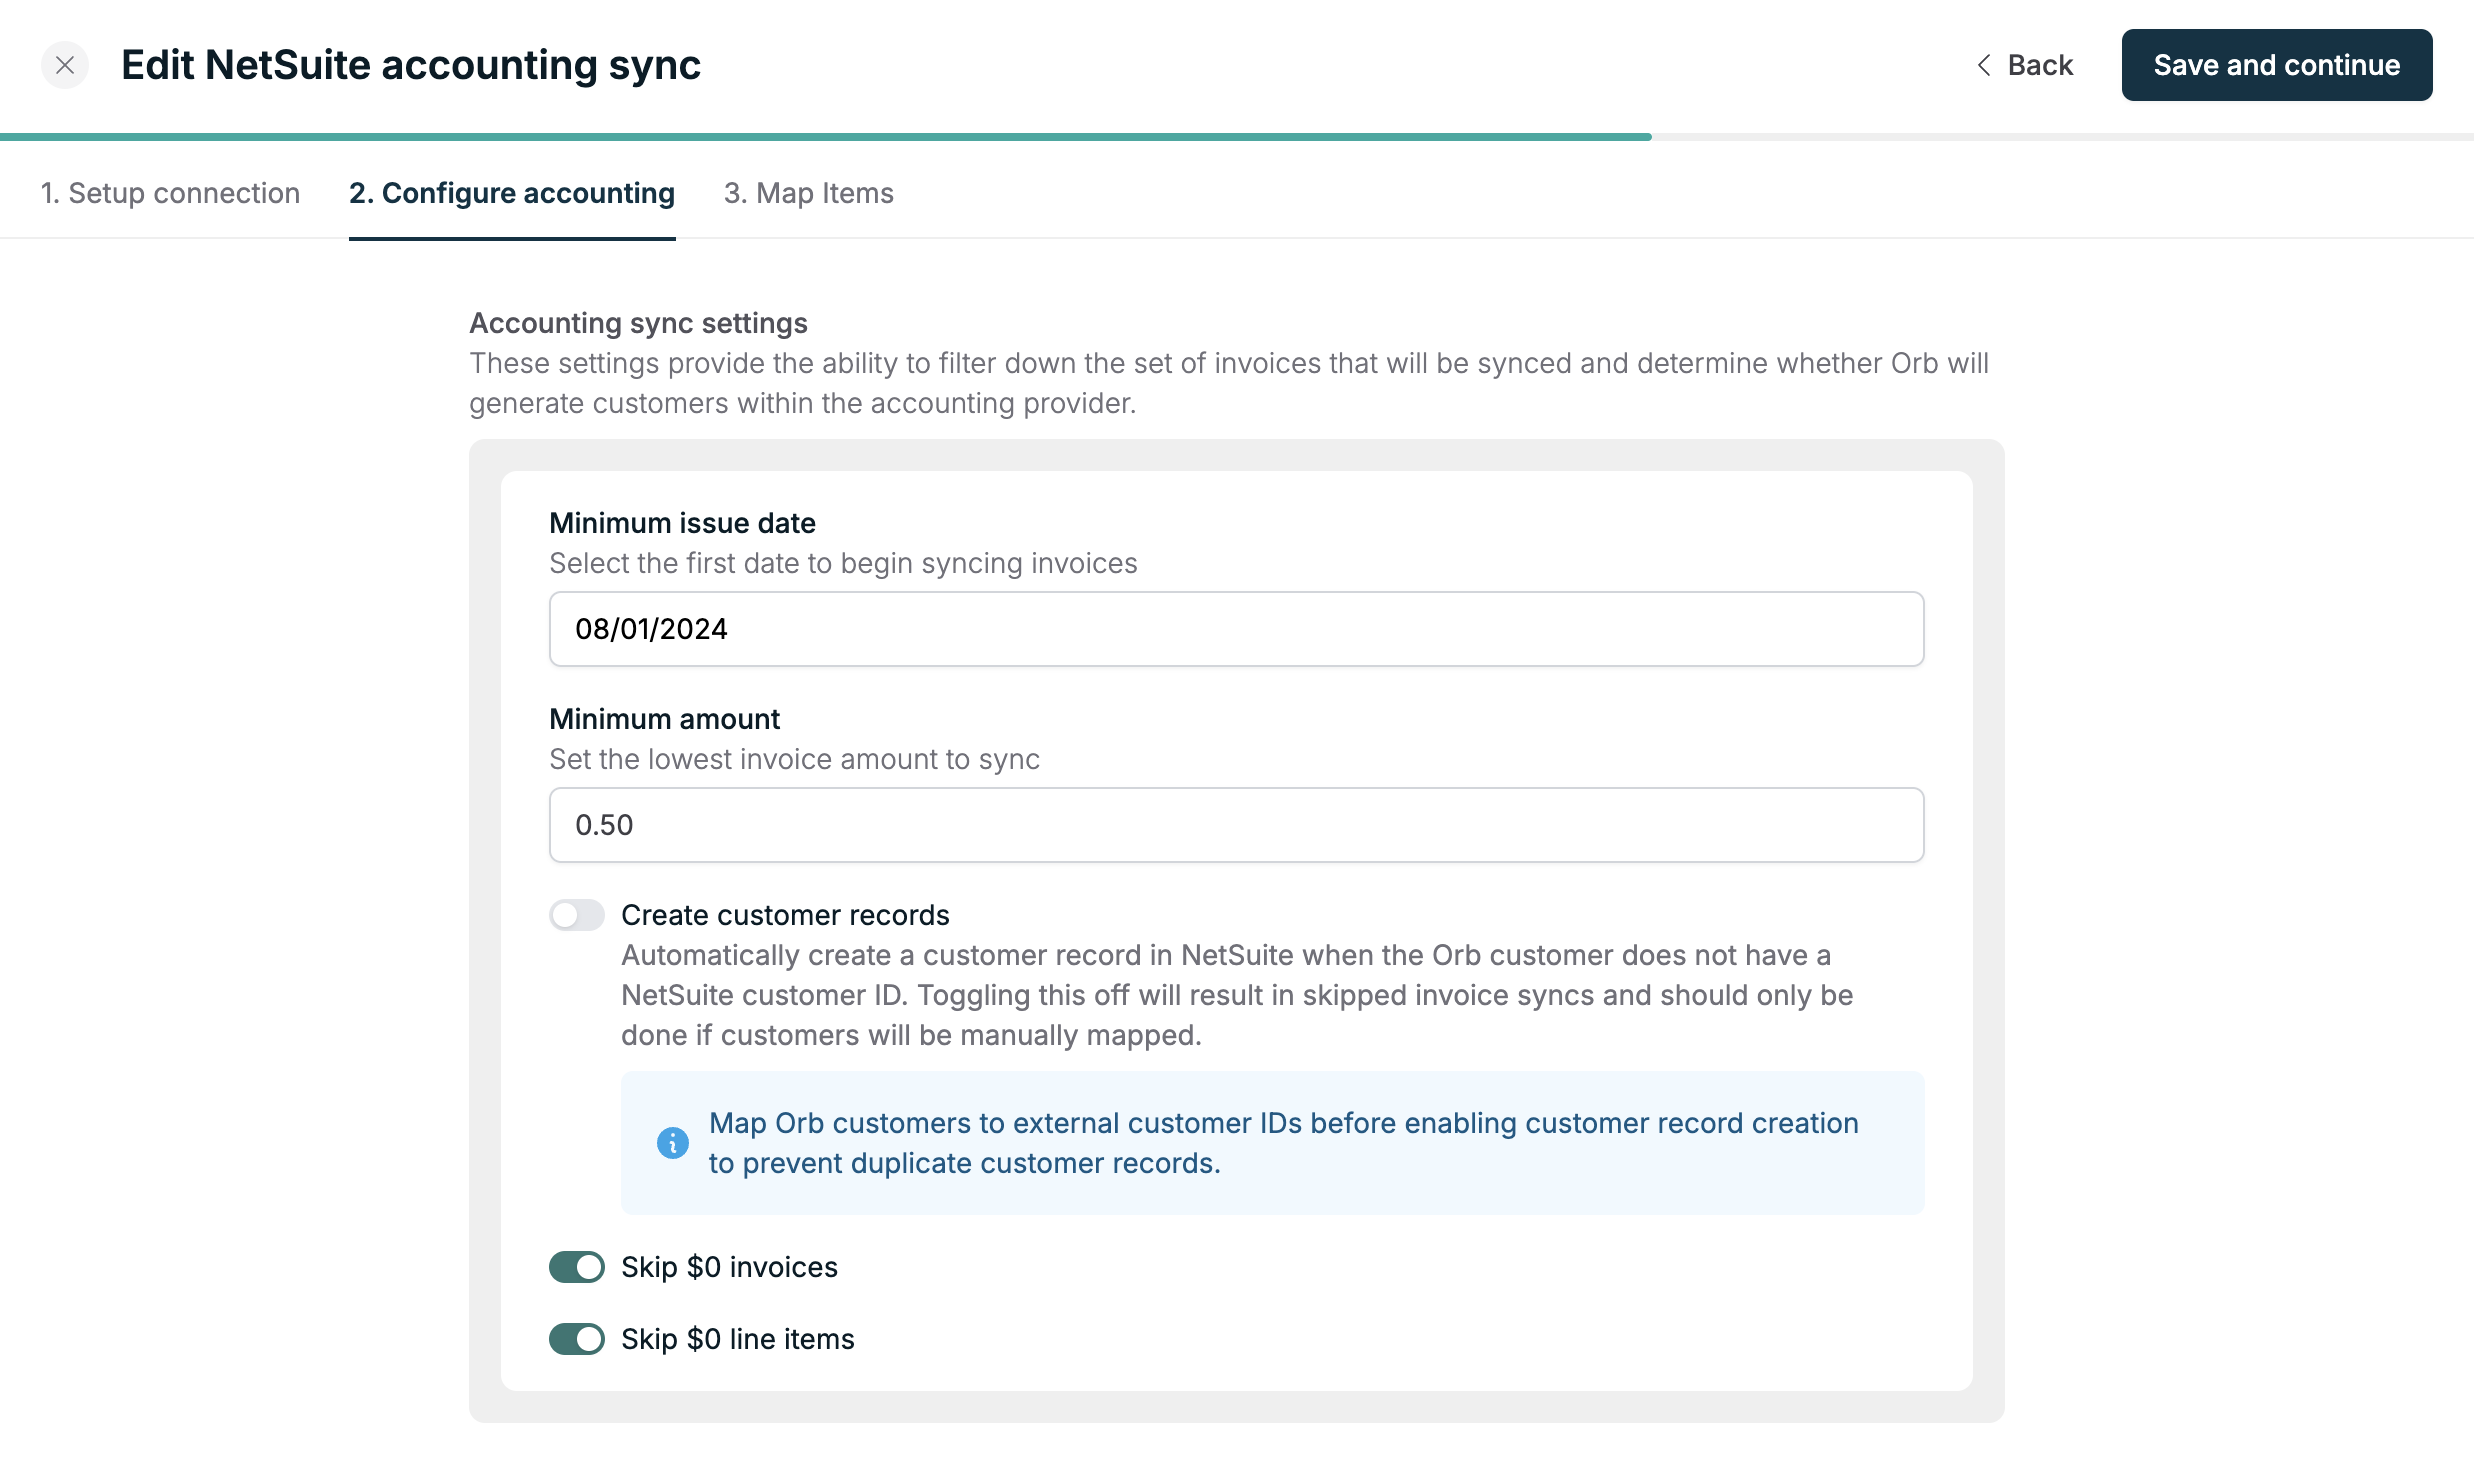
[Accounting sync only] If configuring the connection for the Accounting sync, there is an extra configuration step to define additional criteria for which invoices are synced.
- If you already have customers in your accounting provider, map Orb customers to existing customer records before turning on the “Create customer records” setting, so that duplicate customer records are not generated in your accounting provider. You can enable this setting later if you are not ready to map customers.
- Instructions for mapping customers can be found here.
-
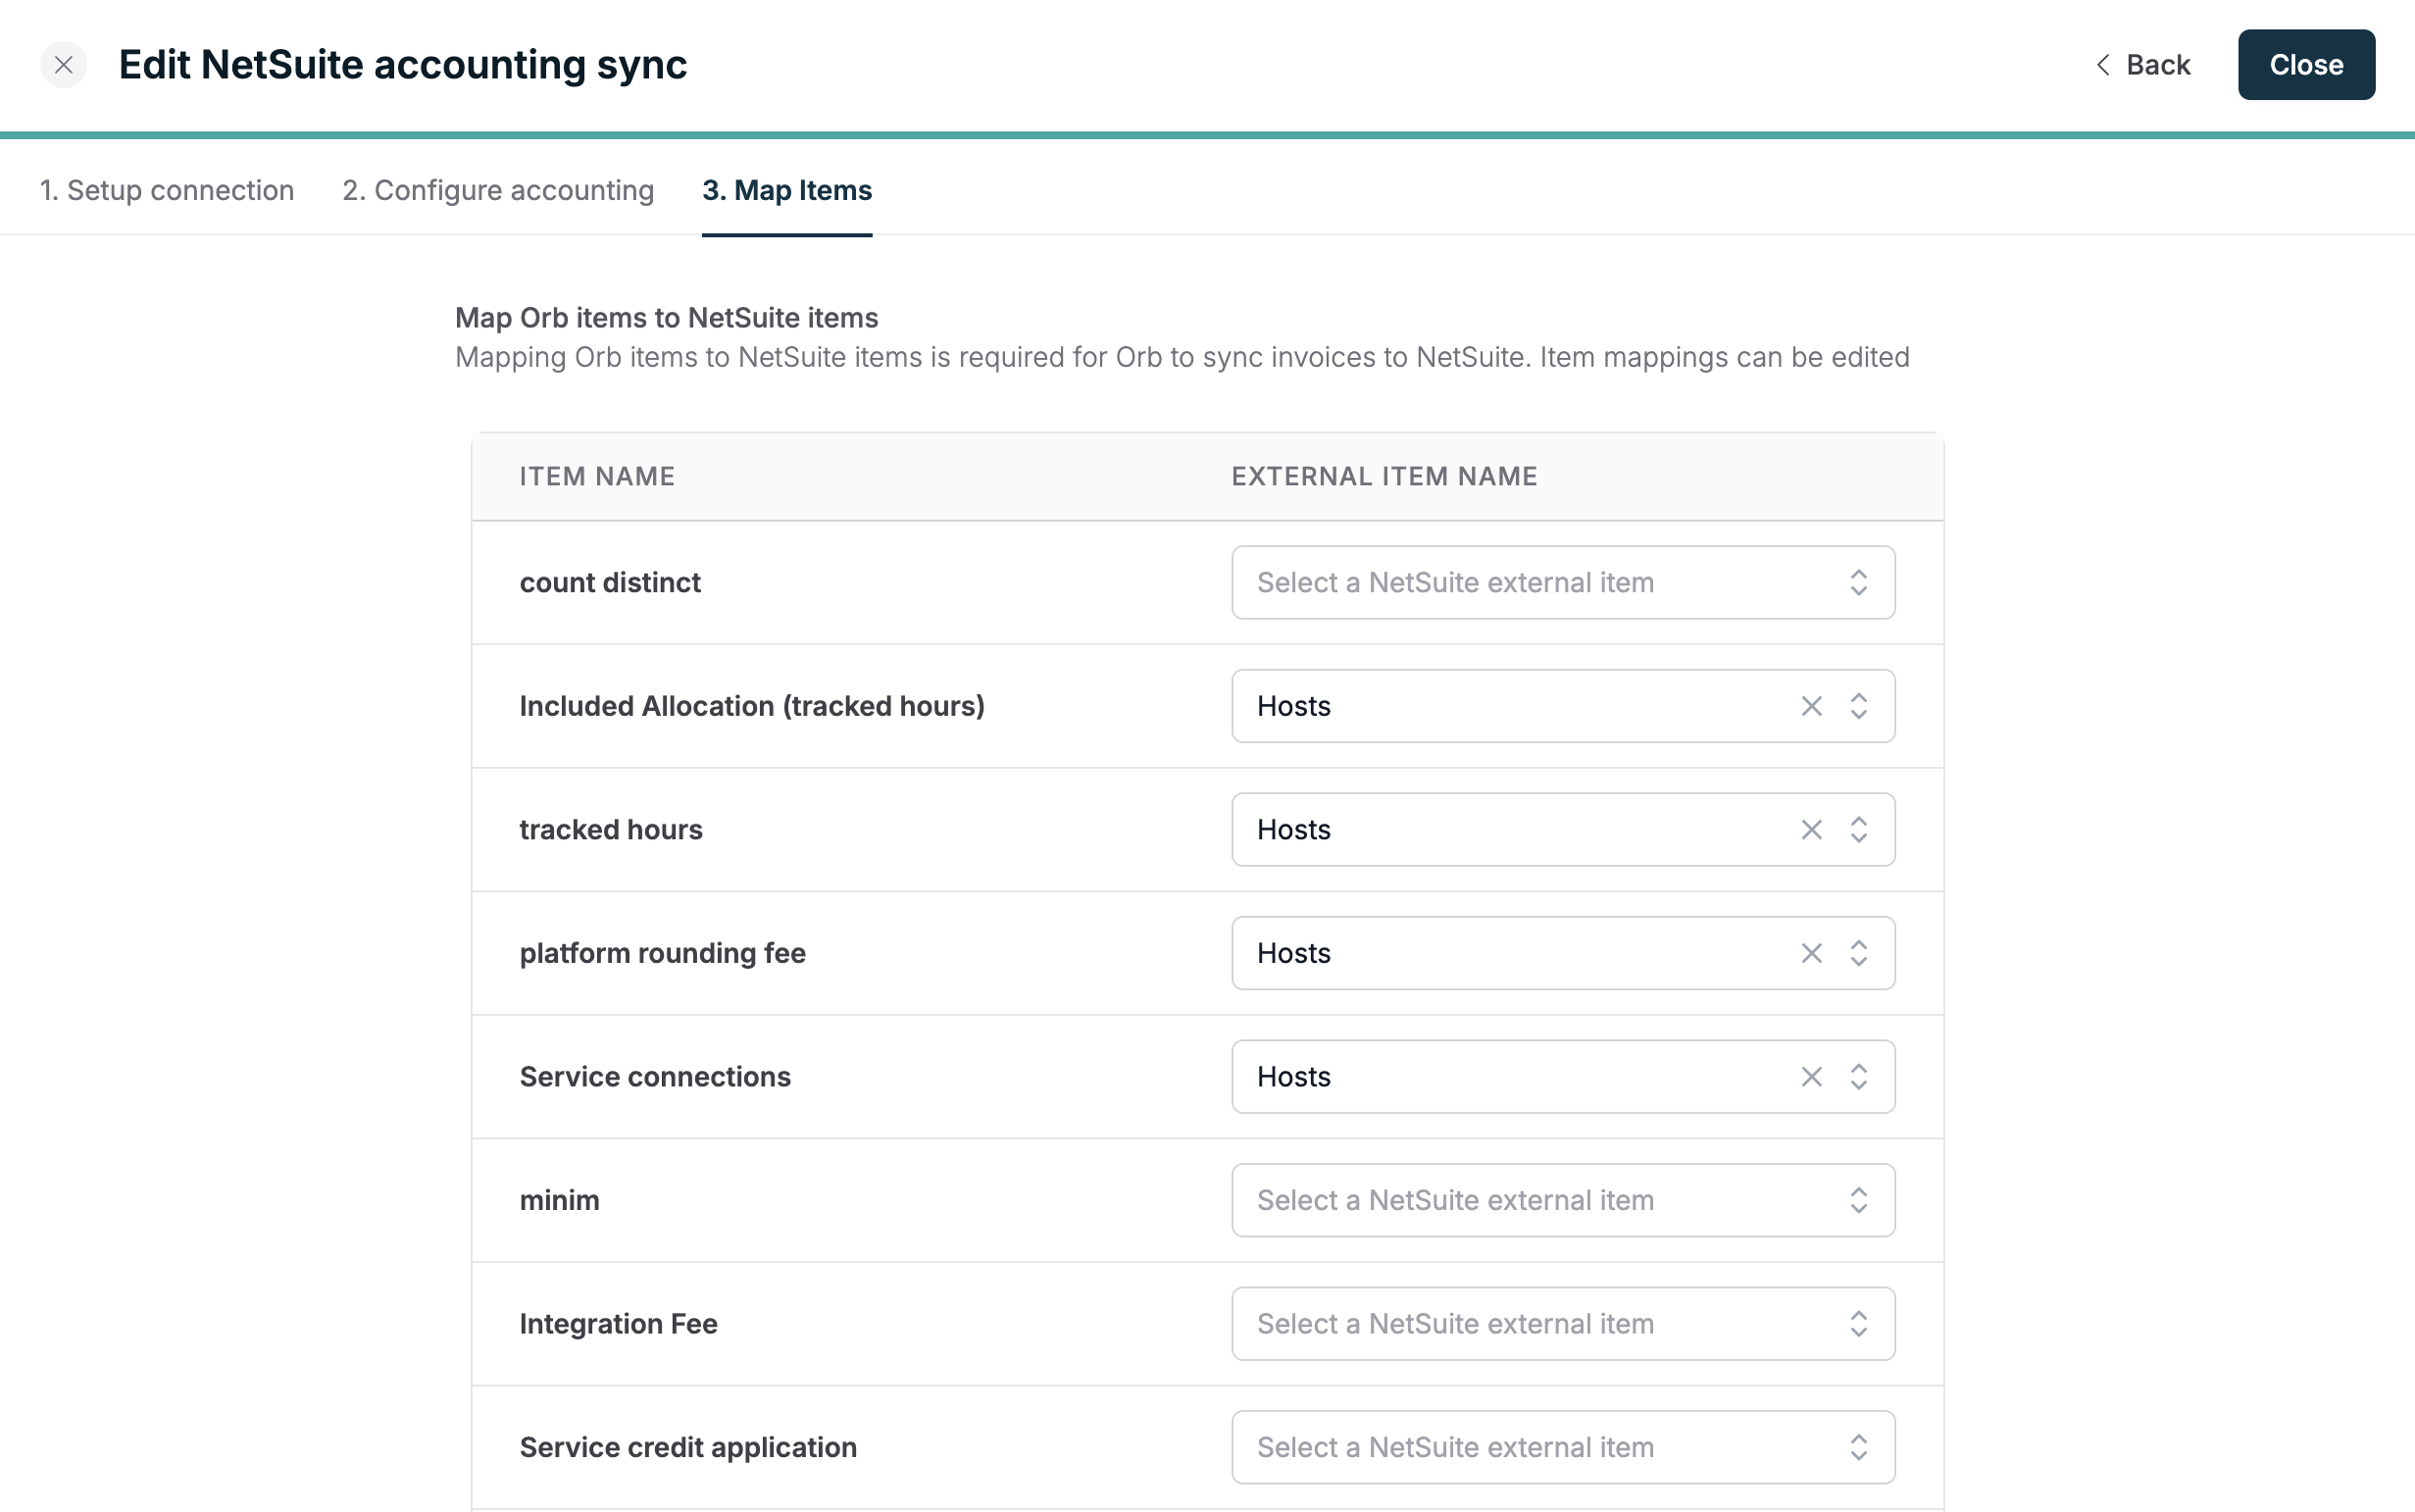
(Optional) Map Orb items to their external item in NetSuite, then click “Save”.
- Mapping Orb items to items in NetSuite is required for Orb to sync invoices to NetSuite. This can be completed later if you are not ready to map items.
- Instructions for setting up items in NetSuite can be found here.
- While setting up customers and items in NetSuite, if data is missing in Orb, click the “Refresh” button to re-sync data from NetSuite. Orb also periodically updates data from NetSuite.
What is synced
Orb’s integration syncs invoices, credit notes, and payment records to NetSuite, in addition to the associated customer and subscription details.- Invoices
- Invoice number
- Line items (totals, price, quantity, service periods, adjustments)
- Each Orb invoice line item creates a matching NetSuite line item
- Service periods (start and end dates) match exactly between Orb and NetSuite
- Tax
- Due date
- Invoice date
- Credit notes
- Credit note number
- Line items
- Tax
- Issue date
- Payments
- Amount
NetSuite guidance
Setting up RevRec schedules
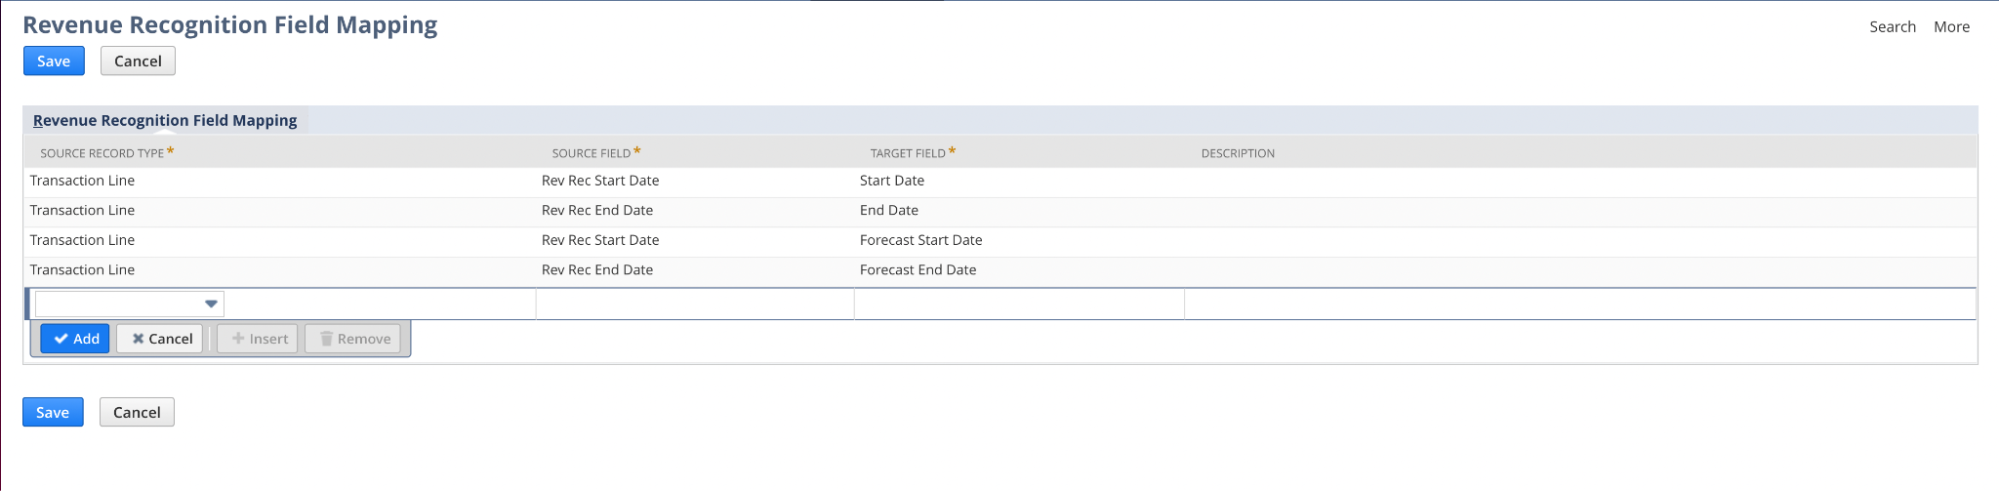
Orb syncs line item service periods so you can perform accurate revenue recognition in NetSuite. To enable this:- In NetSuite, navigate to the Revenue Field Mapper.
- Map the
Rev Rec Start DateandRev Rec End Datesource fields to the corresponding Start Date and End Date end fields, respectively.- Start and end dates synced to NetSuite match service period dates as they appear in Orb.
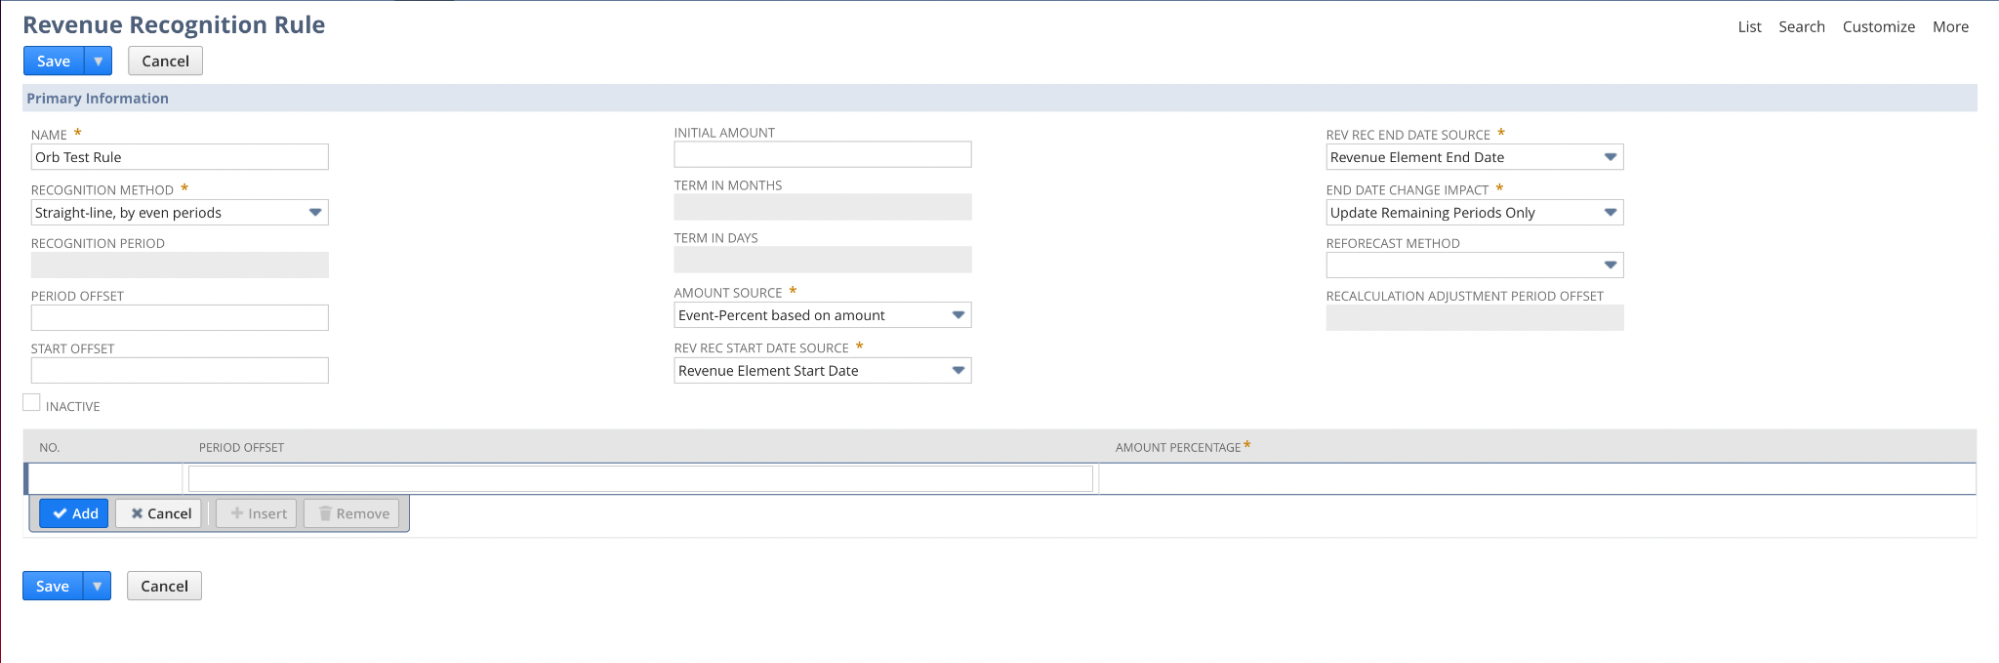
- Navigate to Revenue Recognition Rule, and create a new rule.
- Specify the
Rev Rec Start Date SourceandRev Rec End Date Sourceto the data that mapped in the previous step.
- Specify the
Setting up Items
Mapping Orb items to items in NetSuite is required for the integration to function as expected. Without item mapping, Orb will not be able to successfully sync invoices to Netsuite correctly. In NetSuite, create items corresponding to items you are selling in Orb. When creating the item, in the Revenue Recognition/Amortization tab, select the Revenue Recognition Rule and Rev Rec Forecast Rule you’ve previously created.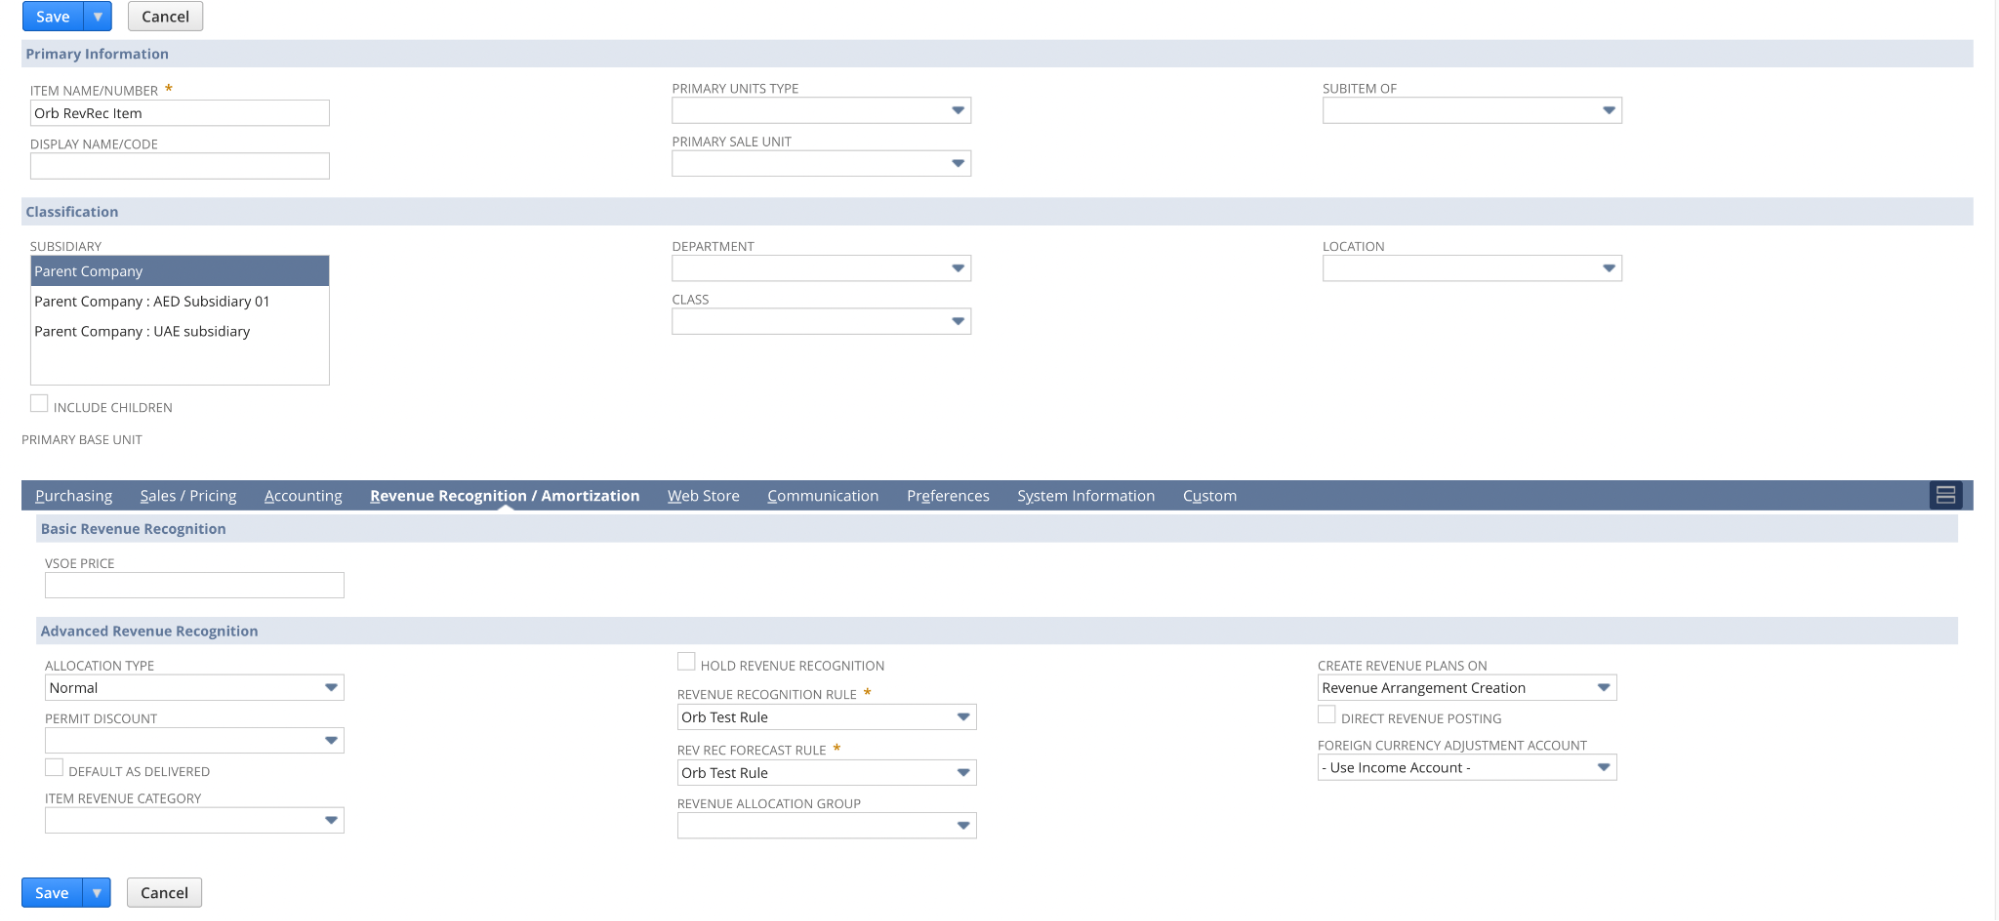
Mapping items
Orb supports many-to-one item mapping, where each item in Orb maps to exactly one item in NetSuite, but multiple Orb items can map to the same NetSuite item if desired. This provides flexibility in organizing your product catalog while maintaining clean revenue recognition. There are two ways to map items:- Option 1: Navigate to the Items tab in Orb under Settings, select an item, click “Edit” and select the corresponding NetSuite item.

- Option 2: Navigate to the Integrations tab in Orb under Settings, and in the NetSuite card, click the “Edit” button and go to the “Map items” step to view a list of all items and select NetSuite items for each.
Frequently asked questions
Does the integration create standard NetSuite Invoice records, or a custom record type?
The integration creates standard NetSuite Invoice records, not custom record types. This ensures compatibility with existing NetSuite workflows and reporting.Can Orb unbundle subscription products (SaaS and usage) before syncing to NetSuite, and map each component to distinct NetSuite items for rev rec purposes?
Yes. For each Orb invoice line item, there will be a matching NetSuite line item on the corresponding NetSuite invoice. Orb’s invoice line items are mapped to NetSuite items using the underlying Orb item resource, which can be managed centrally in the Items settings in Orb. This allows you to unbundle subscription products and map each component to distinct NetSuite items for revenue recognition purposes.Are start and end dates reliably populated for all subscription and usage-based charges, including when items are bundled?
Yes, the start and end dates for each line item in NetSuite will match the start and end dates of the corresponding Orb line item’s service period. This applies to all subscription and usage-based charges, including bundled items.If fair value allocations are required, does Orb handle the allocation logic or is it expected to occur in NetSuite?
Fair value allocations are expected to be handled in NetSuite. If you have specific requirements around fair value pricing or SSP Category data to support NetSuite ARM, please reach out to discuss your use case in more detail.Is item mapping one-to-one between Orb and NetSuite, or can it support one-to-many or many-to-one mappings?
Item mapping is “many-to-one” - each item in Orb maps to exactly one item in NetSuite, but many Orb items can map to the same NetSuite item if desired. This provides flexibility in how you organize your product catalog while maintaining clean revenue recognition in NetSuite.Testing NetSuite
Connect a NetSuite sandbox account to Orb in Test mode. While testing RevRec, syncing invoices does not automatically update revenue arrangements in Netsuite. To force update the revenue arrangement within NetSuite, in Update Revenue Arrangements and Revenue Plans, click Refresh, Update Revenue Arrangements, and then Update Revenue Plans.Best practices: using NetSuite for invoicing
Configuring customers
After item mapping has been completed the last step for the invoicing provider is to create or update customers in the Orb UI, or through the API. When creating or updating customers in the Orb UI, select NetSuite as the Payment Provider in order to view a list of previously created customers in your NetSuite account. Customer mappings can also be configured in the API, by passing in the customer’s NetSuite ID underpayment_provider_id, and setting payment_provider to netsuite. The customer’s NetSuite ID can be found by navigating to the customer’s page in NetSuite, and copying the ID from the URL
(e.g. https://<>.app.netsuite.com/app/common/entity/custjob.nl?id=1613&whence=, where 1613 is the ID)
Once mappings are configured, invoices for customers with a NetSuite payment provider ID will be synced to NetSuite.
Mapping Orb Invoice Number to a NetSuite invoice
Optionally, it’s possible to map the Invoice Number in Orb to a NetSuite invoice. For full feature parity, we recommend this as a best practice. There are two options to enable this:- Option 1: If you wish to keep unique identifiers for invoices in NetSuite, you should use the Using Custom Fields instructions.
- Option 2: If you intend to use Orb’s Invoice Number as your unique identifier, you can use Mapping NetSuite Invoice Document Number.
- LABEL: Orb Invoice Number
- ID: _orb_invoice_number
- OWNER: Your account name should automatically be listed here
- DESCRIPTION: The identifying Number for the Orb generated invoice.
- Applies To: Check only “Sale”
- Navigate to Setup > Company > Auto-Generated Numbers (or use the search bar)
- Click on the “Document Numbers” Tab
- Check the box in the Invoice row, for the “Allow Override” column
- Click “Save”
- Review the prompt, and if you agree, press “Ok”