Why deterministic invoices matter: Invoices in Orb are deterministic queries, not side effects. Unlike streaming systems where invoices are calculated once (and corrections require manual intervention), Orb’s invoices are reproducible calculations. Finance can backfill late usage data and Orb automatically recalculates affected invoices. Product can test pricing changes with exact invoice previews. Every line item traces back to specific events and pricing rules—complete auditability by design.
Configuring invoicing metadata
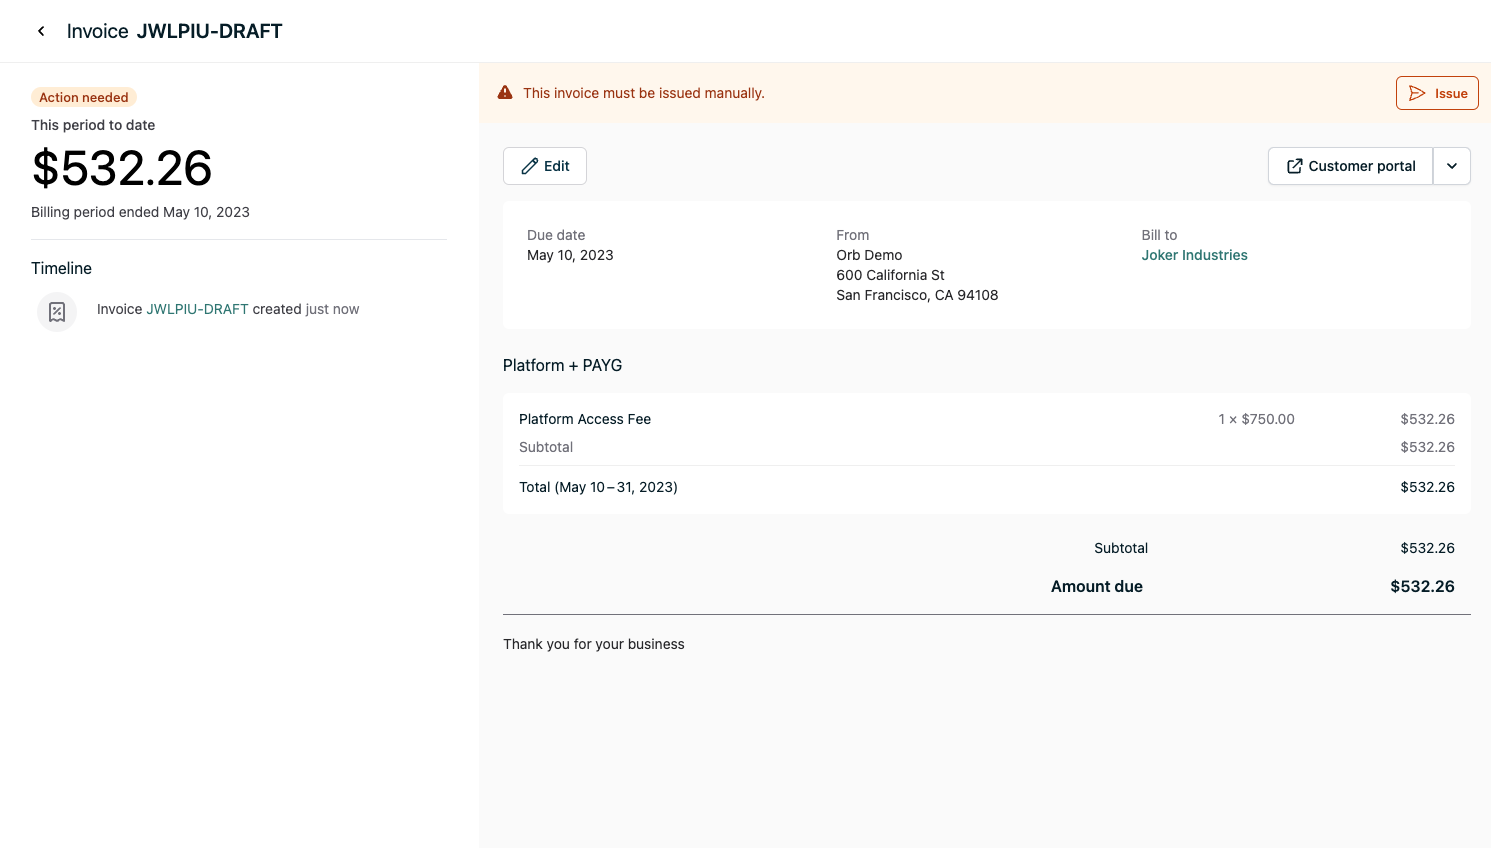
The details section at the top of your invoices doesn’t look very complete yet, which can lead to a confusing experience for your customers and cause issues from a compliance perspective. Let’s fix that by setting up your company details and your customer’s address.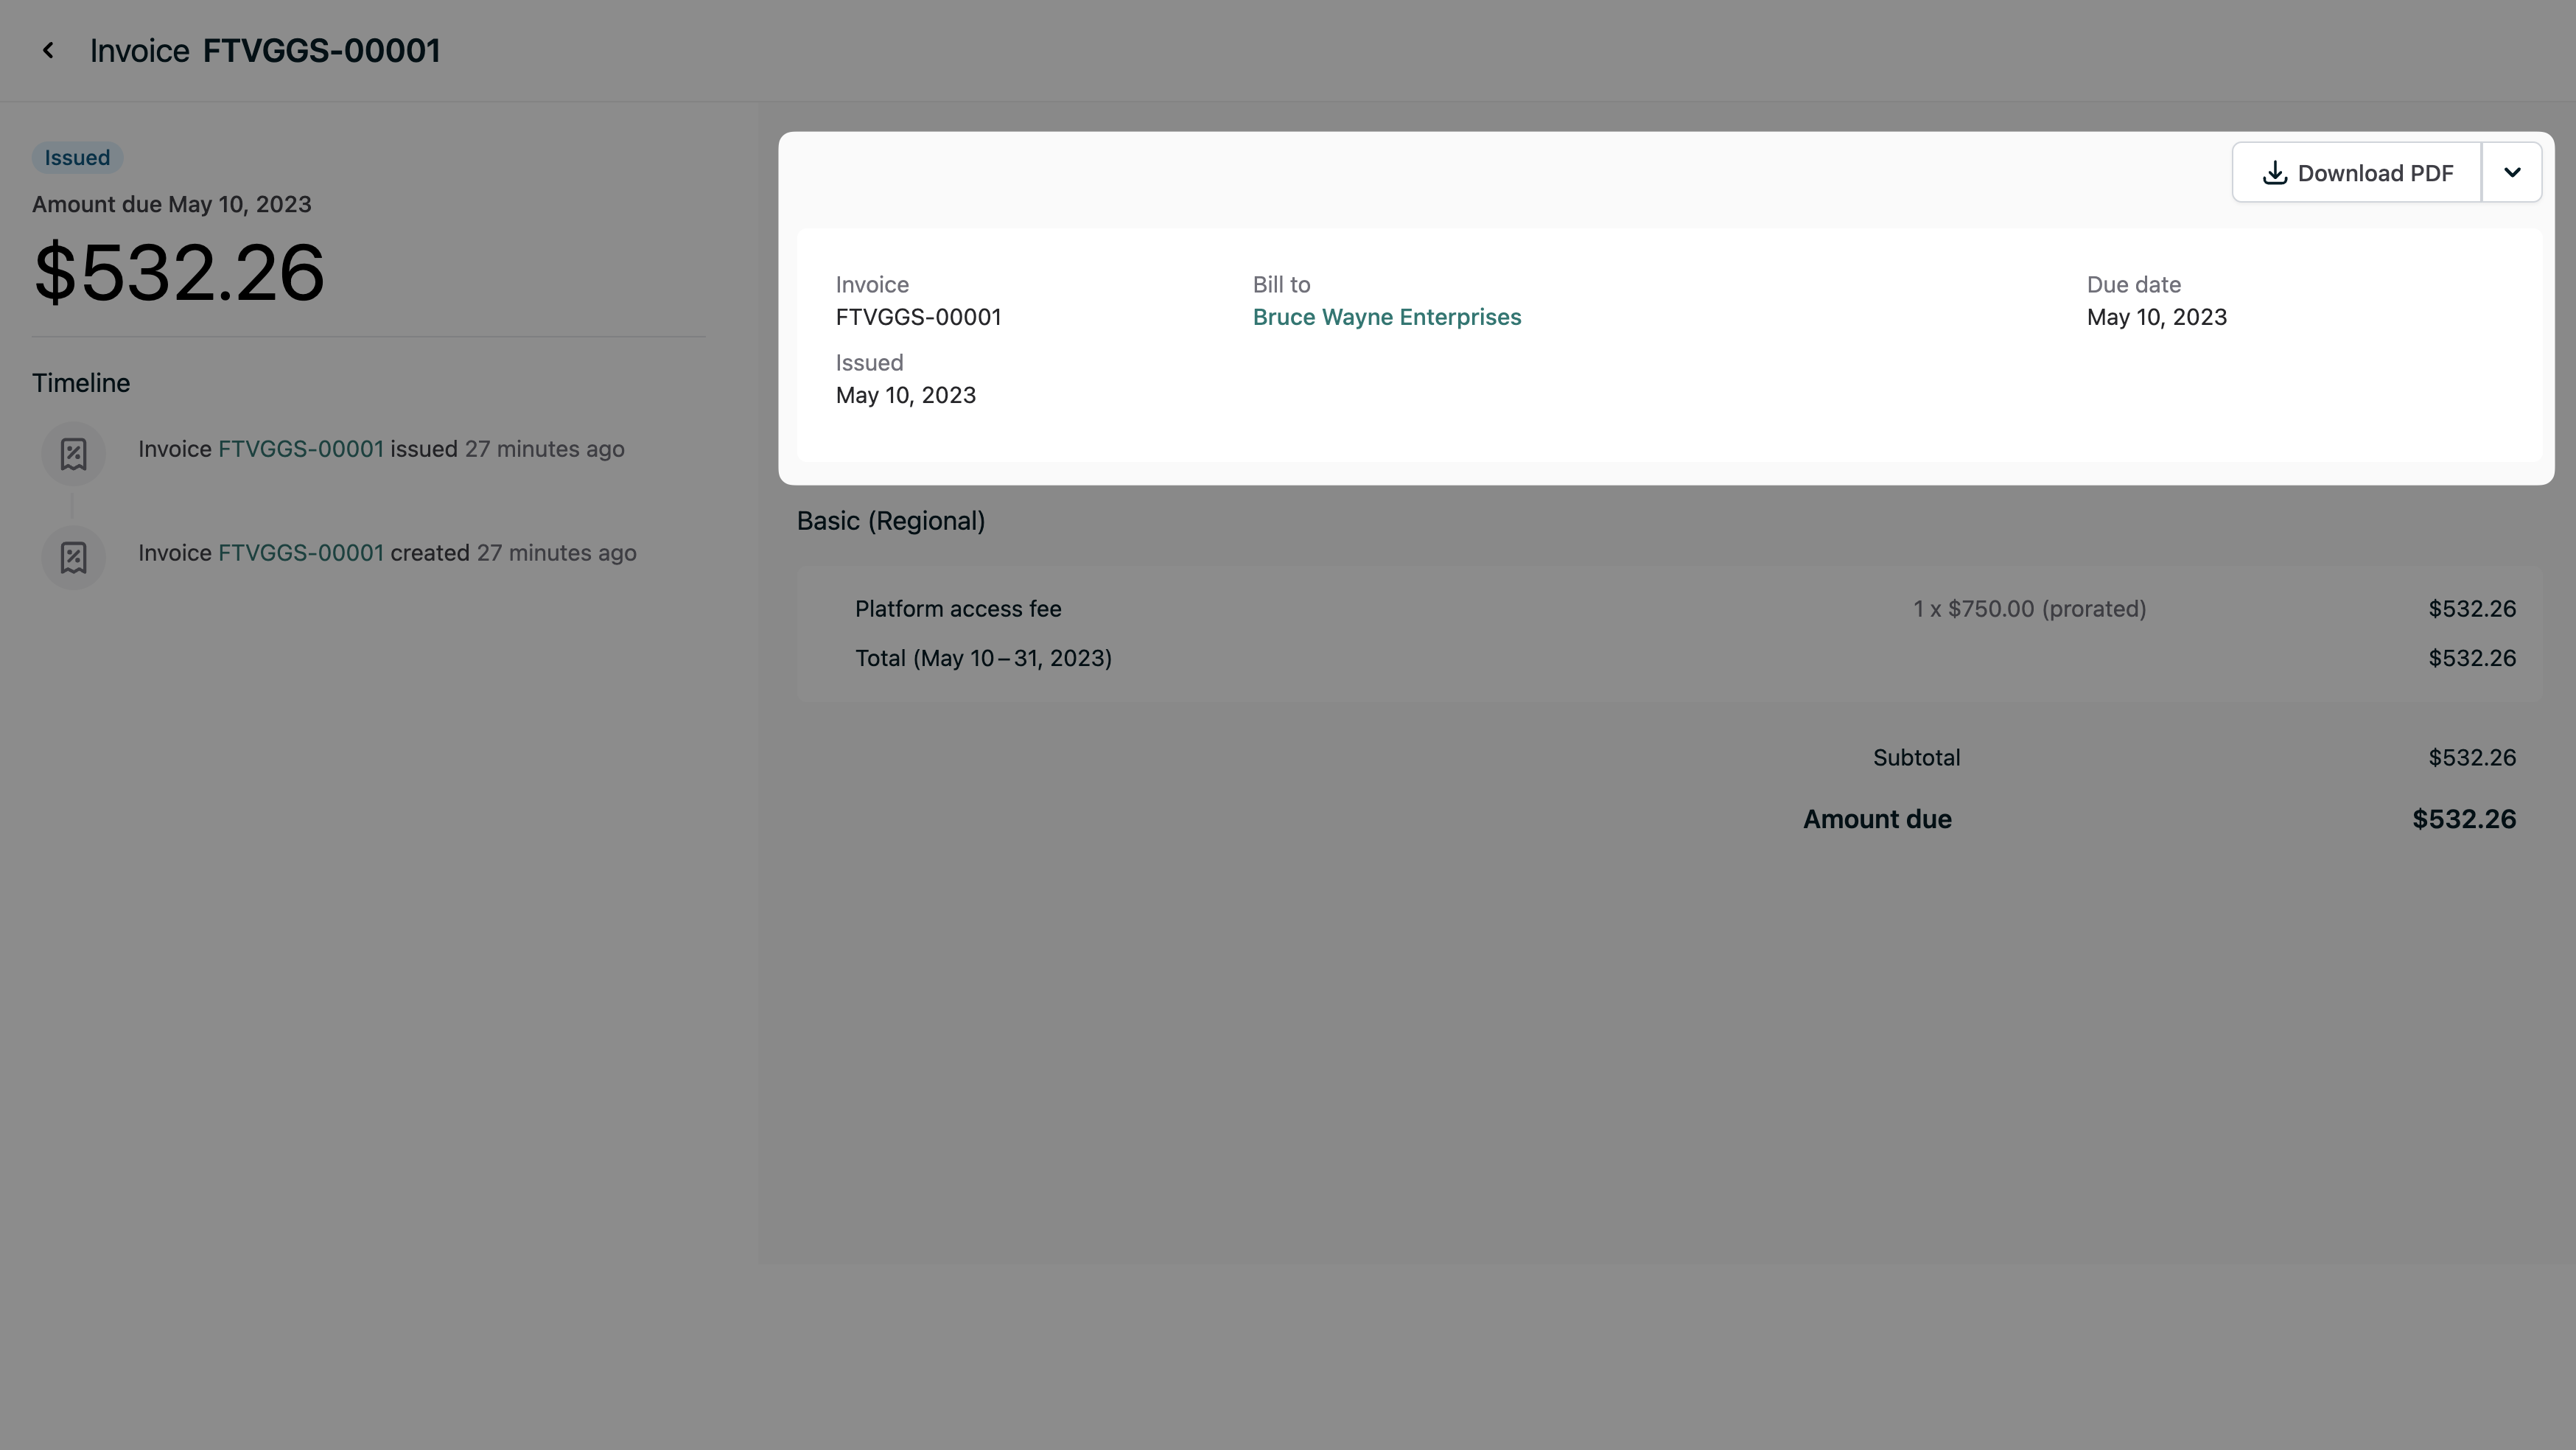
Testing invoice email delivery
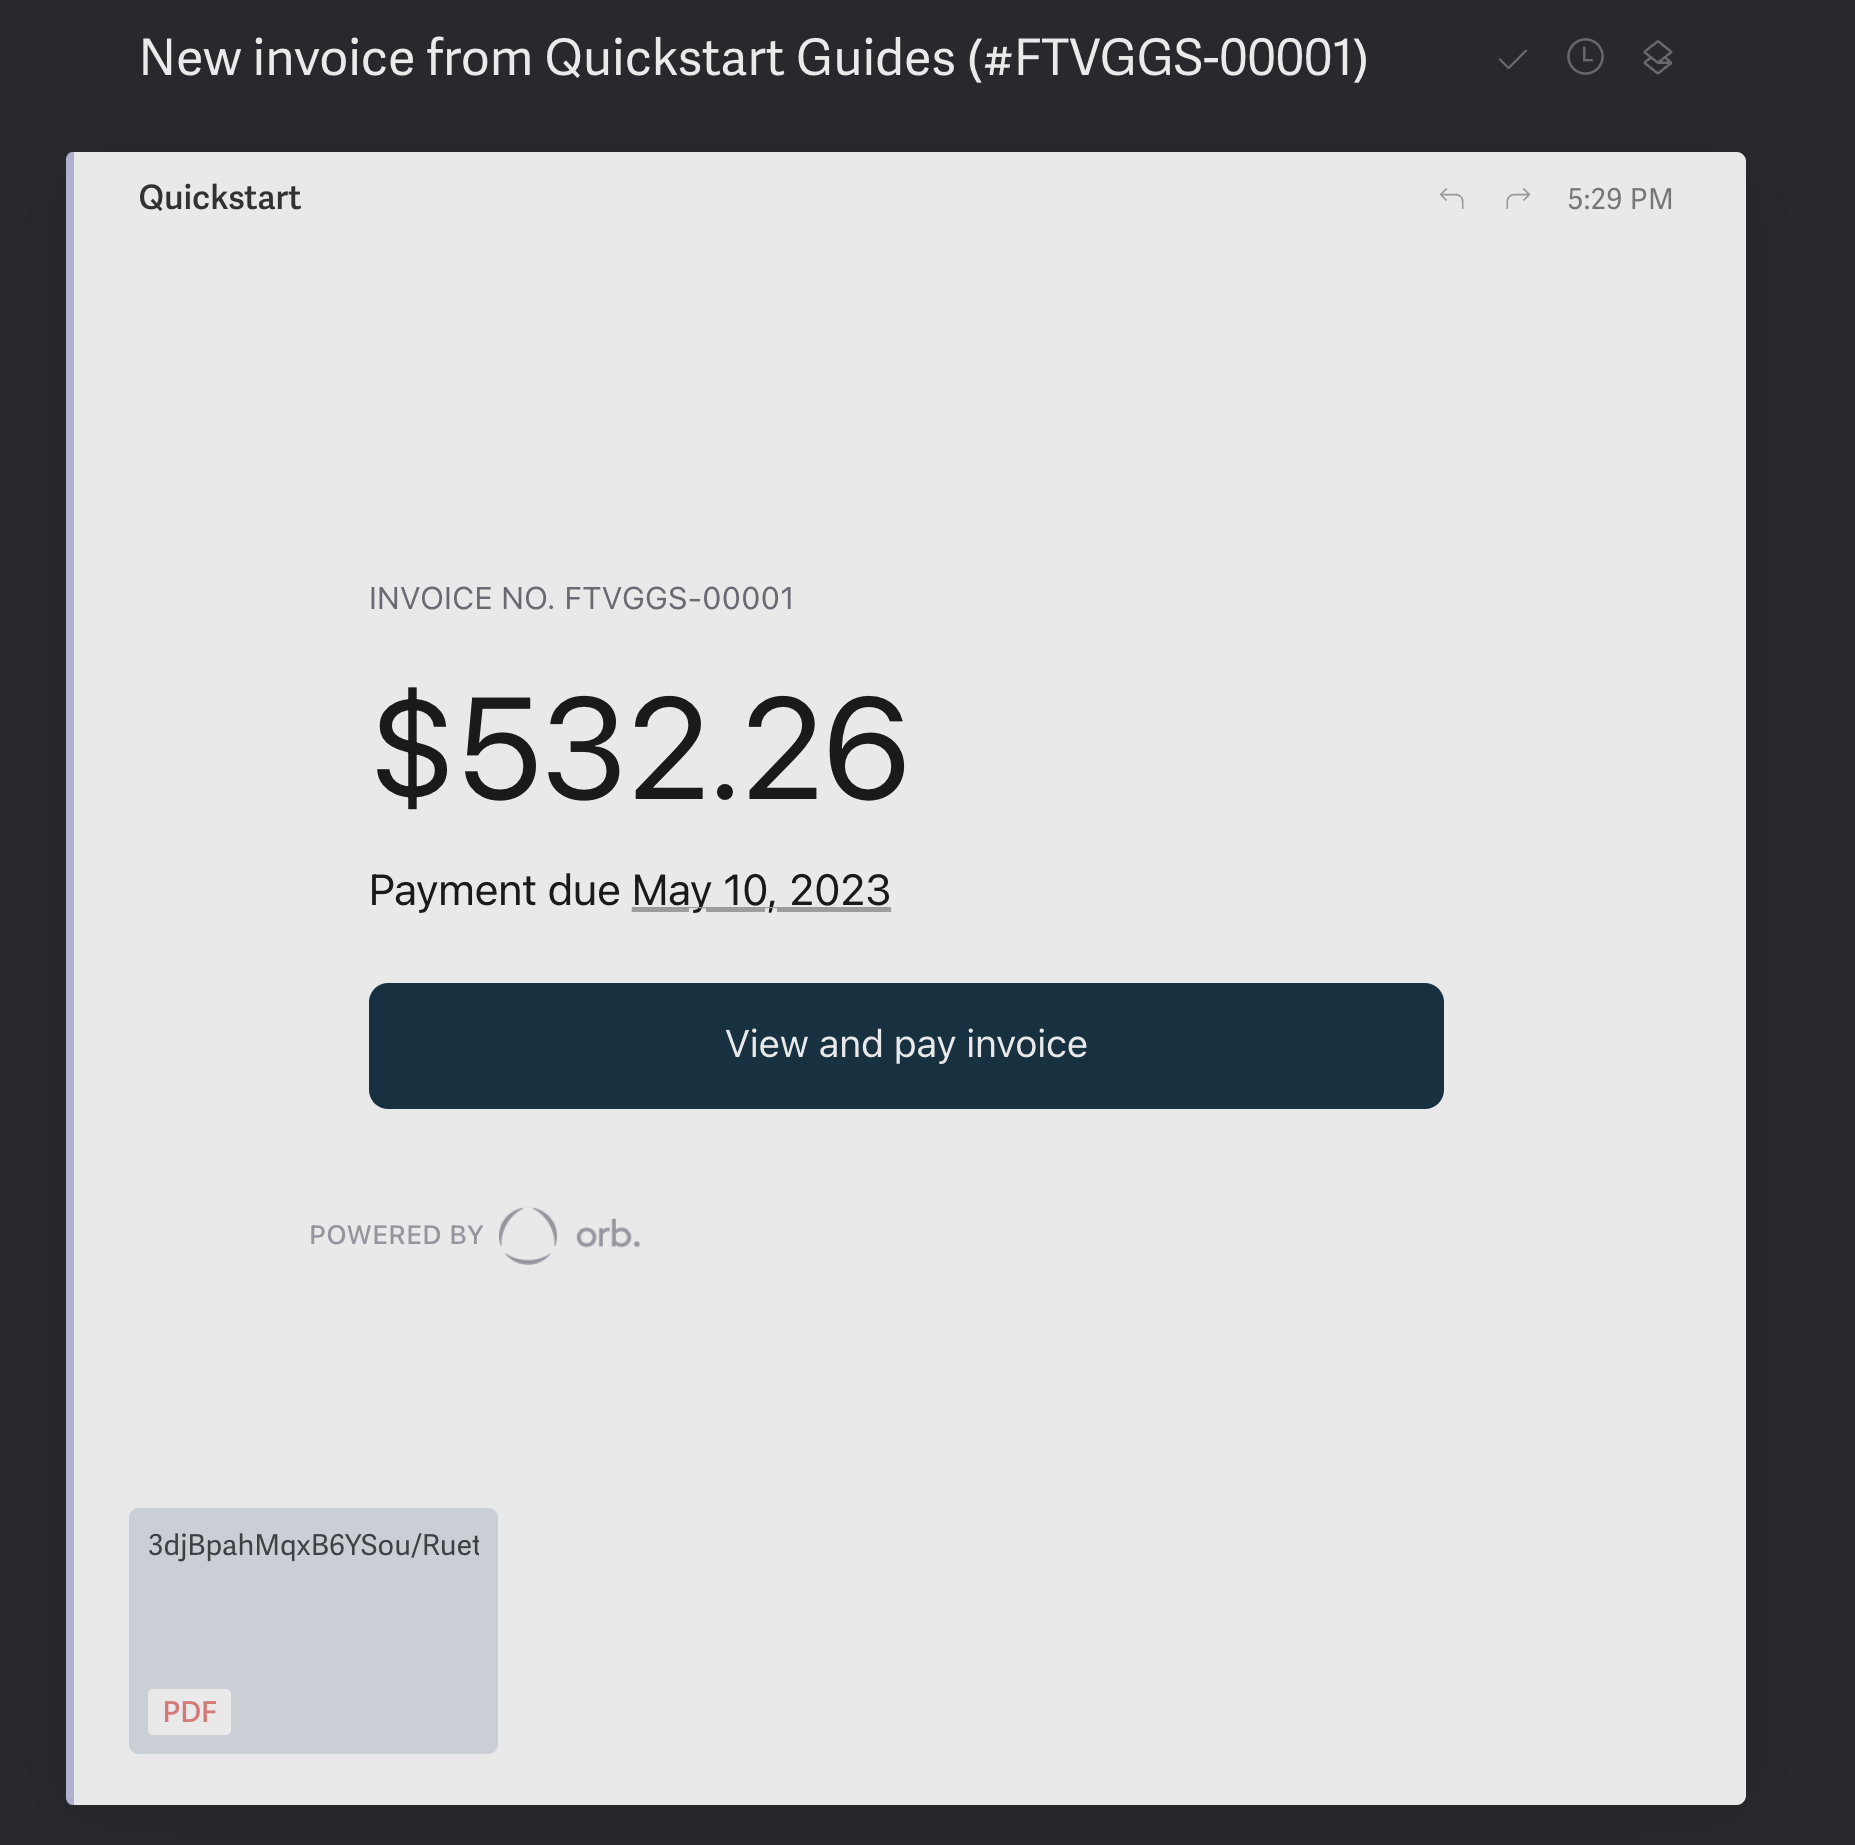
Orb sends invoice emails to your customers directly on your behalf, linking directly to the invoicing portal. This link is an invoice’s customer-facing link as opposed to the internal dashboard link you’ve been exploring in this quickstart. You can learn more about the invoice portal in the invoice portal documentation. It’s accessible directly on the invoice detail page by clicking the `Invoice portal preview’ button. To test emails manually, ensure that you have areply-to email address set in your account’s invoice settings page. You can leave the “Send email notifications for all Orb invoices” off if you’d like to just test them one-off.
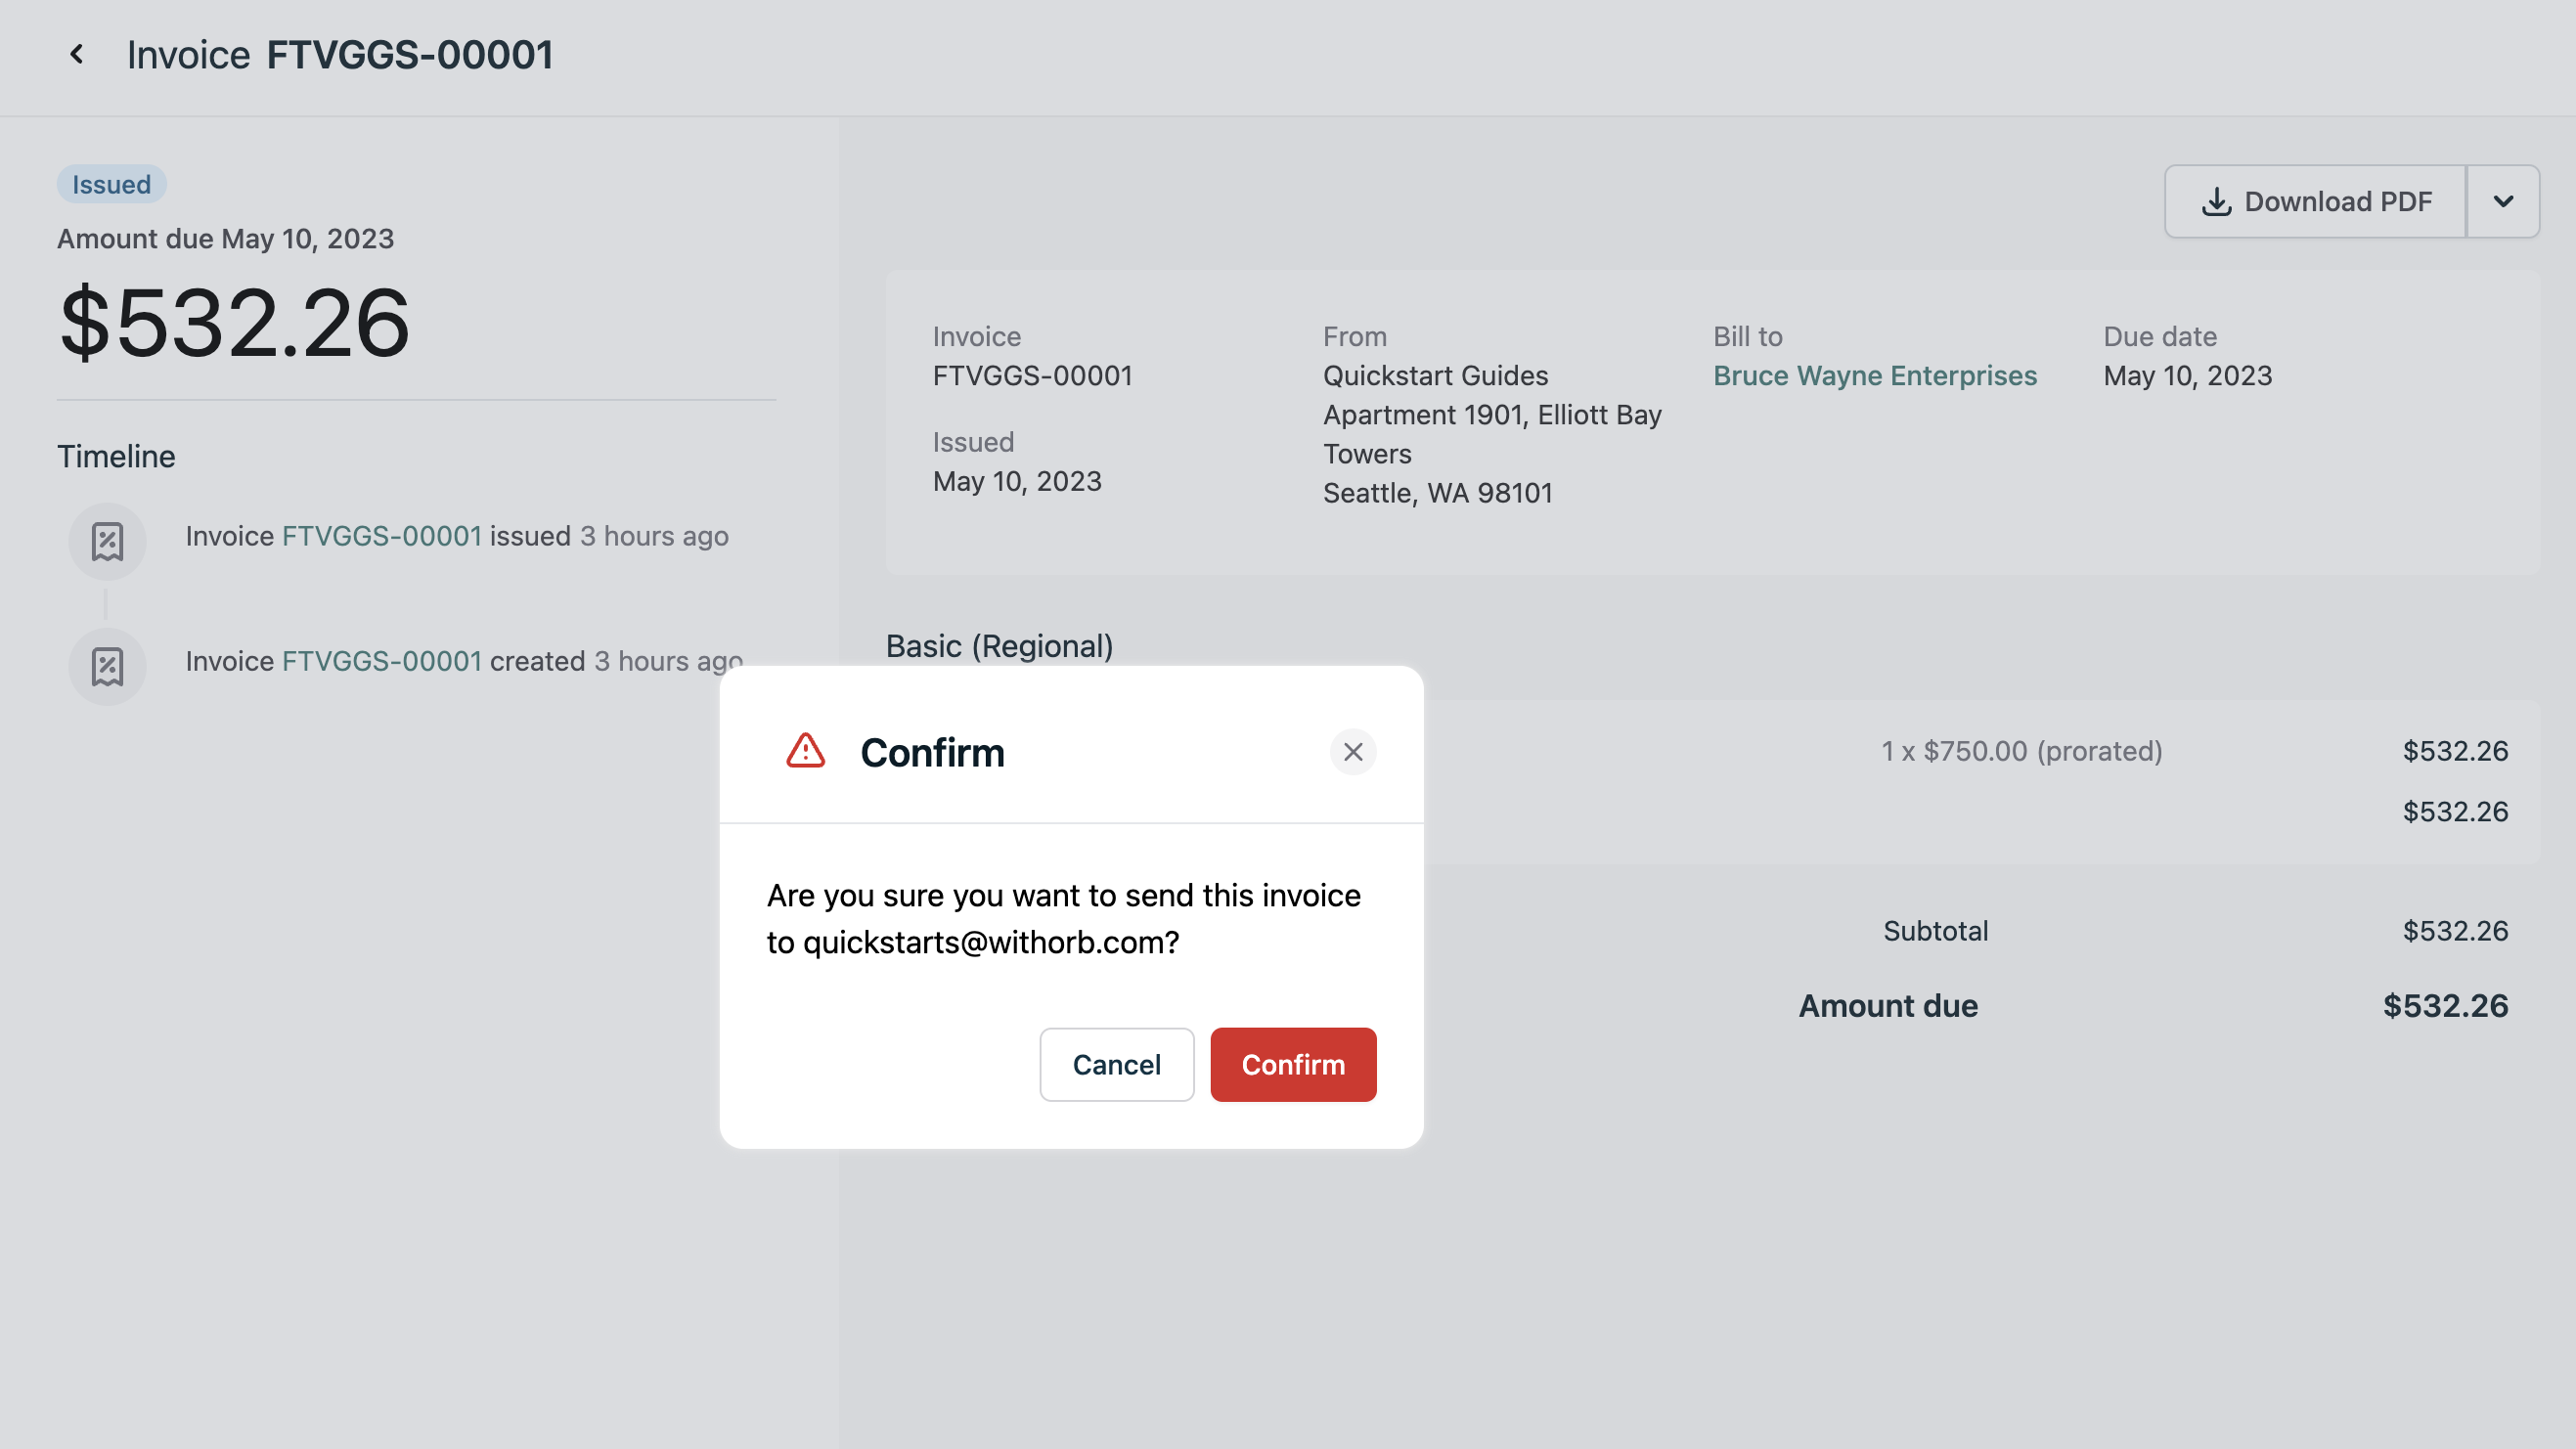
Navigate back to your issued invoice, and click “Email Invoice” in the dropdown in the top-right action menu. This will open a confirmation dialog, and if you confirm, an email will be sent to the customer’s email address.
reply-to email is set to your desired email address, so that any questions or concerns from your customers can be directed to the right place.
Configuring and testing payments
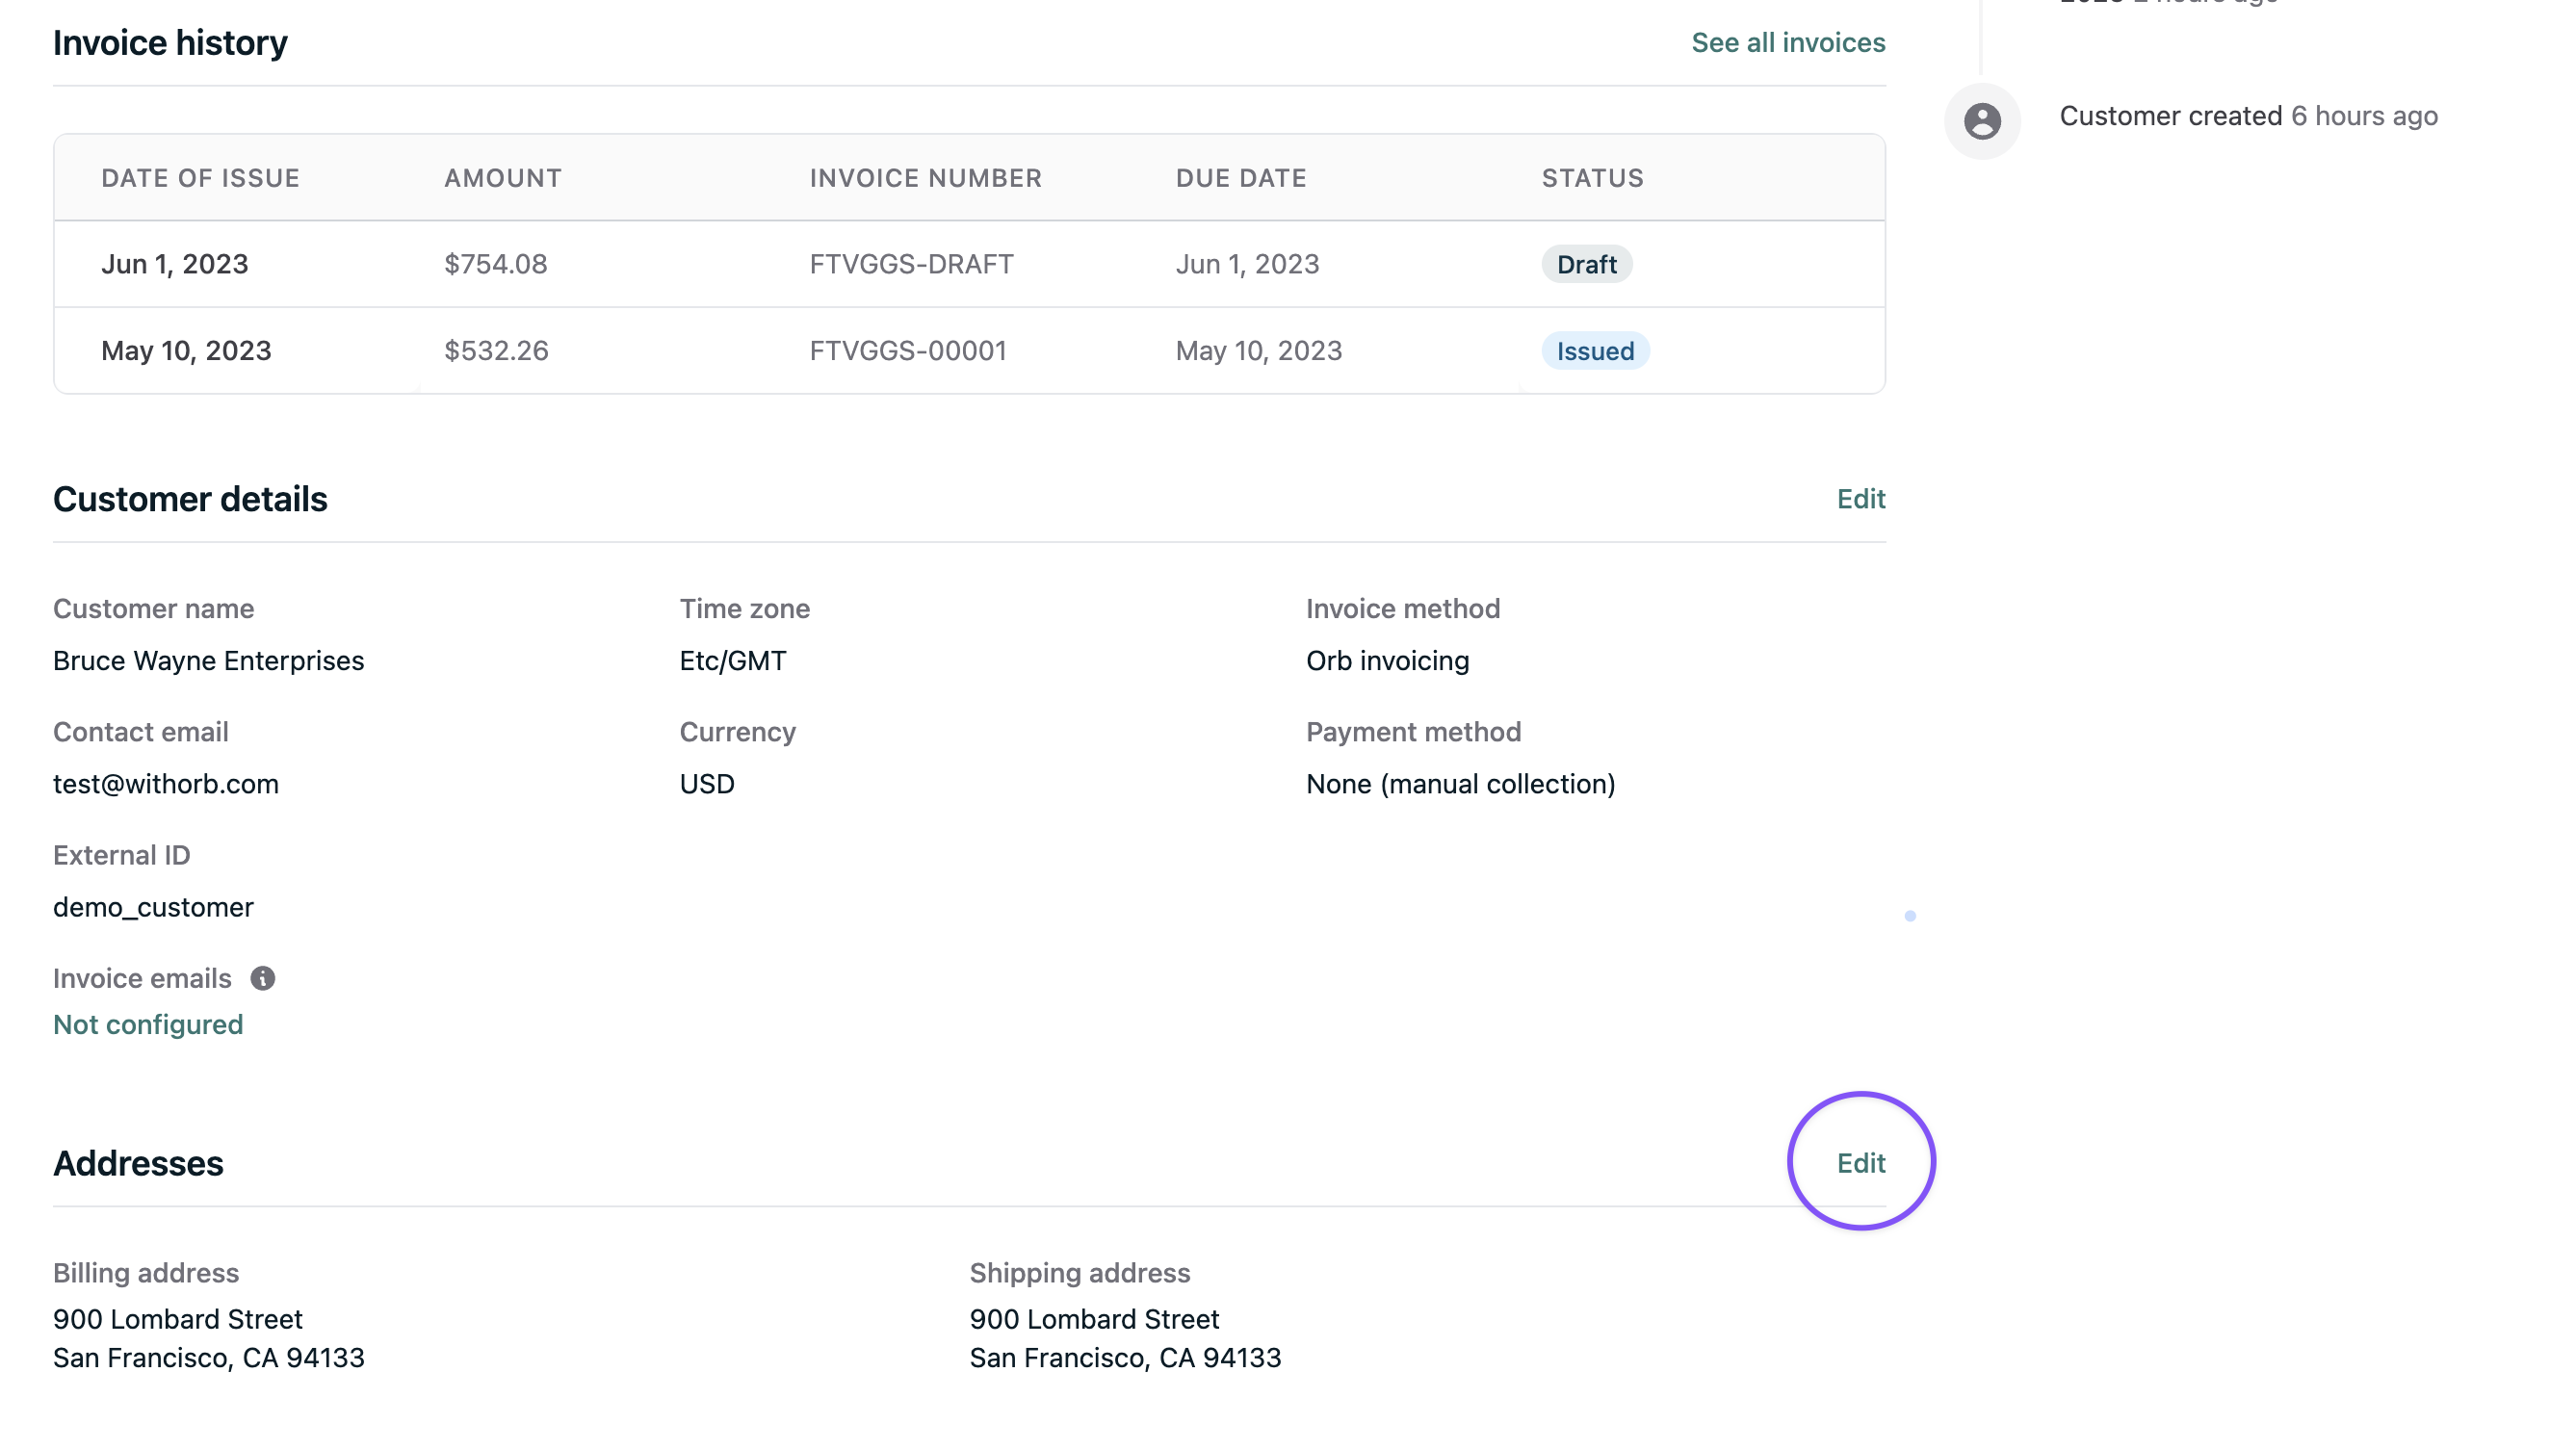
Orb supports Adyen and Stripe as payment providers, and you can fully test the payment flow in test mode with your payment provider’s test mode configuration. The walkthrough below uses Stripe; for Adyen, see the Adyen integration guide. After ensuring you are in test mode via the toggle at the top of the page (you should see a green banner), go to the integrations tab on the Settings page and click “Connect with Stripe” to enter the Stripe Connect OAuth flow to add your test mode account. Note that you will need to grant Stripe permission to connect your account. Once Stripe is connected to your Orb account, you can connect a Stripe customer to your Orb customer by editing the customer details, and picking from an auto-populated dropdown of Stripe customers. Note that the ‘Invoice Method’ is still Orb Invoicing, signifying that Orb is the source of truth for the invoice and payment status, but that Orb will use the Stripe customer’s default payment method to collect payment on the invoice. For details on how Orb determines which payment method to charge, see Payment method selection.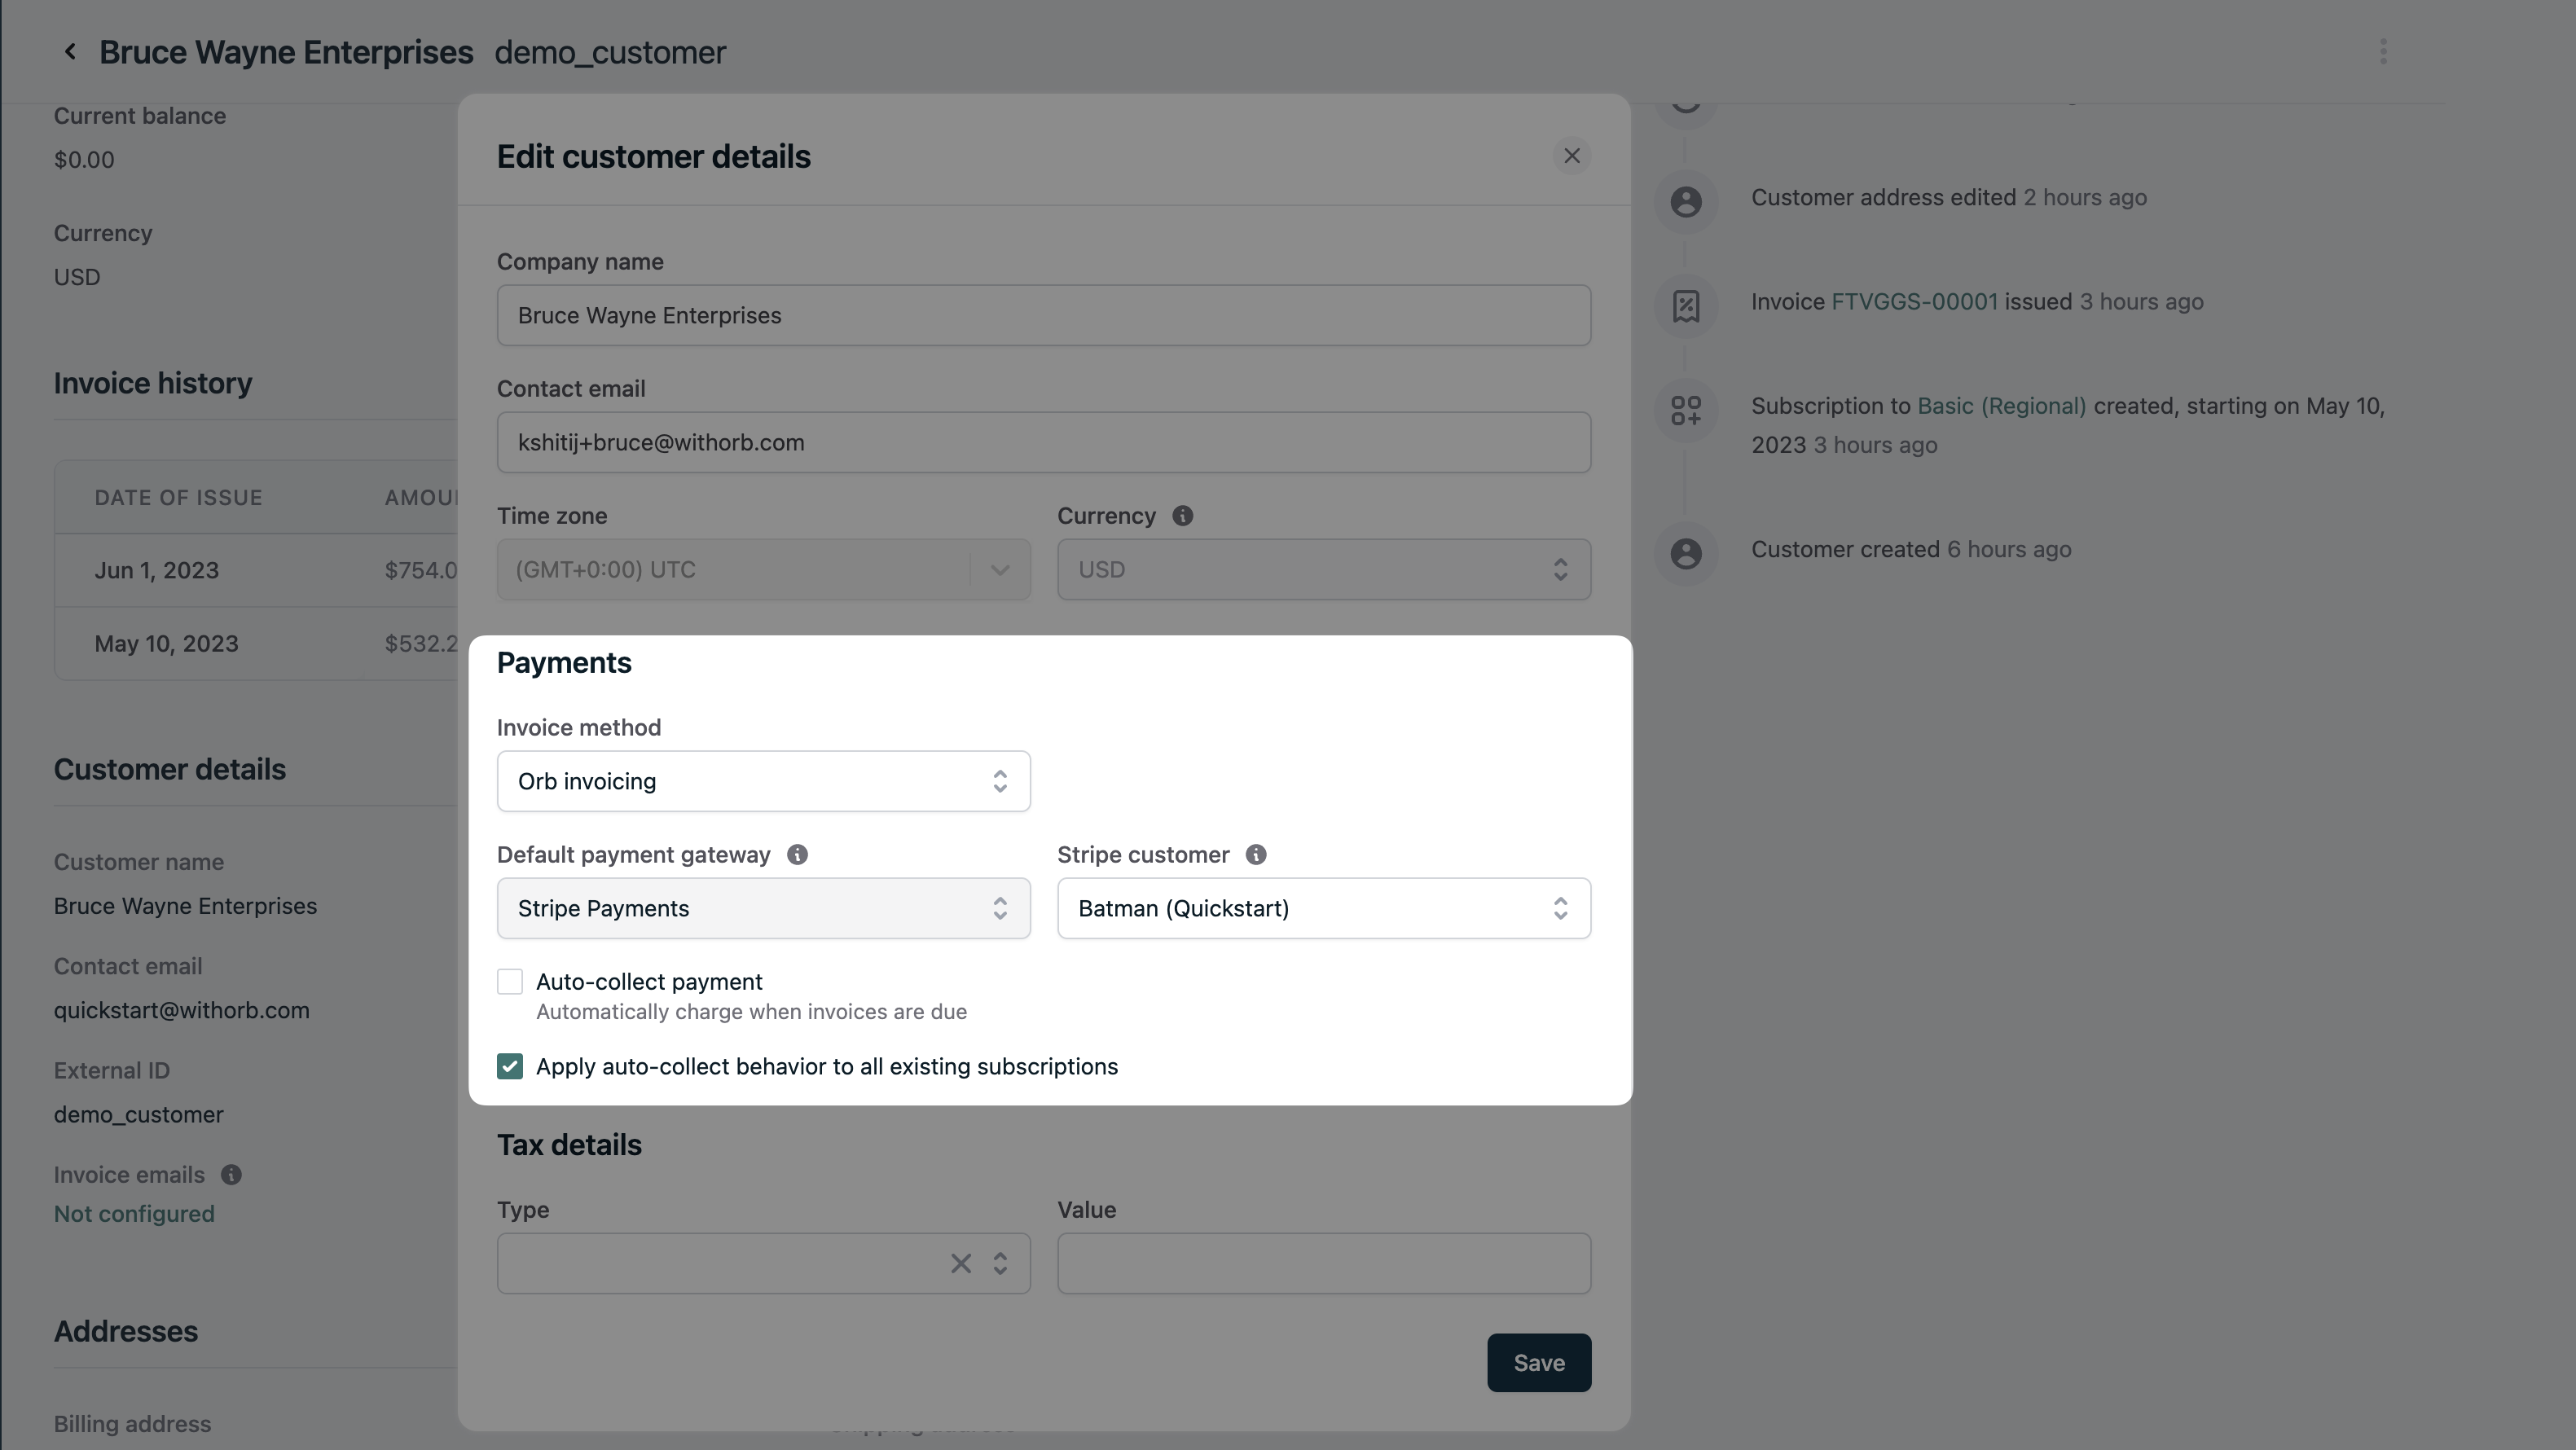
Creating a test payment method
There are a few ways you can trigger payment on an invoice:- Auto-collection, displayed above in customer details, will control if newly issued invoices will try to collect payment via the connected Stripe customer on the invoice’s due date. This is fully managed by Orb and is most common for self-serve customers. For more details on payment retries and how Orb handles failed auto-collection, see the payment behavior documentation.
- If auto-collection is not configured but invoice emails are configured, then Orb will issue the invoice and allow the customer to pay directly via the invoice portal. This is common for enterprise customers who may have a dedicated billing contact and pay after inspecting the invoice’s charges.
- You can manually trigger collection of an invoice via the internal Invoice detail page by clicking the “Charge now” button on an invoice with a payment gateway connected.
Testing manual payment
We’ll test the third option, manual payment, to ensure that the payment flow is working as expected. Navigate again to the issued internal invoice page. Below the amount due on the left side of the invoice should be a largeCharge now button.
Once the invoice is confirmed and processed, you’ll see new timeline events on the invoice detail page confirming the payment method which was used and indicating when the payment was collected. The invoice status will be updated to paid.
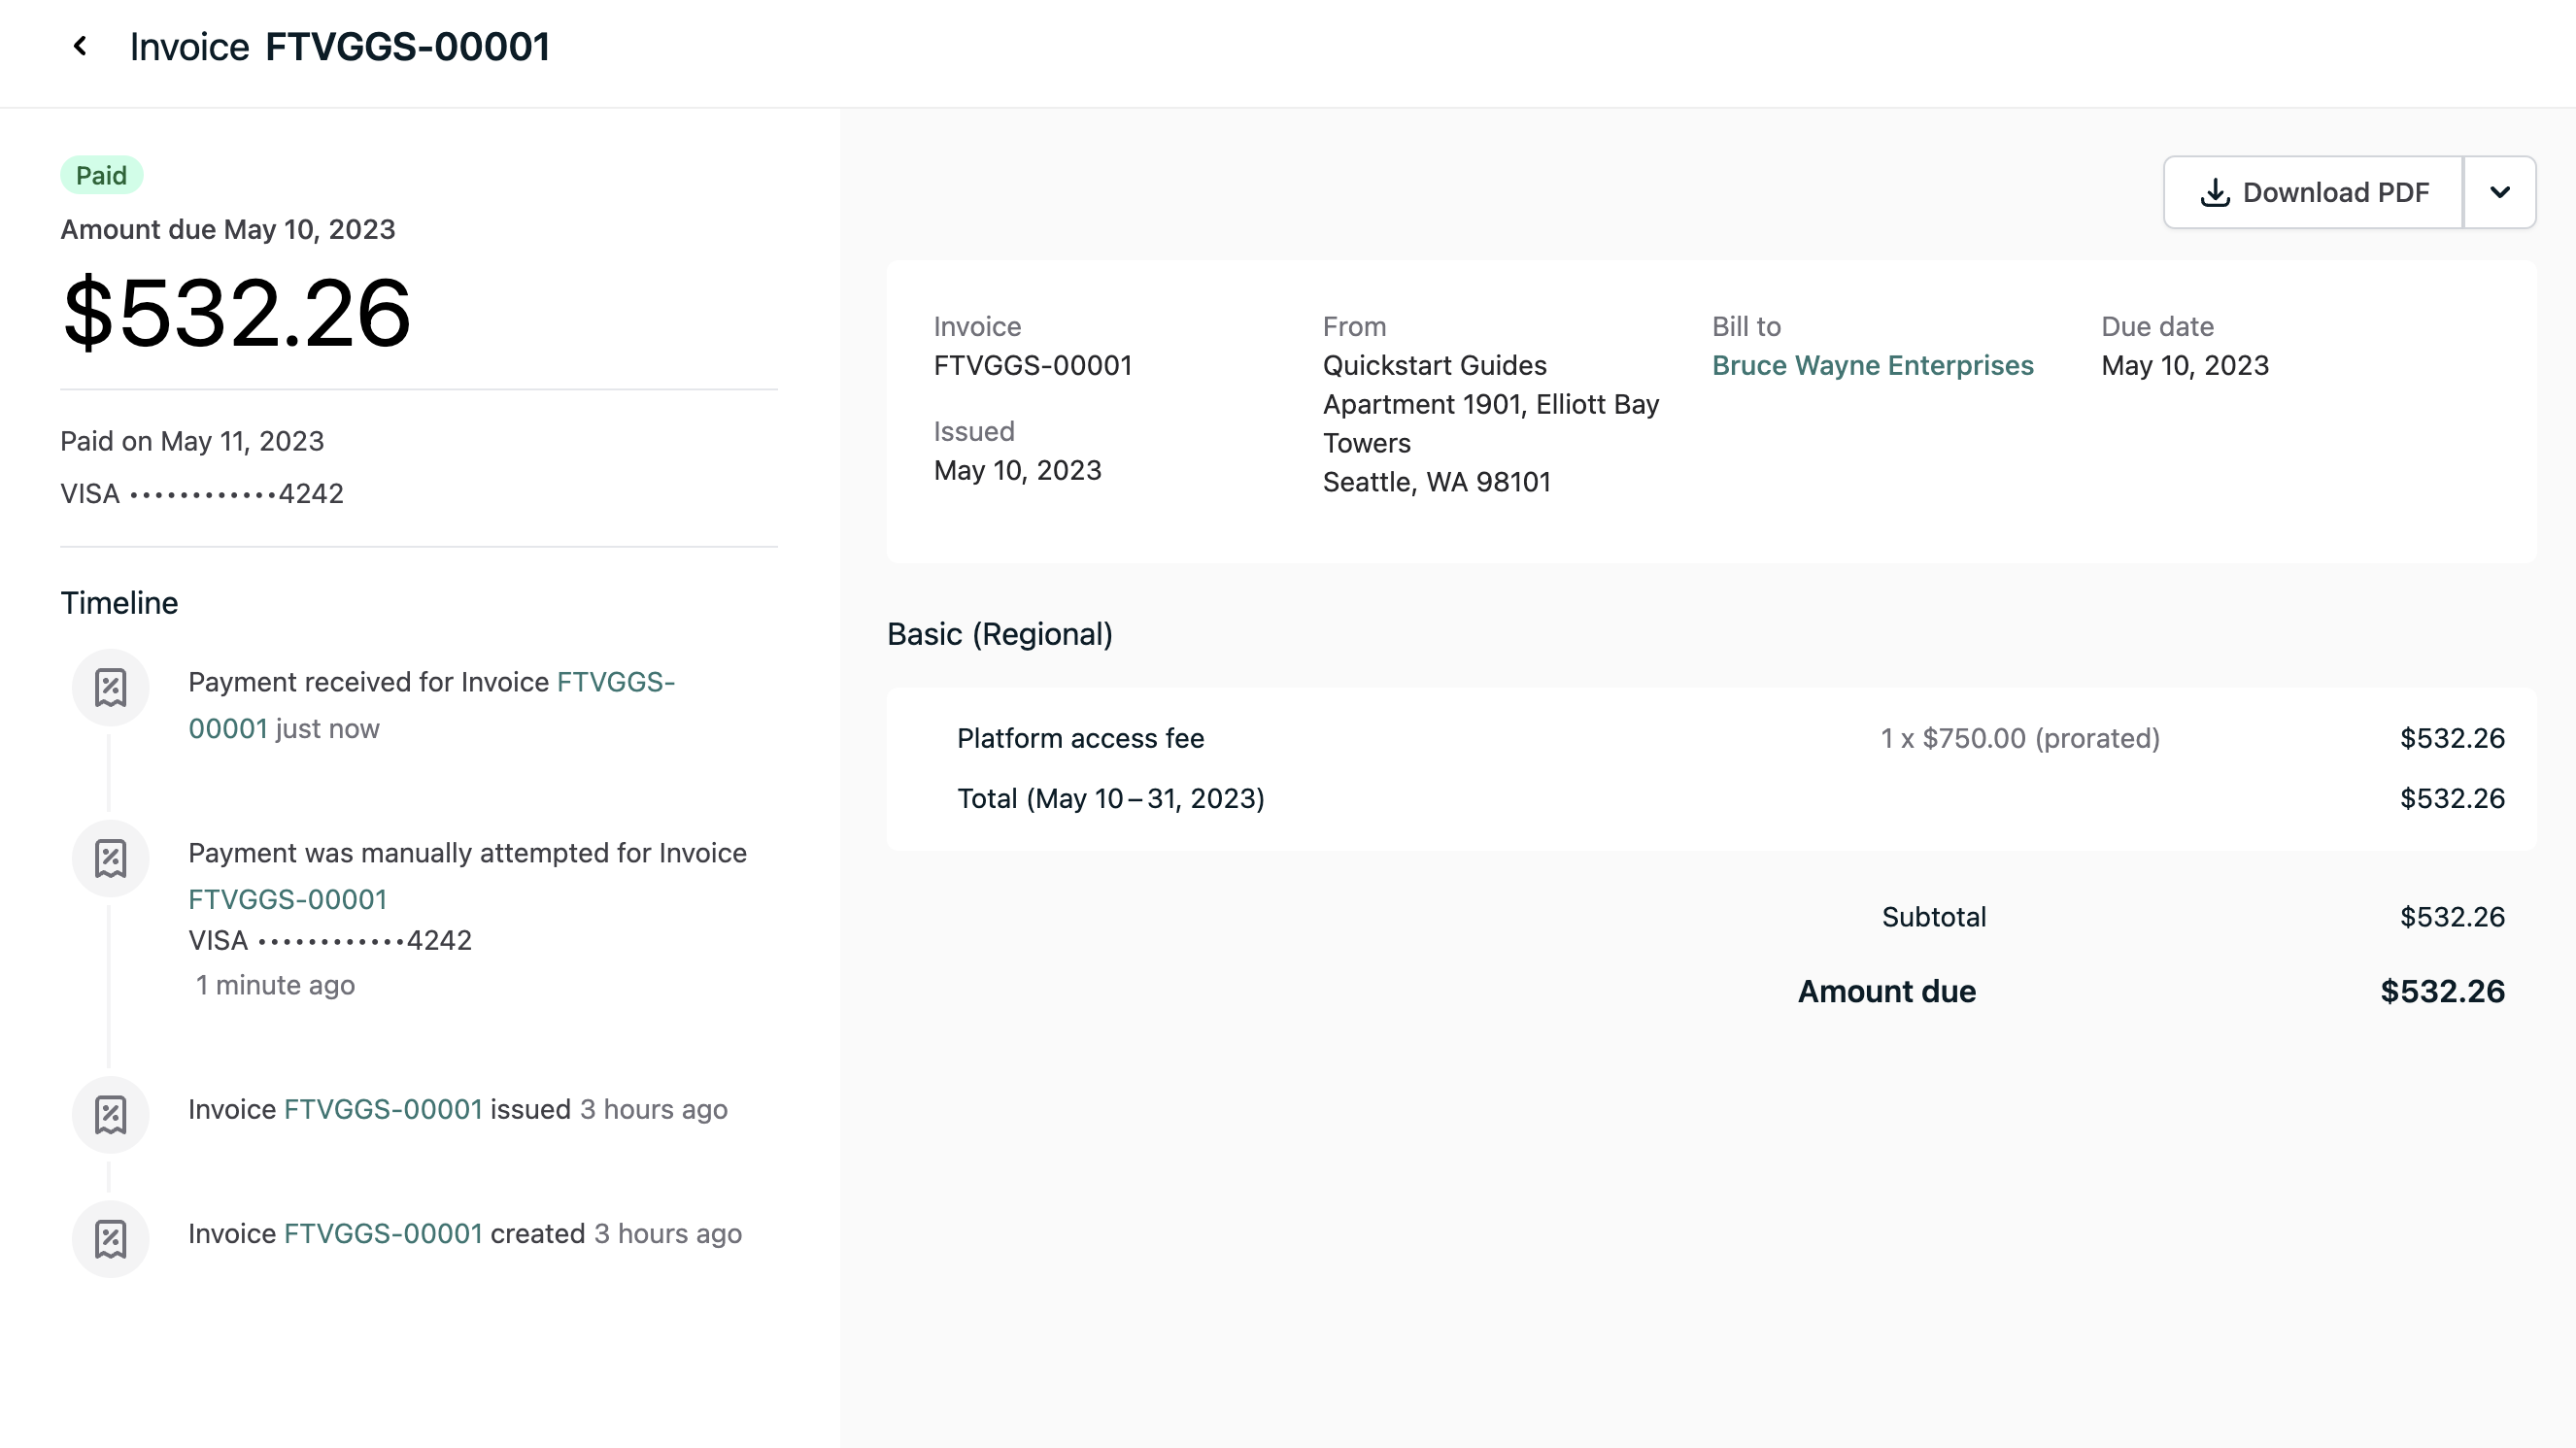
When an invoice is successfully paid, Orb generates a payment receipt PDF. The receipt is included in the payment success email sent to your customer.
Manual invoice review
Once you’ve tested your invoicing flow in test mode, you’re ready to start using invoicing for real customers in live mode. However, you might want to manually review and adjust invoices at first before sending them to customers to ensure everything is set up correctly. We’ll turn on manual invoice review in our test mode account first to understand the workflow. You can find this setting in the Invoice settings tab.