Invoicing with NetSuite
Prerequisites
- NetSuite account
- Sufficient administrator settings in your NetSuite instance to install bundles and enable SuiteCloud features
Connecting NetSuite with Orb
- In the sidebar of the Orb dashboard, click on "Settings", then click on the "Connections" tab.
- Follow the instructions to connect NetSuite:
- Install the AccountLink NetSuite Bundle, and the AccountLink: Rev Rec Columns Bundle
- Note: You need to install both bundles for revenue recognition data to work
- Enable SuiteCloud features as listed
- Confirm setup
- Upon clicking Save, you should now see NetSuite as a connection at the top of the Connections tab with status “Sync in progress”
- Once existing data from NetSuite is synced and ready to be used by Orb, the status of the connection will show up as “Configuration required”. Until then, the connection cannot be used in Orb.
- Install the AccountLink NetSuite Bundle, and the AccountLink: Rev Rec Columns Bundle
- Configure the NetSuite integration
- In the connections table, click the overflow menu for the NetSuite connection and click "Configure NetSuite"
- Select a subsidiary and a default bank account to connect your Orb account to. You will need to select a bank account per currency that you support in Orb.
While setting up customers and items in NetSuite, if data is missing in Orb, click the “Refresh” button to resync data from NetSuite. Orb also periodically updates data from NetSuite.
Setting up RevRec schedules
Orb syncs line item service periods so you can perform accurate revenue recognition in NetSuite. To enable this:
- In NetSuite, navigate to the Revenue Field Mapper
- Map Rev Rec Start Date and Rev Rec End Date to Start Date and End Date respectively

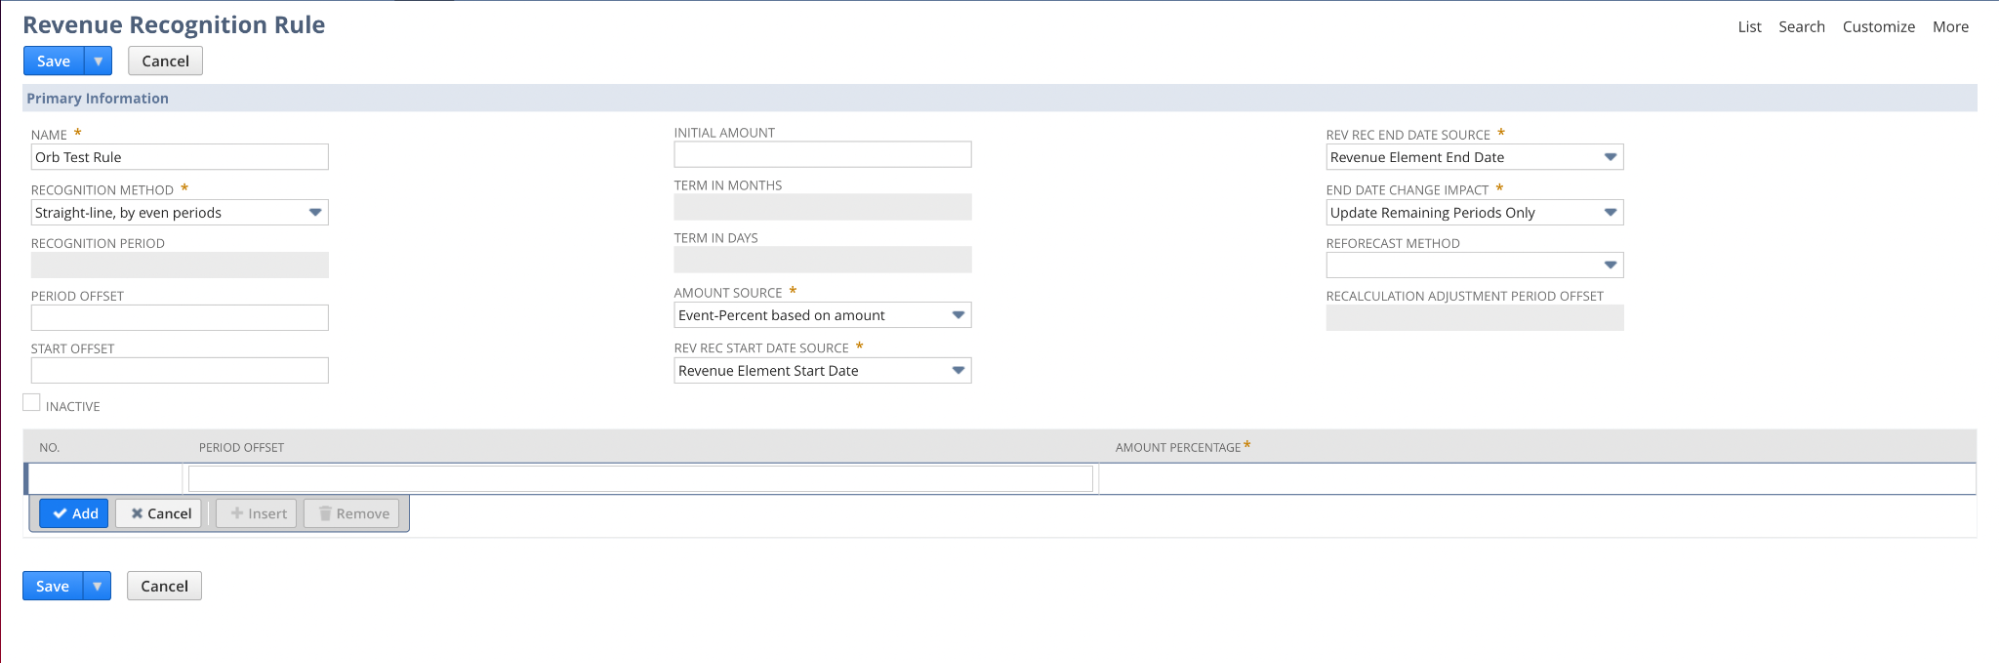
- Navigate to Revenue Recognition Rule, and create a new rule
- Specify the Rev Rec Start Date Source and Rev Rec End Date Source to the data that we mapped in the previous step
Mapping items
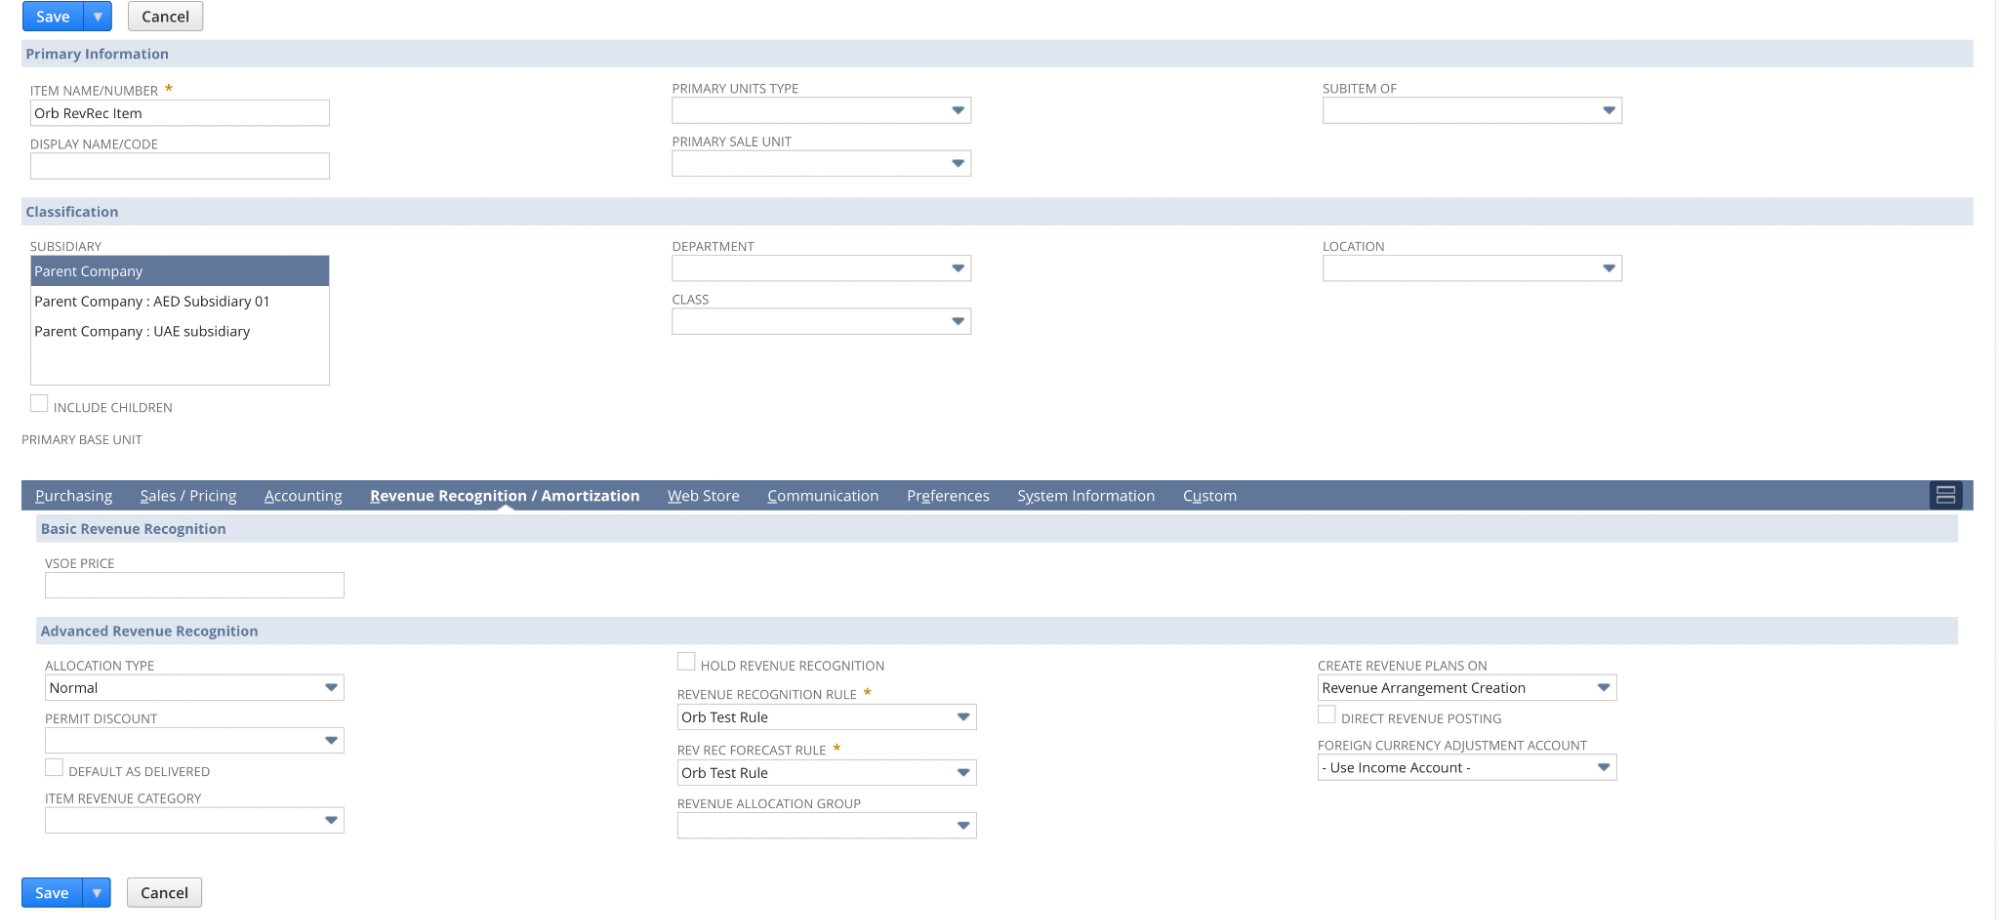
Mapping items to items in NetSuite is required for the integration to succeed. If you do not map items, invoices will fail to issue. In NetSuite, create items corresponding to items you are selling in Orb. When creating the item, in the Revenue Recognition/Amortization tab, select the Revenue Recognition Rule and Rev Rec Forecast Rule that you created in the above step.
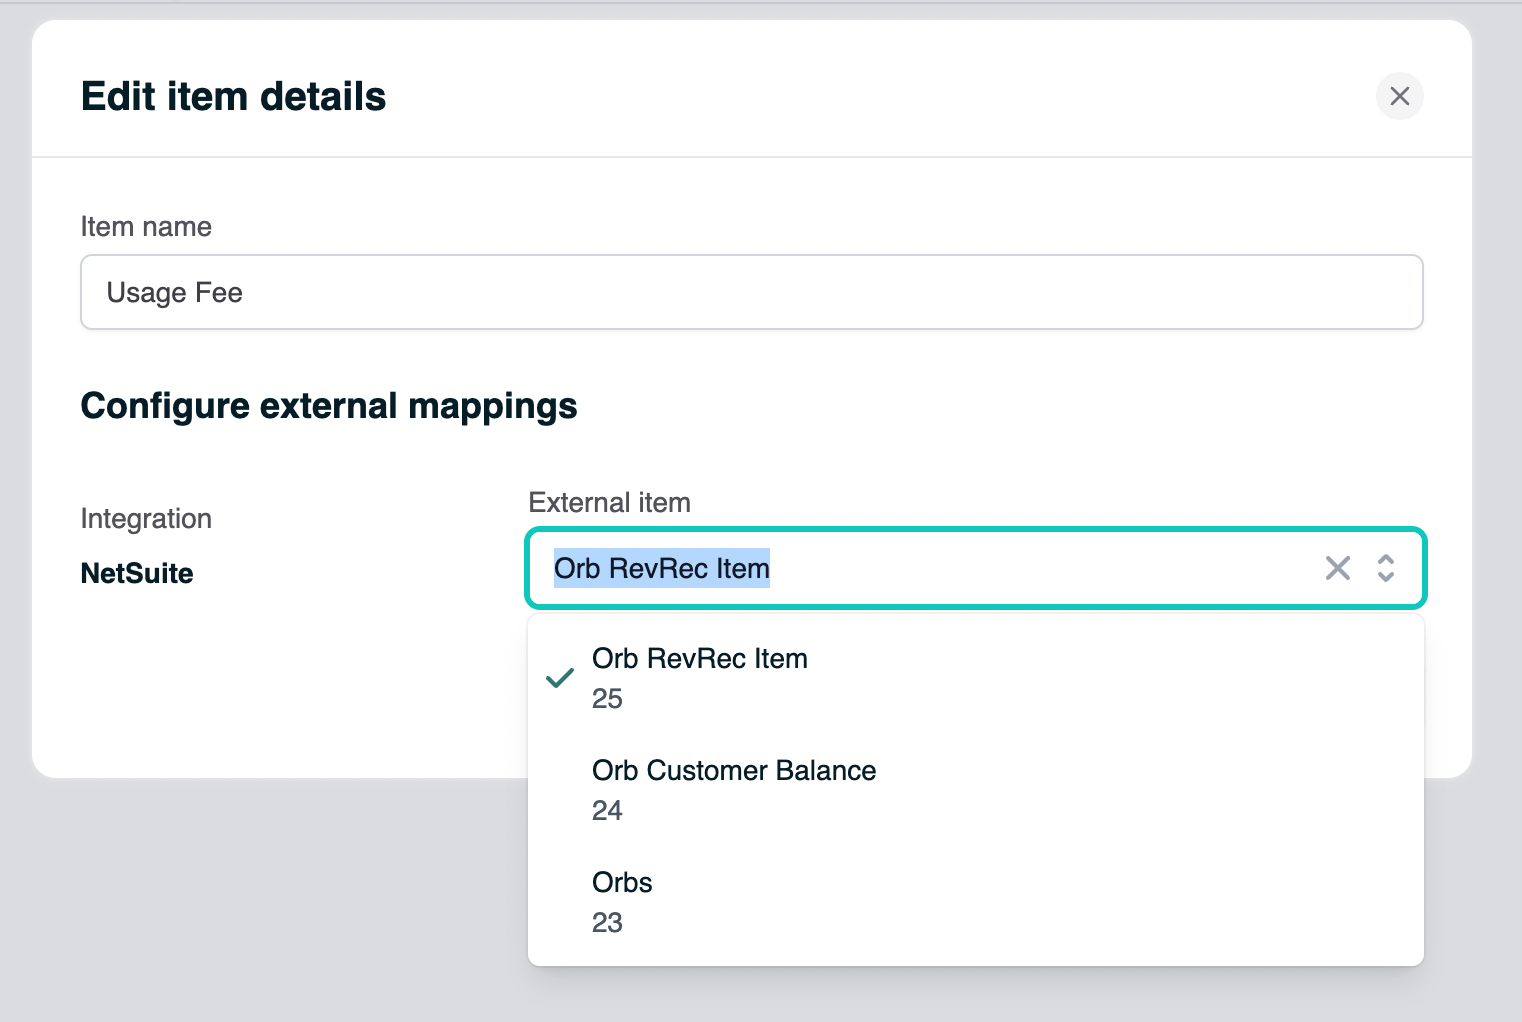
Then, navigate to the Items tab in Orb under Settings, and select a NetSuite item for each Orb item.
Configuring customers
When creating or updating customers in the Orb UI, select NetSuite as the Payment Provider in order to view a list of previously created customers in your NetSuite account.
Customer mappings can also be configured in the API, by passing in the customer’s NetSuite ID under payment_provider_id, and setting payment_provider to netsuite. The customer’s NetSuite ID can be found by navigating to the customer’s page in NetSuite, and copying the ID from the URL
(e.g. https://<>.app.netsuite.com/app/common/entity/custjob.nl?id=1613&whence=, where 1613 is the ID)
Once mappings are configured, invoices for customers with a NetSuite payment provider ID will be synced to NetSuite.
Testing NetSuite
While testing, connect a NetSuite sandbox account to Orb. When you are testing RevRec in a sandbox, syncing invoices does not automatically update revenue arrangements. To force update the revenue arrangement within NetSuite, in Update Revenue Arrangements and Revenue Plans, click Refresh, Update Revenue Arrangements, and then Update Revenue Plans.